一、Newman环境安装
Newman 是 Postman 推出的一个 nodejs 库,直接来说就是 Postman 的json文件可以在命令行执行的插件。
Newman可以方便地运行和测试集合,并用之构造接口自动化测试和持续集成。
1、使用nodejs安装newman,首先安装node
进入/usr/local 目录
[root@glhr-test1 ~]# cd /usr/local/
[root@glhr-test1 local]#
2、在/usr/local目录下载node安装包
[root@glhr-test1 local]# wget https://nodejs.org/dist/v10.16.2/node-v10.16.2-linux-x64.tar.xz
100%[==============================================================================================================================>] 13,043,892  2.00MB/s   in 8.4s
3、解压tar包
[root@glhr-test1 local]# tar -xvf node-v10.16.2-linux-x64.tar.xz
4、为了方便配置环境变量将node重命名
[root@glhr-test1 local]# mv node-v10.16.2-linux-x64 node
4、配置环境变量
[root@glhr-test1 local]# vi /etc/profile
# 在文件末尾添加
export NODE_HOME=/usr/local/node
export PATH=$NODE_HOME/bin:$PATH
[root@glhr-test1 local]# vi /etc/profile
#export PATH=/usr/local/sbin:/usr/local/bin:/usr/sbin:/usr/bin:$JAVA_HOME/bin:$M2_HOME/bin
# /etc/profile

# System wide environment and startup programs, for login setup
# Functions and aliases go in /etc/bashrc

# It's NOT a good idea to change this file unless you know what you
# are doing. It's much better to create a custom.sh shell script in
# /etc/profile.d/ to make custom changes to your environment, as this
# will prevent the need for merging in future updates.
export JAVA_HOME=/usr/local/src/jdk1.8.0_221
export PATH=$PATH:$JAVA_HOME/bin:$JAVA_HOME/jre/bin:$PATH
export CLASSPATH=.:$JAVA_HOME/lib:$JAVA_HOME/jre/lib
export ANT_HOME=/usr/local/apache-ant-1.9.16
export PATH=$ANT_HOME/bin:$PATH
export JMETER_HOME=/opt/apache-jmeter-5.2.1
export PATH=${JMETER_HOME}/bin:$PATH
#添加一项两行环境变量
export NODE_HOME=/usr/local/node
export PATH=$NODE_HOME/bin:$PATH
pathmunge () {
    case ":${PATH}:" in
        *:"$1":*)
            ;;
        *)
            if [ "$2" = "after" ] ; then
                PATH=$PATH:$1
            else
                PATH=$1:$PATH
            fi
    esac
}
....
5、启用环境变量
[root@glhr-test1 local]# source /etc/profile
6、检查npm和node是否安装成功
[root@glhr-test1 local]# node -v
v10.16.2
[root@glhr-test1 local]# npm -v
6.9.0
[root@glhr-test1 local]#
7、成功安装nodejs后开始安装newman
[root@glhr-test1 local]# npm install -g newman       #会有两个警告:一个5.1.5库弃用,旧版本使用math.random()这个方法时会出现问题
npm WARN deprecated har-validator@5.1.5: this library is no longer supported
npm WARN deprecated uuid@3.4.0: Please upgrade  to version 7 or higher.  Older versions may use Math.random() in certain circumstances, which is known to be problematic.  See https://v8.dev/blog/math-random for details.
/usr/local/node/bin/newman -> /usr/local/node/lib/node_modules/newman/bin/newman.js
+ newman@5.3.0
added 129 packages from 187 contributors in 114.258s
8、检查newman是否安装成功
[root@glhr-test1 local]# newman -v
5.3.0
二、接口脚本调试
1.准备接口
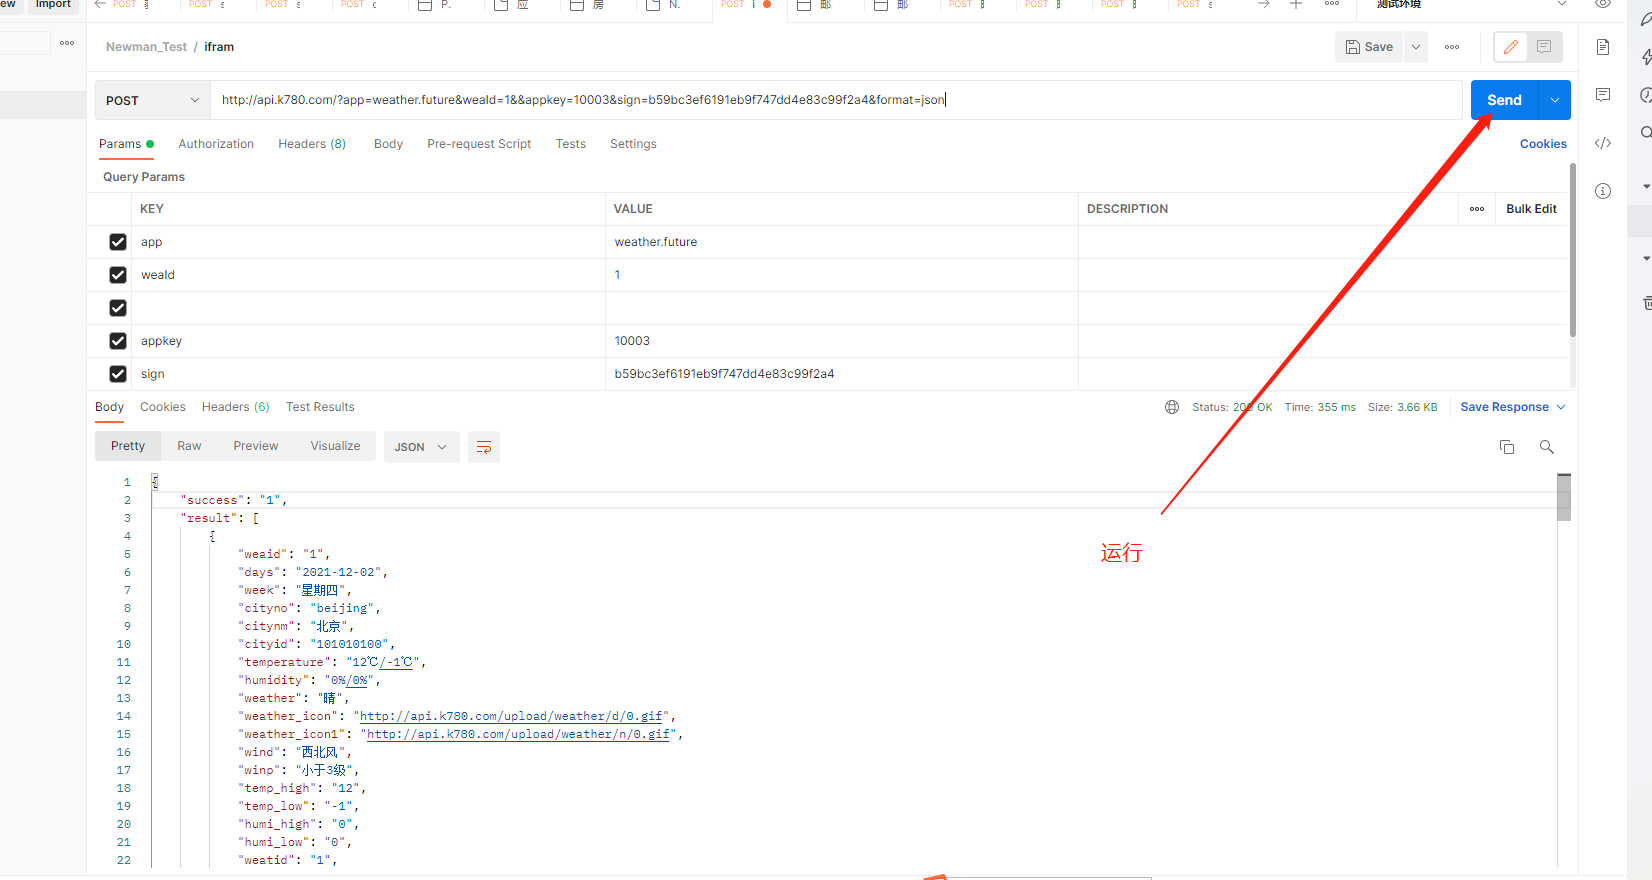
可以使用本地接口或使用天气接口:http://api.k780.com/?app=weather.future&weaId=1&&appkey=10003&sign=b59bc3ef6191eb9f747dd4e83c99f2a4&format=json
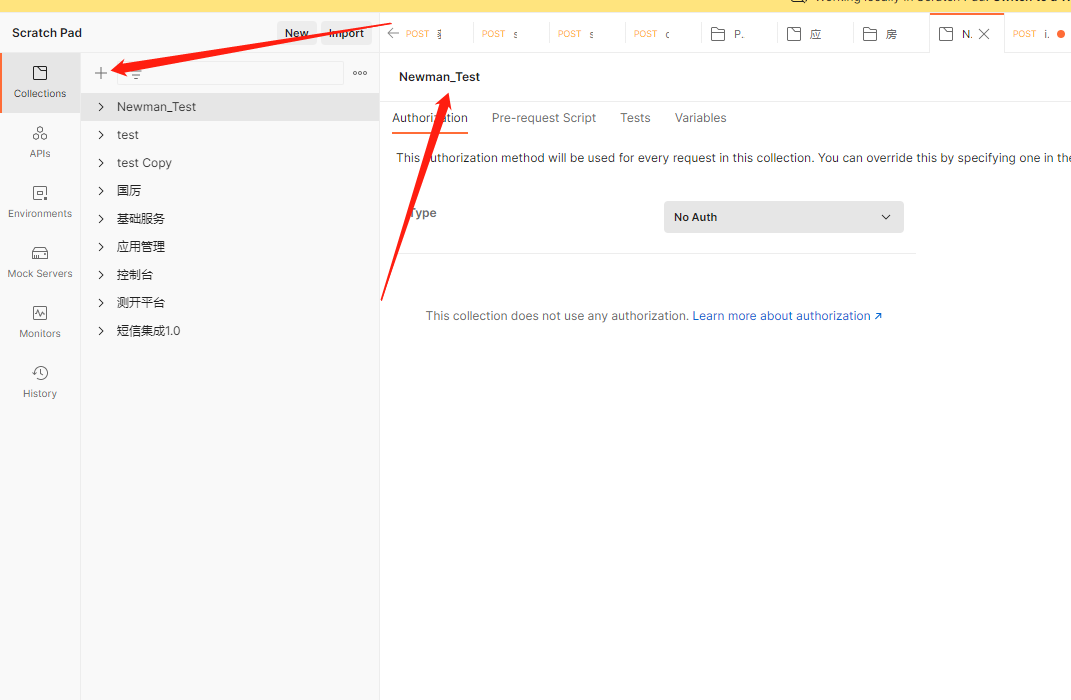
2、调试在Postman中调试接口测试脚本
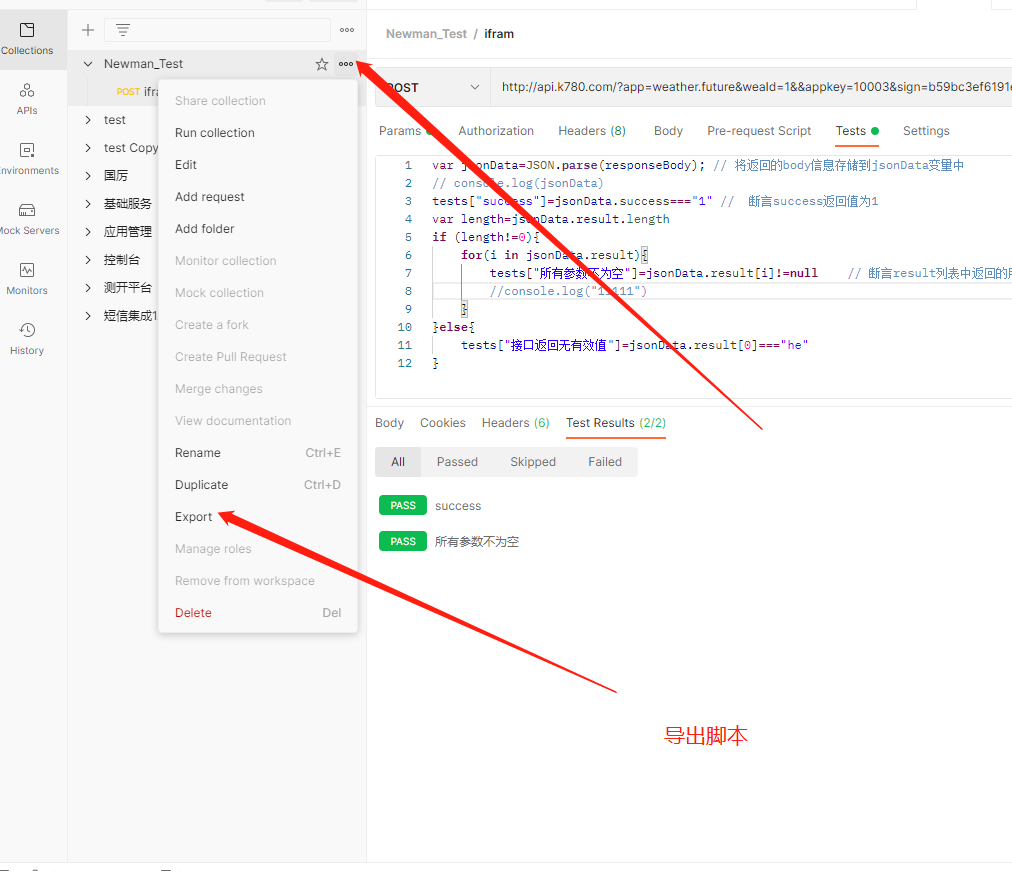
- 创建文件夹并命名为Newman_Test
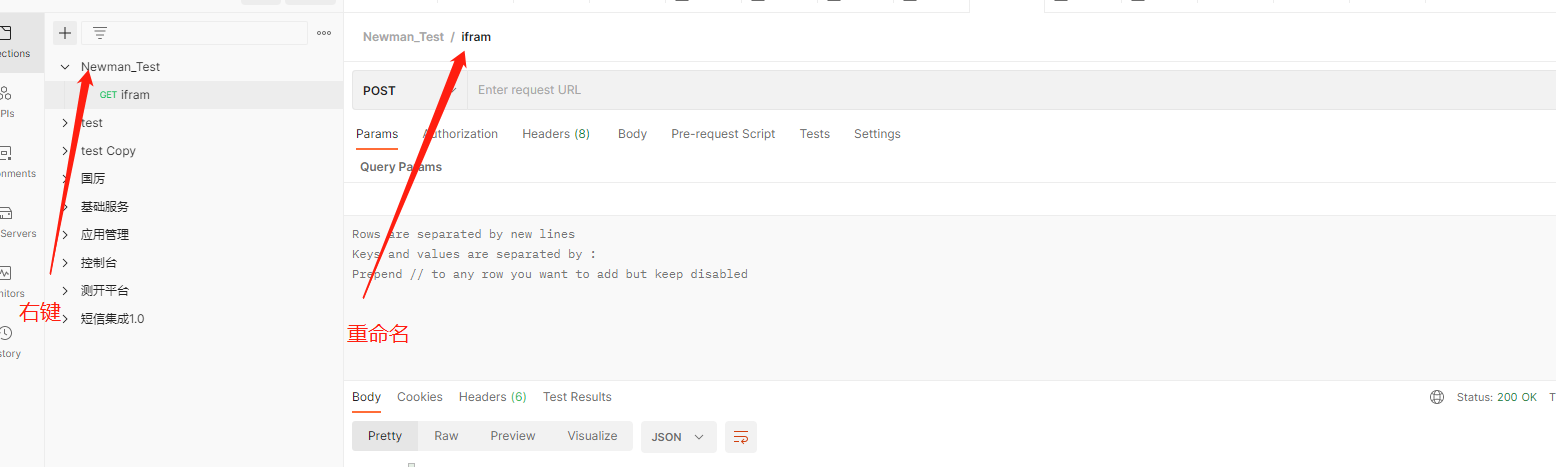
- 在文件夹Newman_Test上右键点击,选择AddRequest添加New Request请求并重命名
- 测试脚本,将天气接口连接复制到请求中,get、post请求均可以请求成功(也可以将接口的url保存到环境变量中)
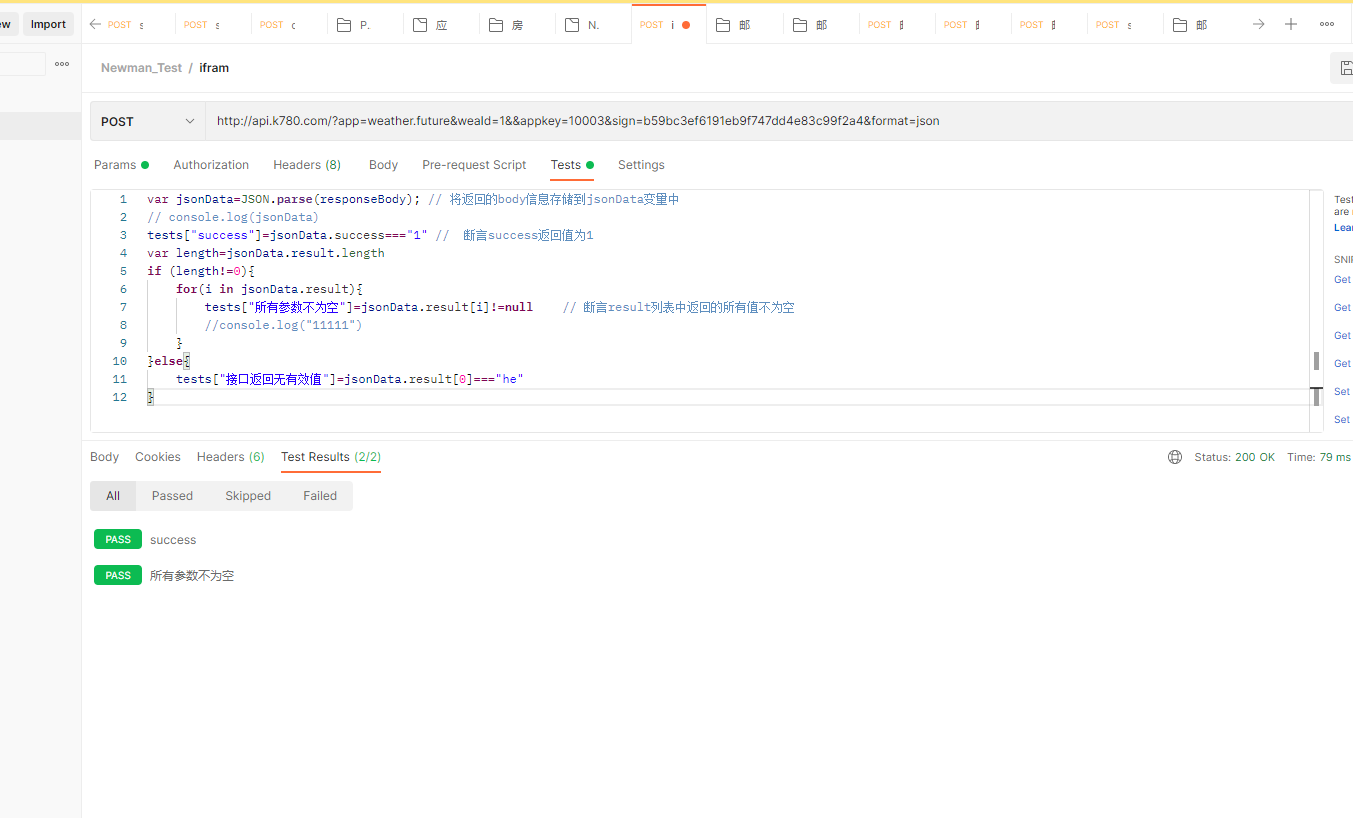
- 添加脚本断言
- 将脚本导出到本地
三、使用Newman运行Postman脚本
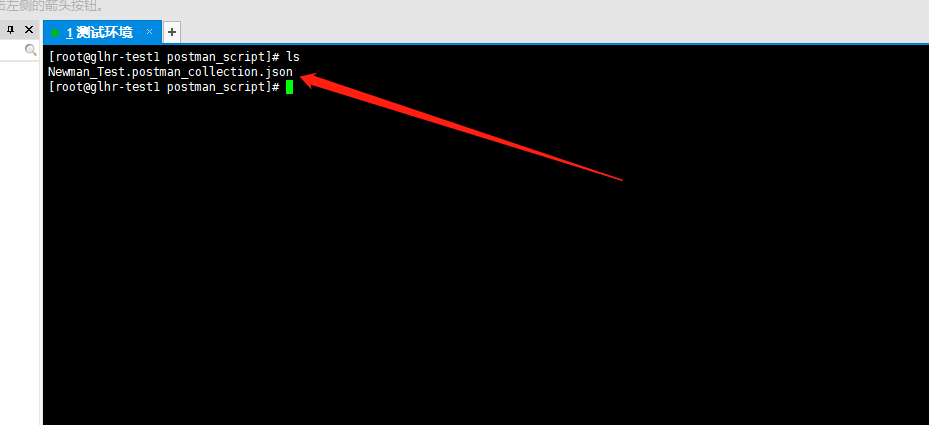
1、将保存的postman脚本放入到 /usr/local/postman_script目录下,也可以放在任意脚本目录,运行时指定绝对路径即可
[root@glhr-test1 newman]# cd /usr/local/
[root@glhr-test1 newman]# pwd
/usr/local/node/lib/node_modules/newman/postman_script
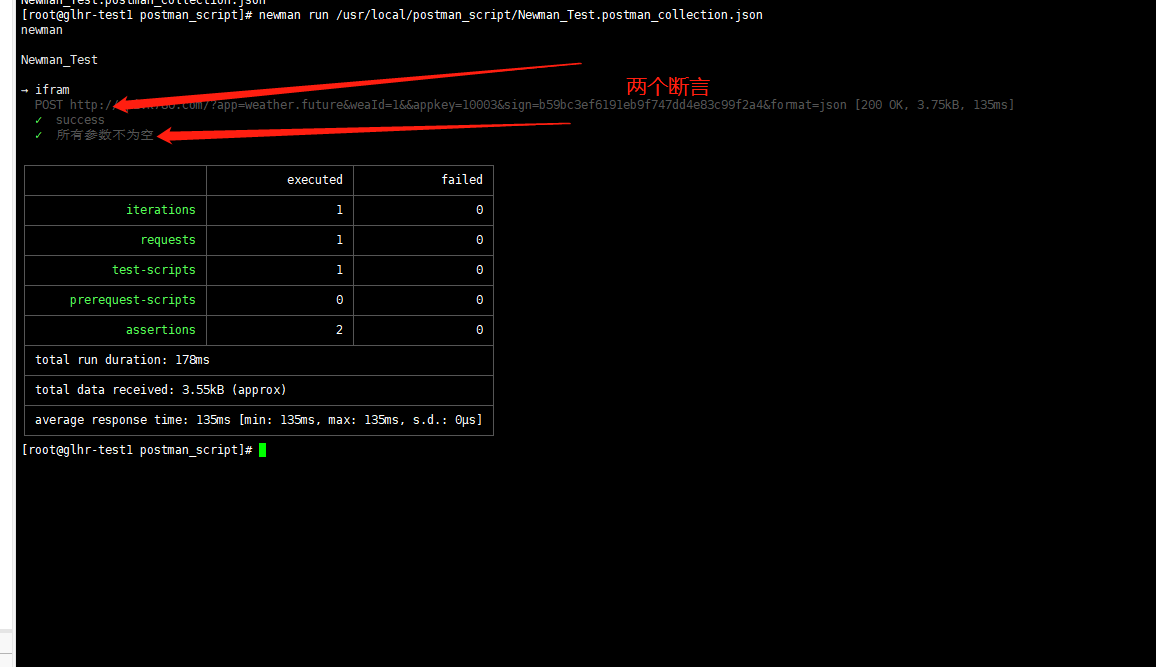
2、使用newman run 命令执行脚本,必须填写测试脚本的绝对路径 newman run /usr/local/postman_script/Newman_Test.postman_collection.json
[root@glhr-test1 postman_script]# ls
Newman_Test.postman_collection.json
[root@glhr-test1 postman_script]# newman run /usr/local/postman_script/Newman_Test.postman_collection.json  #填写脚本绝对路径
四、使用Jenkins执行postman脚本
1、新建工程
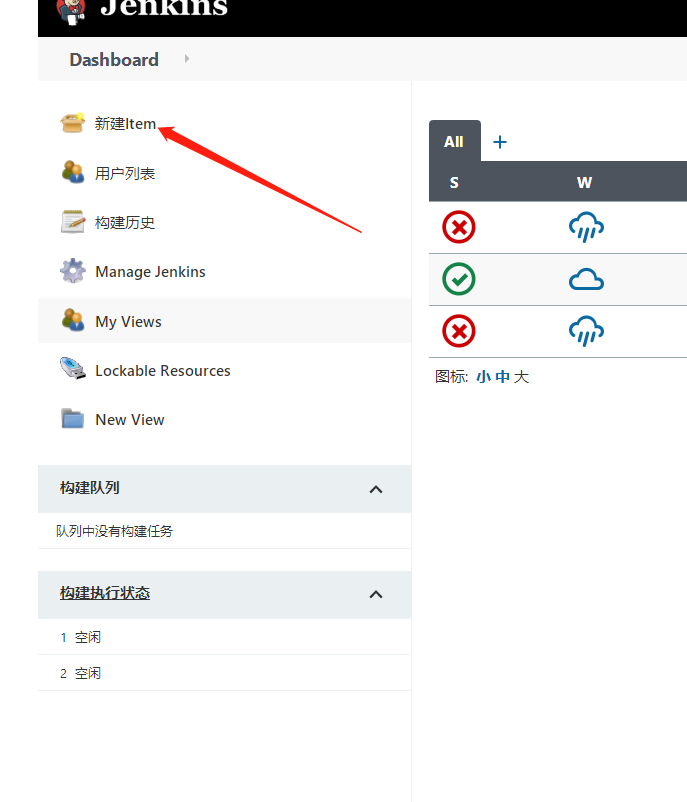
2、新工程命名test并保存
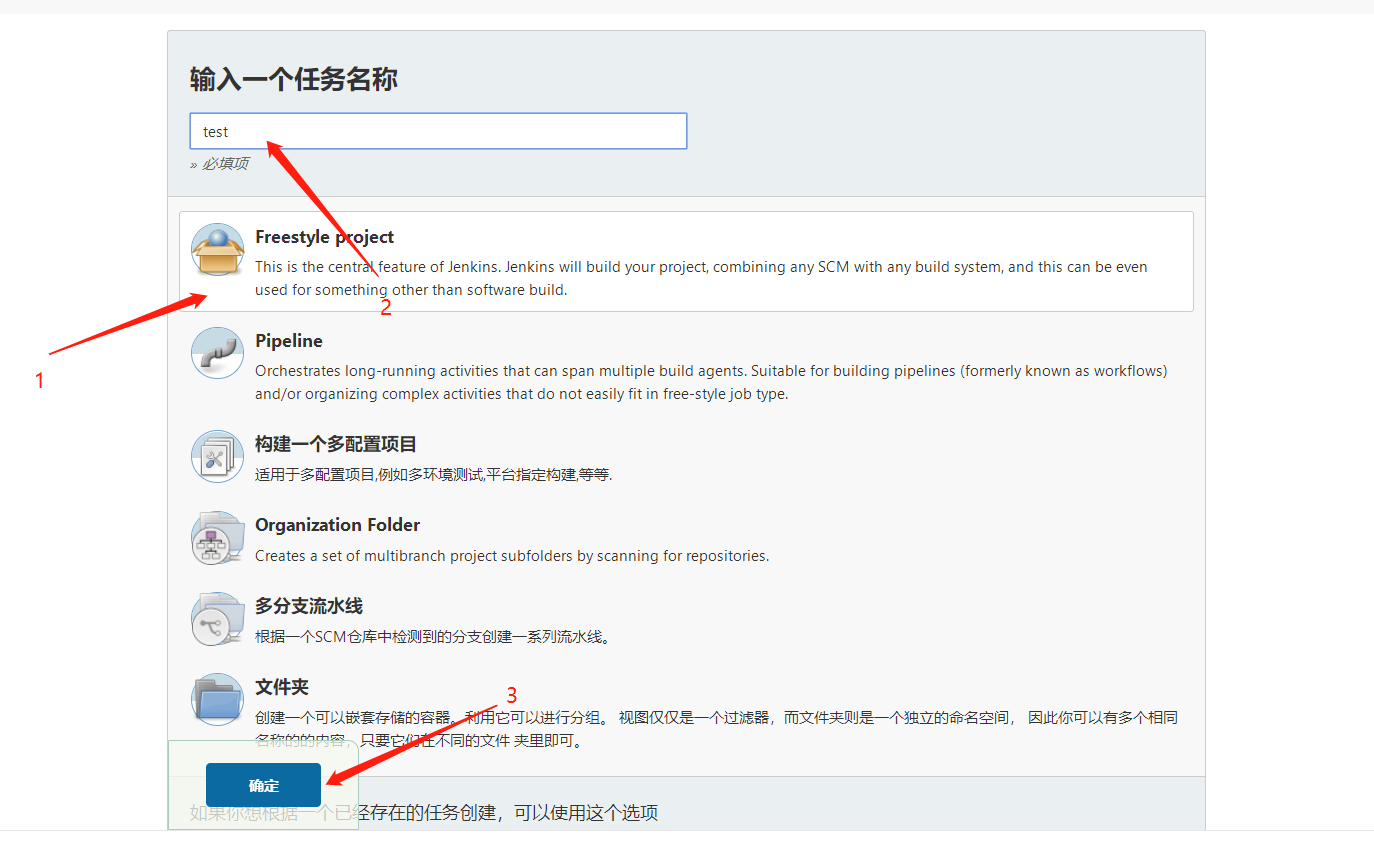
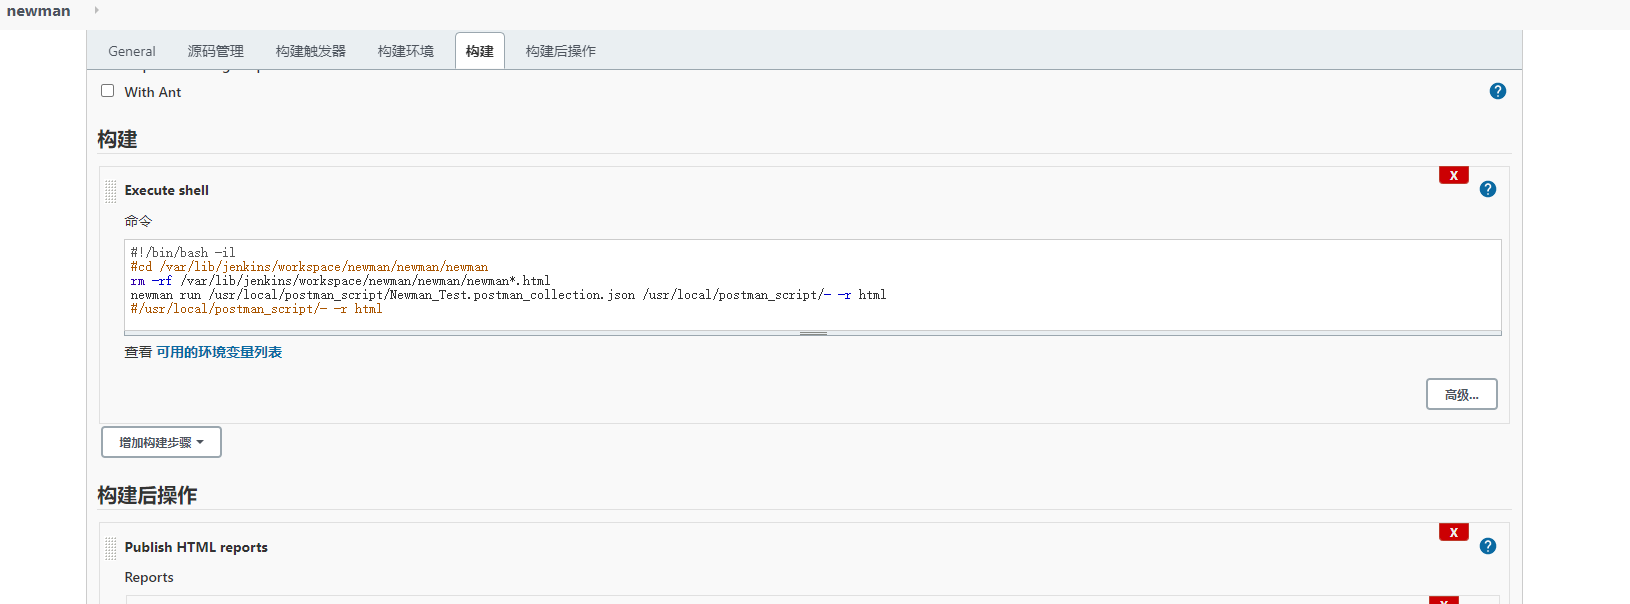
3、选择构建类型,使用 Execute shell 进行构建
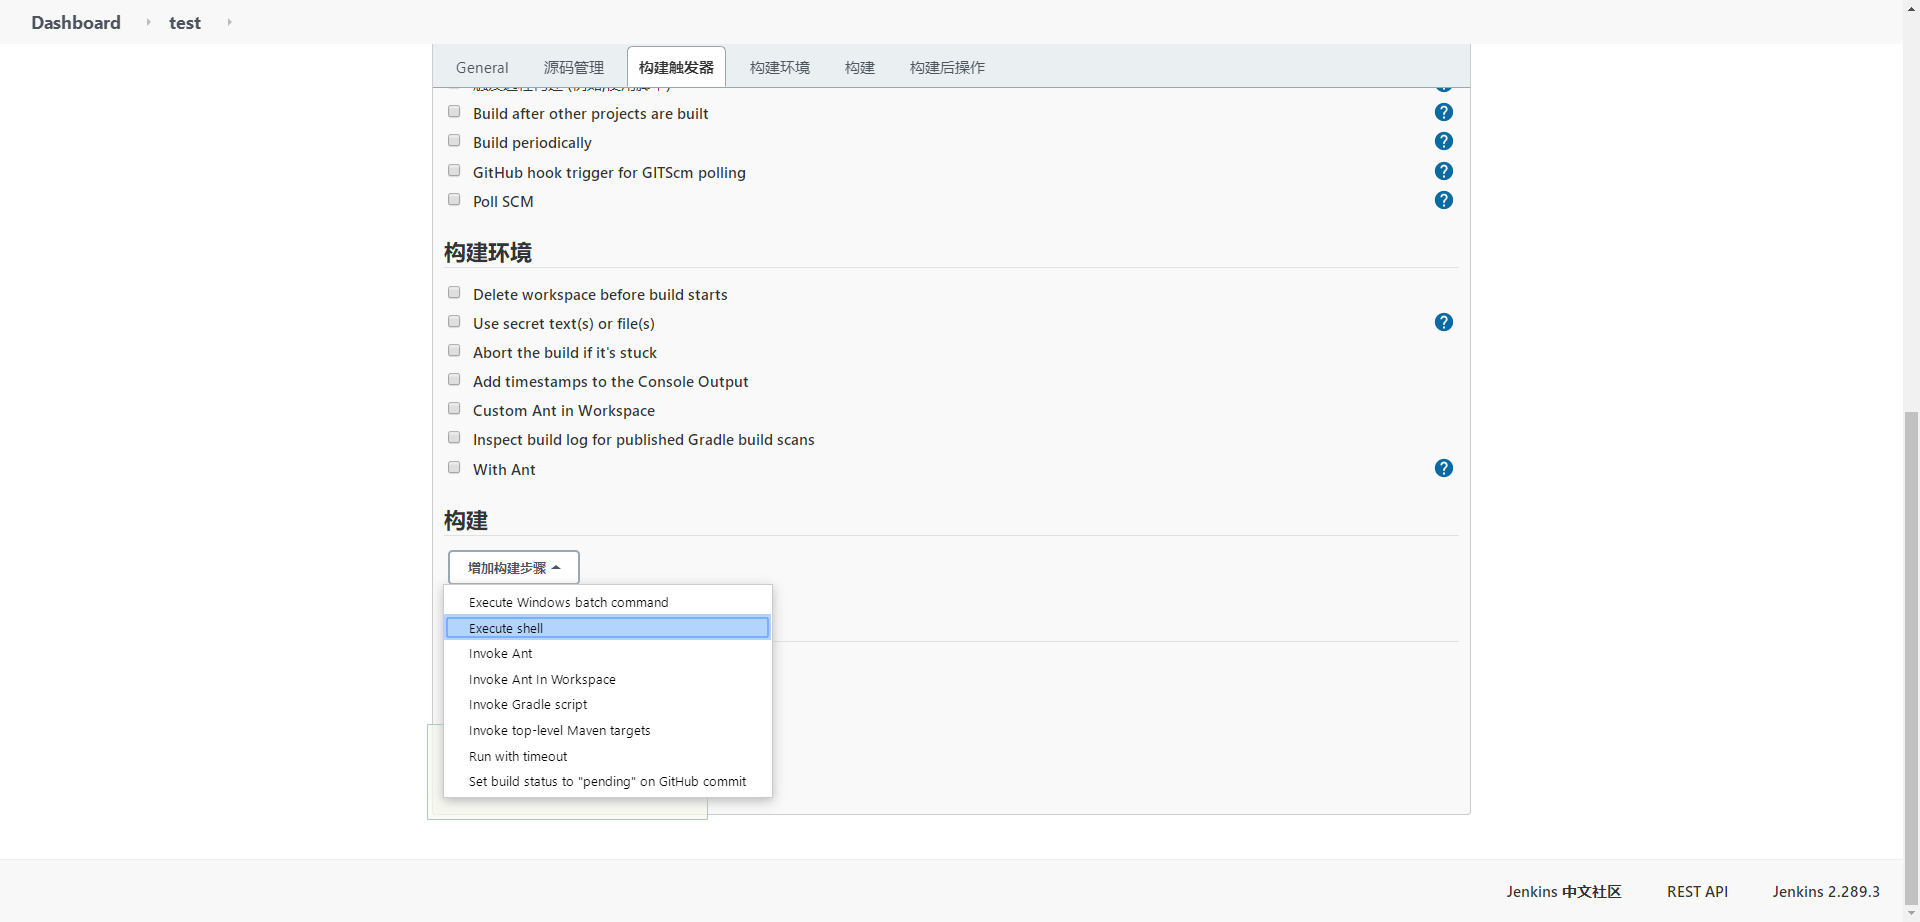
4、输入命令后保存
#!/bin/bash -il
newman run /usr/local/postman_script/Newman_Test.postman_collection.json

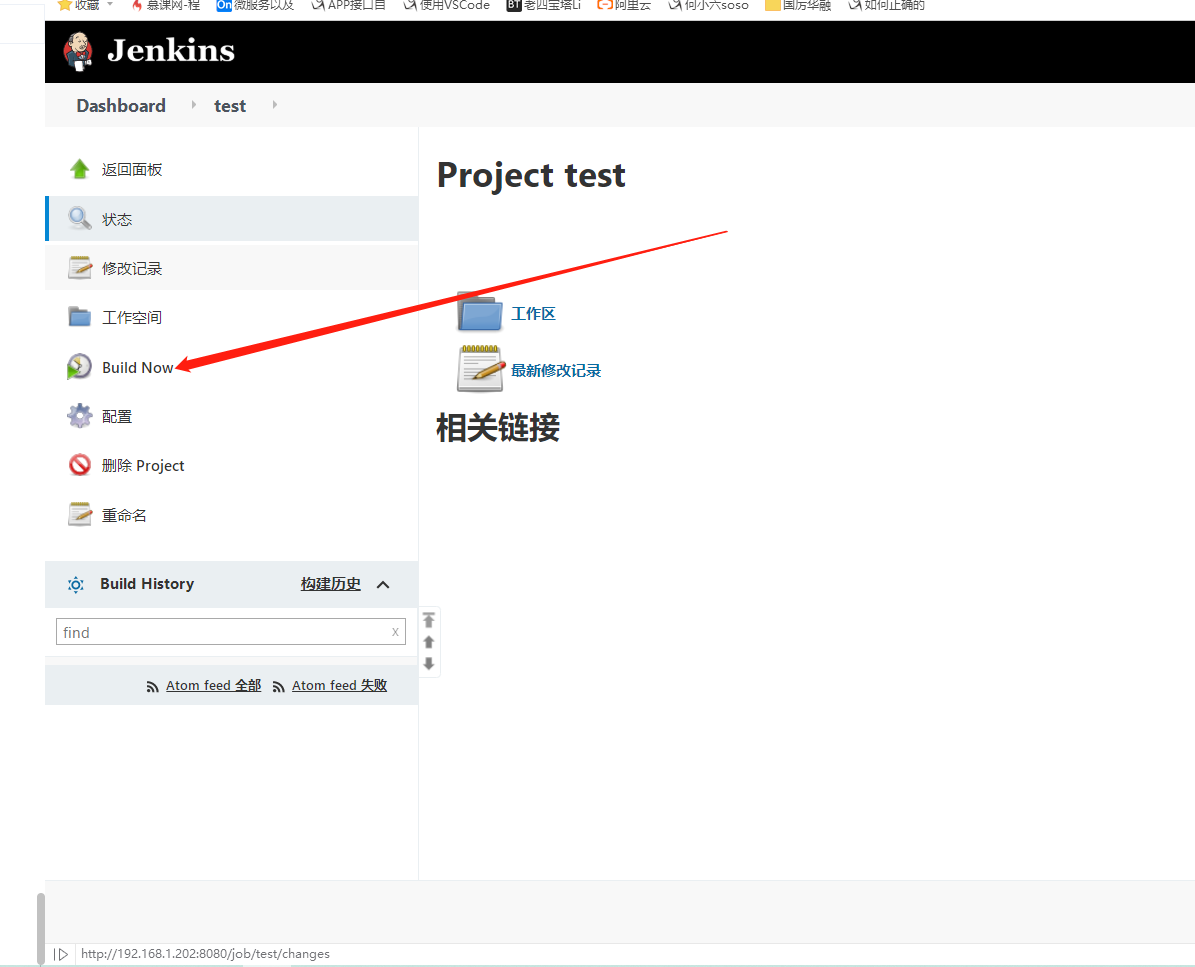
5、点击Build Now构建工程
6、构建成功
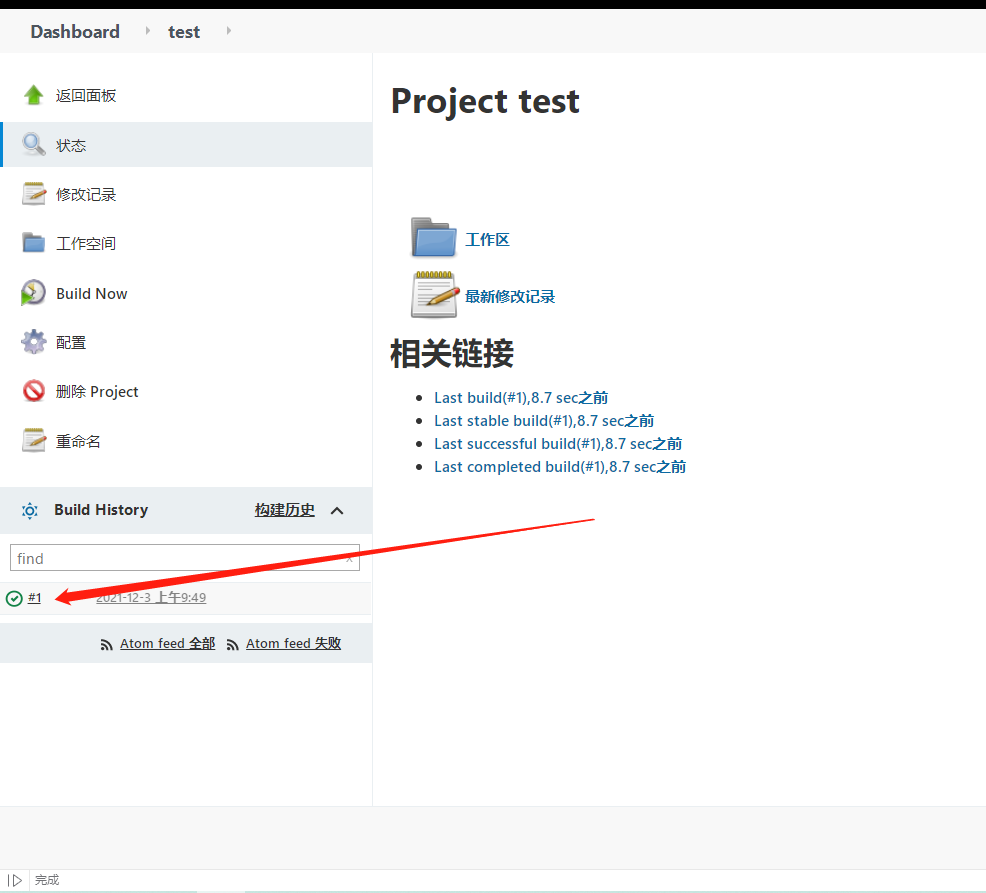
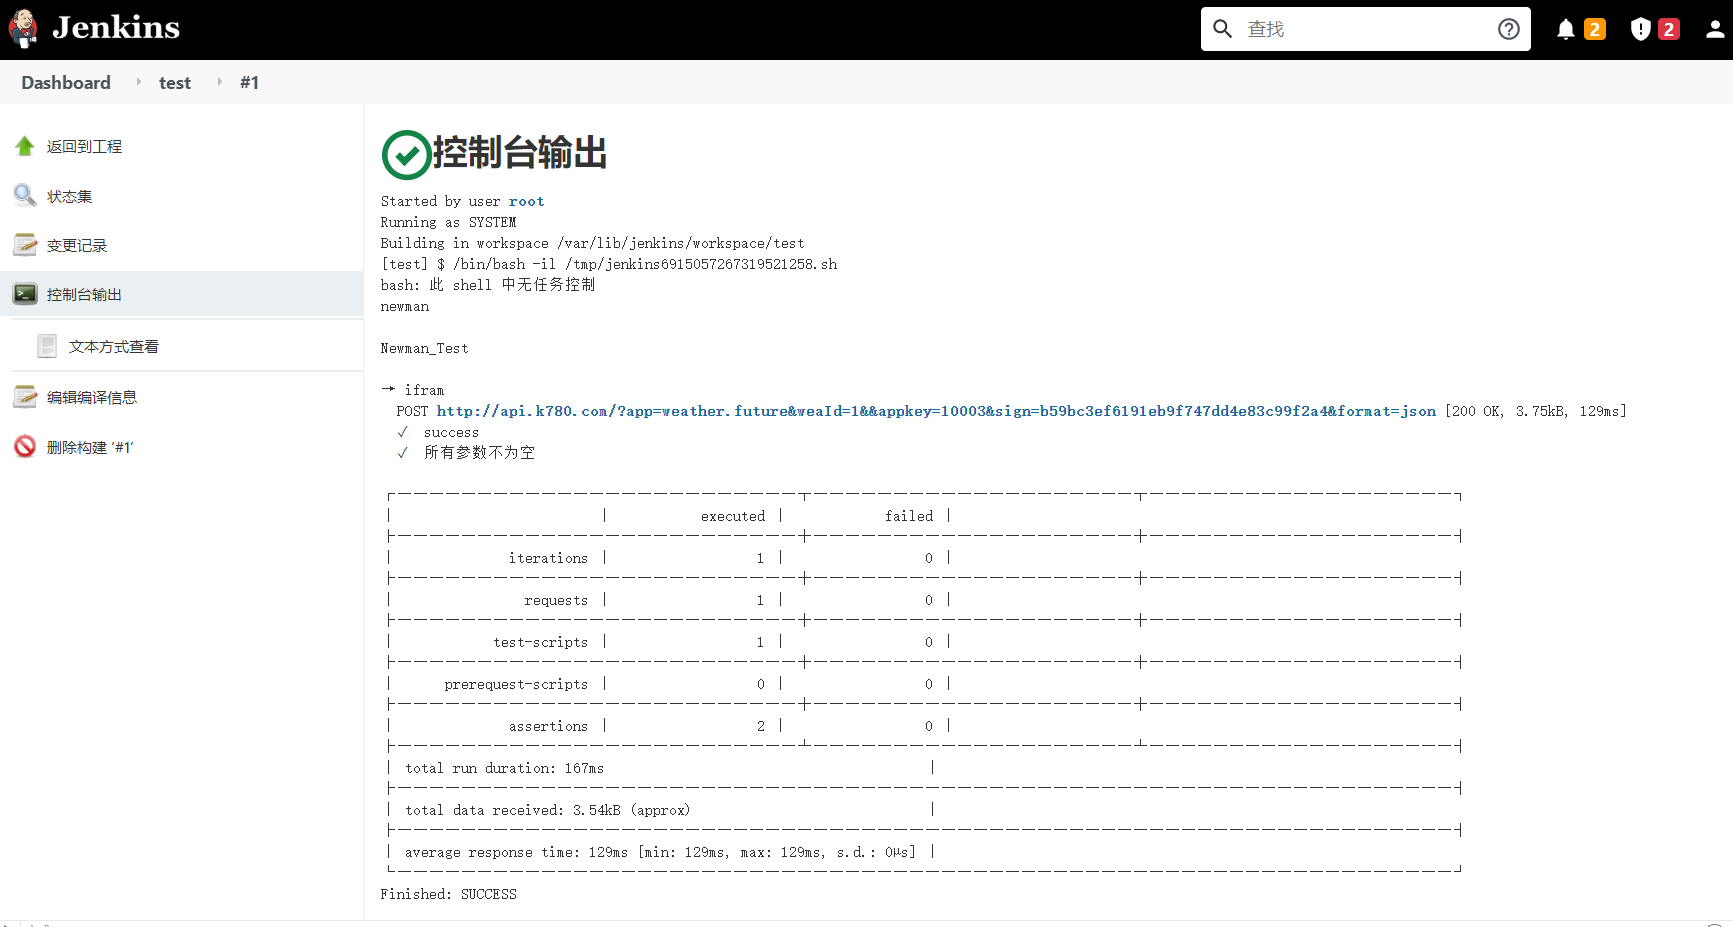
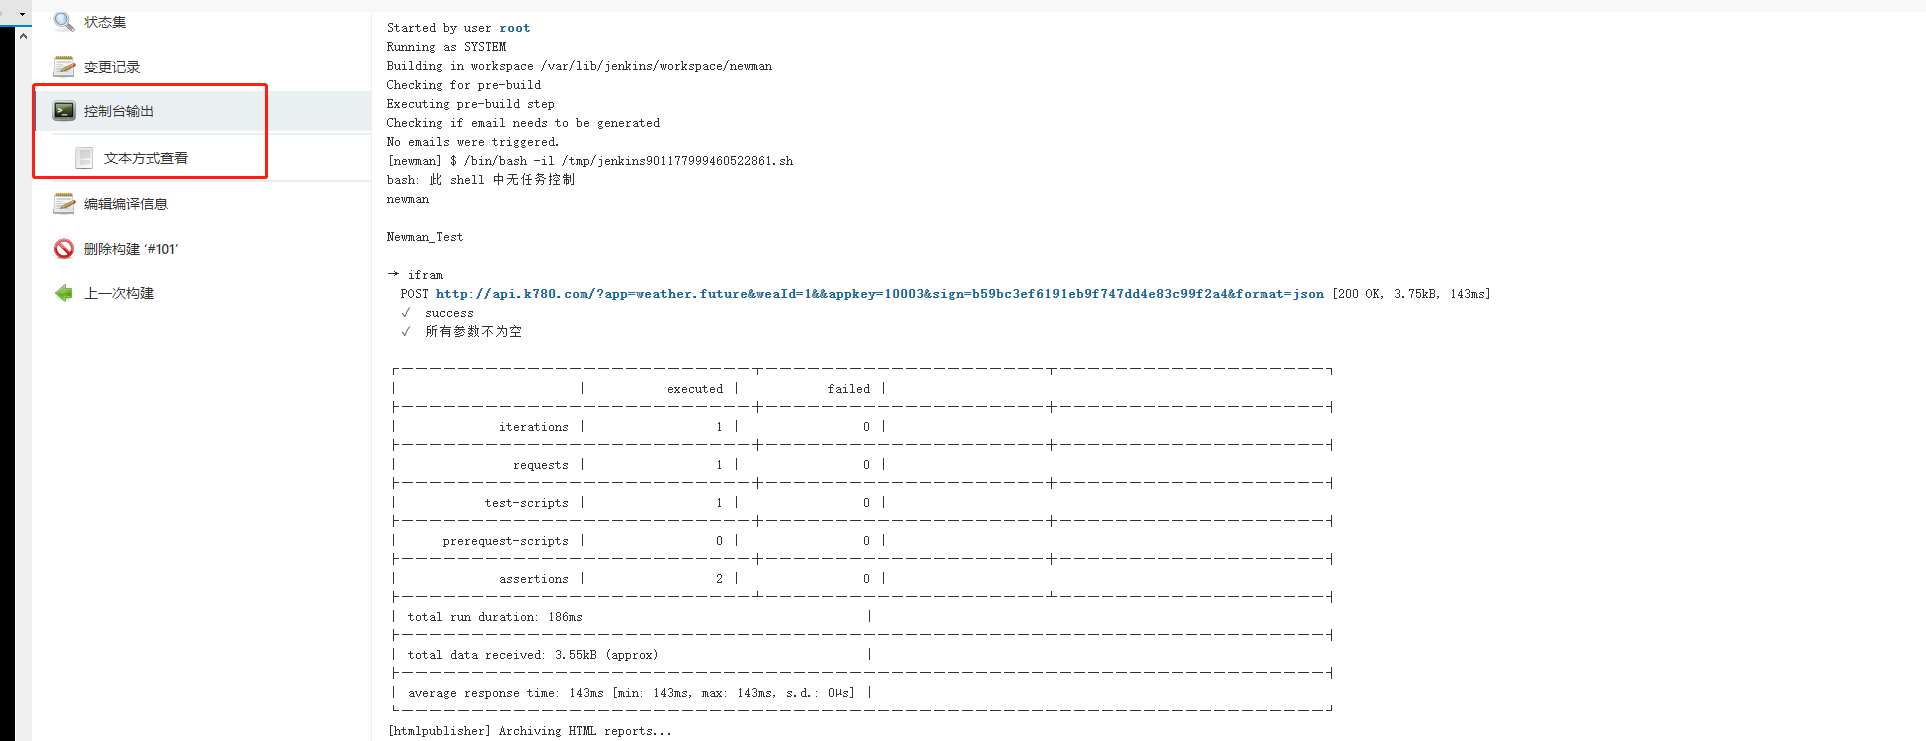
7、点击进入控制台输出
五、配置邮件发送测试报告
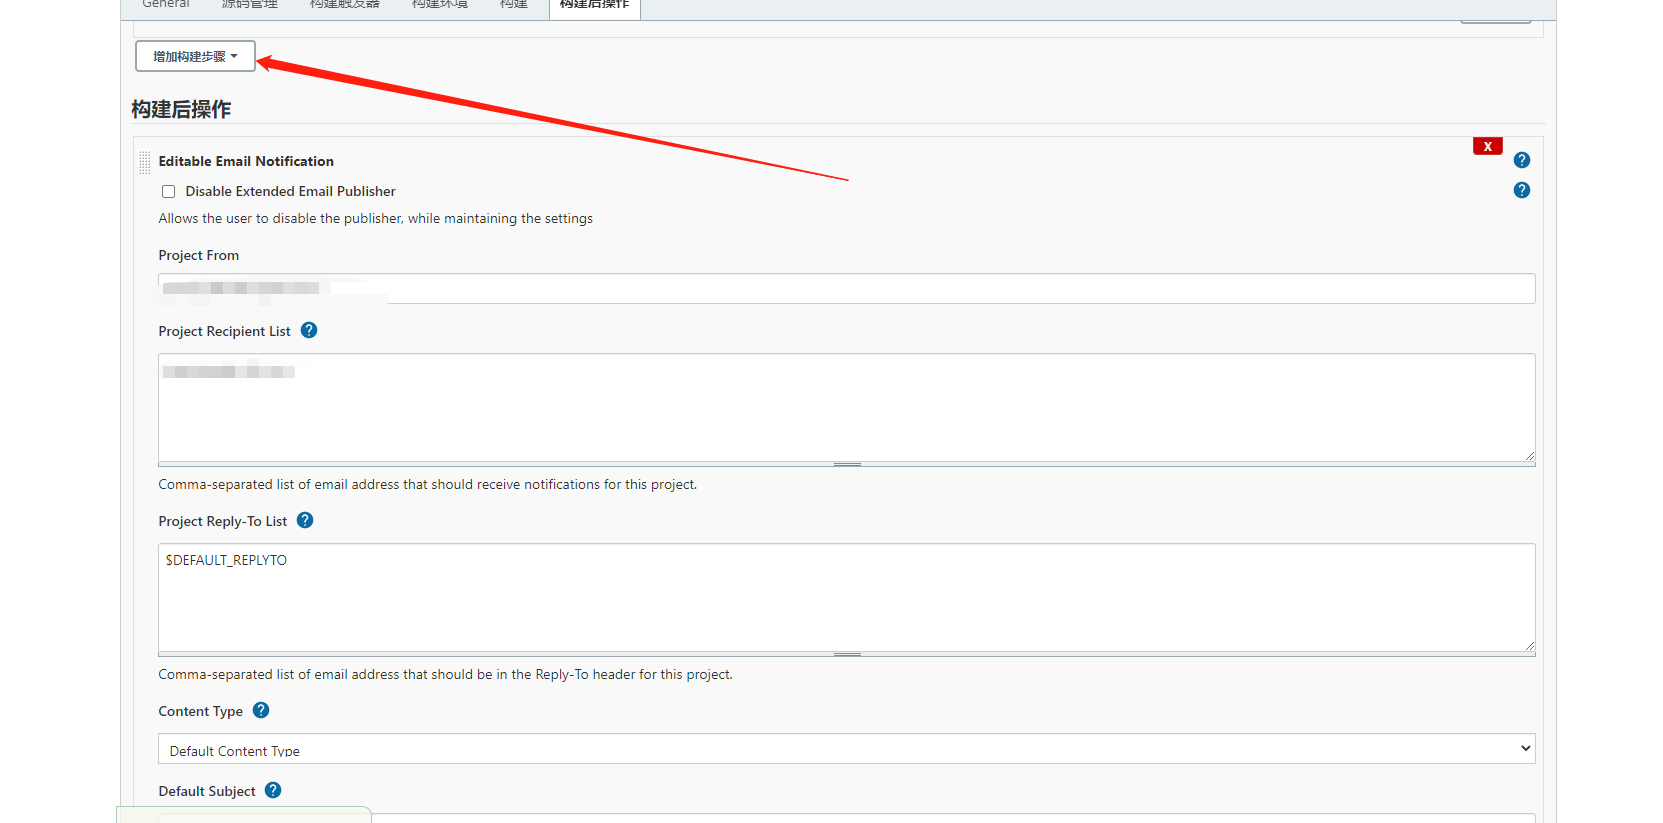
1、进入项目配置增加构建步骤:
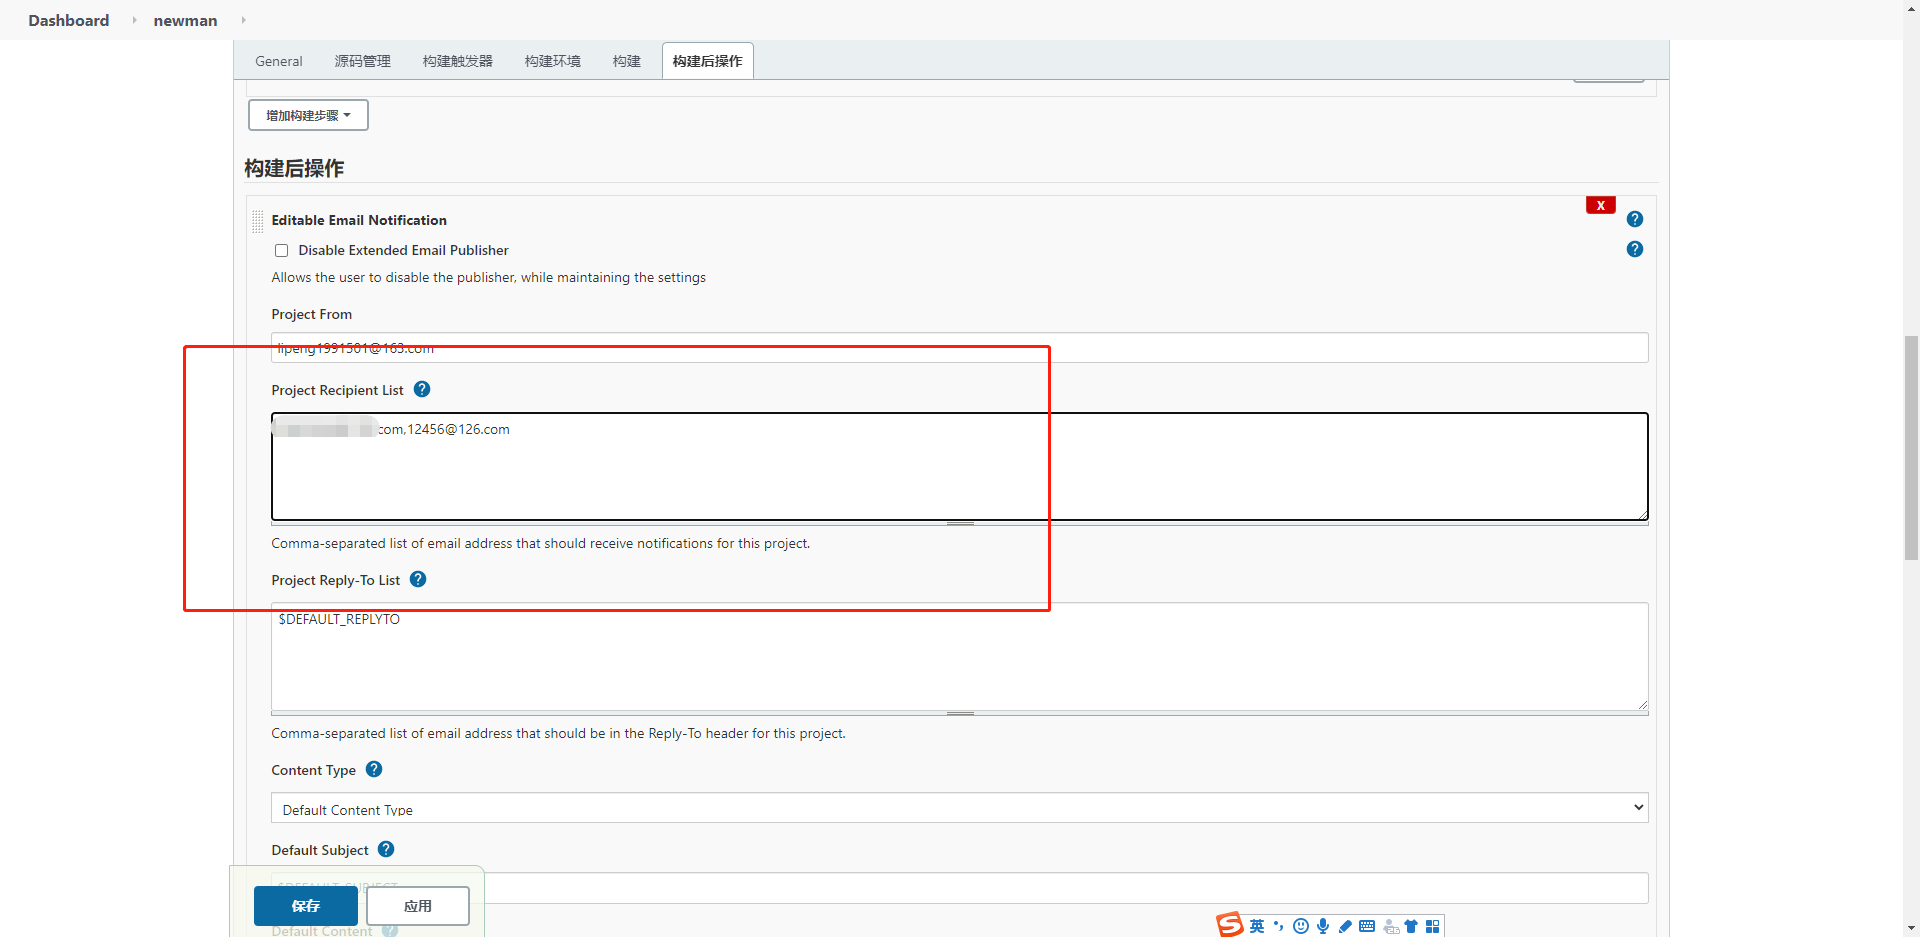
2、填入发送者邮箱(邮件服务器配置),和接收人邮箱。多个接收人使用逗号分隔
3、将下方邮件发送模板拷贝到Default Content中,并点击保存
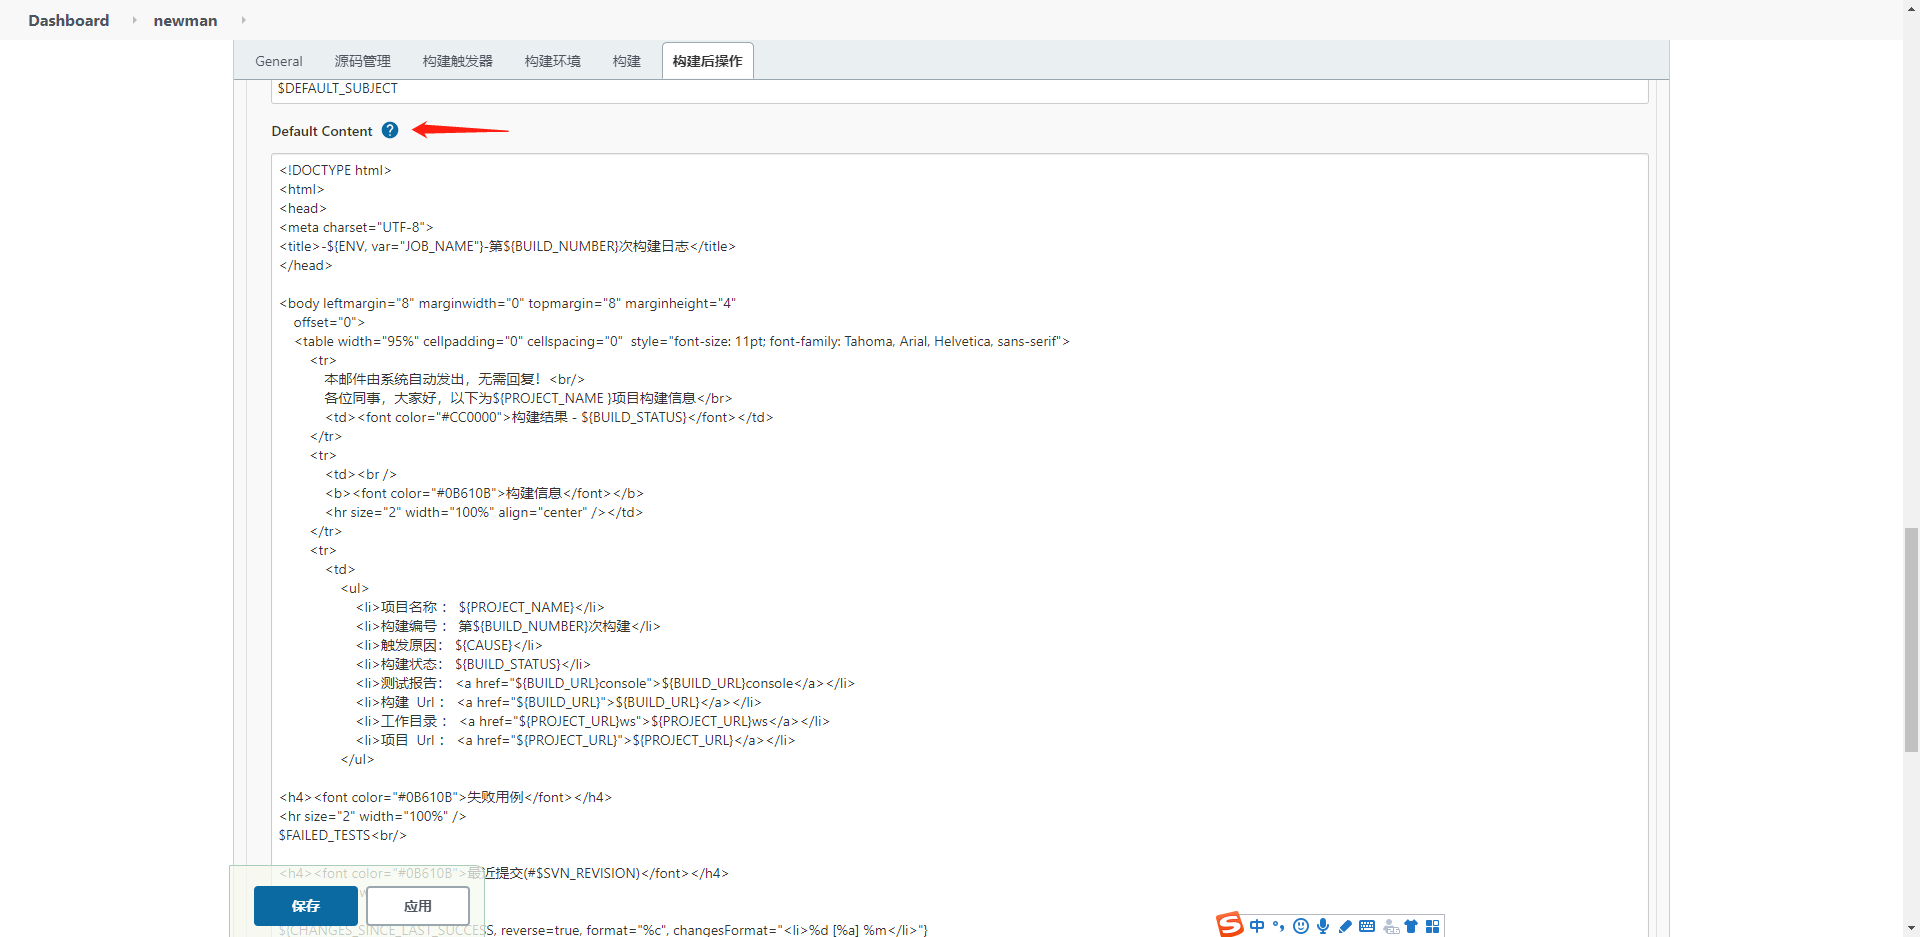
<!DOCTYPE html>
<html>
<head>
<meta charset="UTF-8">
<title>-${ENV, var="JOB_NAME"}-第${BUILD_NUMBER}次构建日志</title>
</head>

<body leftmargin="8" marginwidth="0" topmargin="8" marginheight="4"
    offset="0">
    <table width="95%" cellpadding="0" cellspacing="0"  style="font-size: 11pt; font-family: Tahoma, Arial, Helvetica, sans-serif">
        <tr>
            本邮件由系统自动发出,无需回复!<br/>
            各位同事,大家好,以下为${PROJECT_NAME }项目构建信息</br>
            <td><font color="#CC0000">构建结果 - ${BUILD_STATUS}</font></td>
        </tr>
        <tr>
            <td><br />
            <b><font color="#0B610B">构建信息</font></b>
            <hr size="2" width="100%" align="center" /></td>
        </tr>
        <tr>
            <td>
                <ul>
                    <li>项目名称 : ${PROJECT_NAME}</li>
                    <li>构建编号 : 第${BUILD_NUMBER}次构建</li>
                    <li>触发原因: ${CAUSE}</li>
                    <li>构建状态: ${BUILD_STATUS}</li>
                    <li>测试报告: <a href="${BUILD_URL}console">${BUILD_URL}console</a></li>
                    <li>构建  Url : <a href="${BUILD_URL}">${BUILD_URL}</a></li>
                    <li>工作目录 : <a href="${PROJECT_URL}ws">${PROJECT_URL}ws</a></li>
                    <li>项目  Url : <a href="${PROJECT_URL}">${PROJECT_URL}</a></li>
                </ul>

<h4><font color="#0B610B">失败用例</font></h4>
<hr size="2" width="100%" />
$FAILED_TESTS<br/>

<h4><font color="#0B610B">最近提交(#$SVN_REVISION)</font></h4>
<hr size="2" width="100%" />
<ul>
${CHANGES_SINCE_LAST_SUCCESS, reverse=true, format="%c", changesFormat="<li>%d [%a] %m</li>"}
</ul>
详细提交: <a href="${PROJECT_URL}changes">${PROJECT_URL}changes</a><br/>

            </td>
        </tr>
    </table>
</body>
</html>
4、构建,构建后在控制台输出中可以查看脚本执行报告
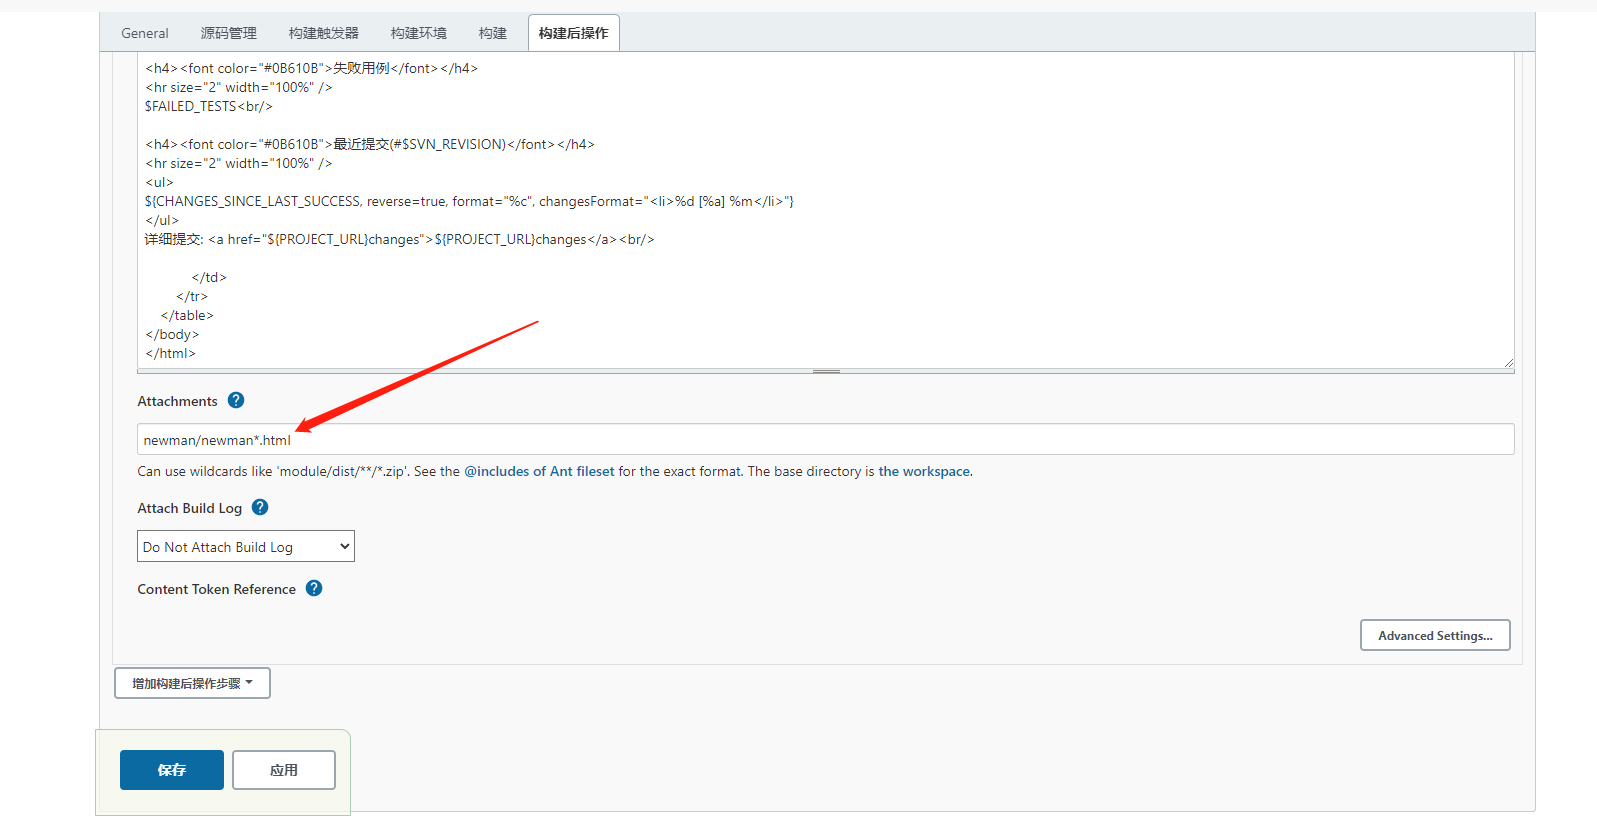
5、添加报告附件
执行脚本中添加生成报告命令
rm -rf /var/lib/jenkins/workspace/newman/newman/newman*.html # 删除上一次报告
newman run /usr/local/postman_script/Newman_Test.postman_collection.json /usr/local/postman_script/- -r html # 执行测试脚本,并以html格式生成测试报告
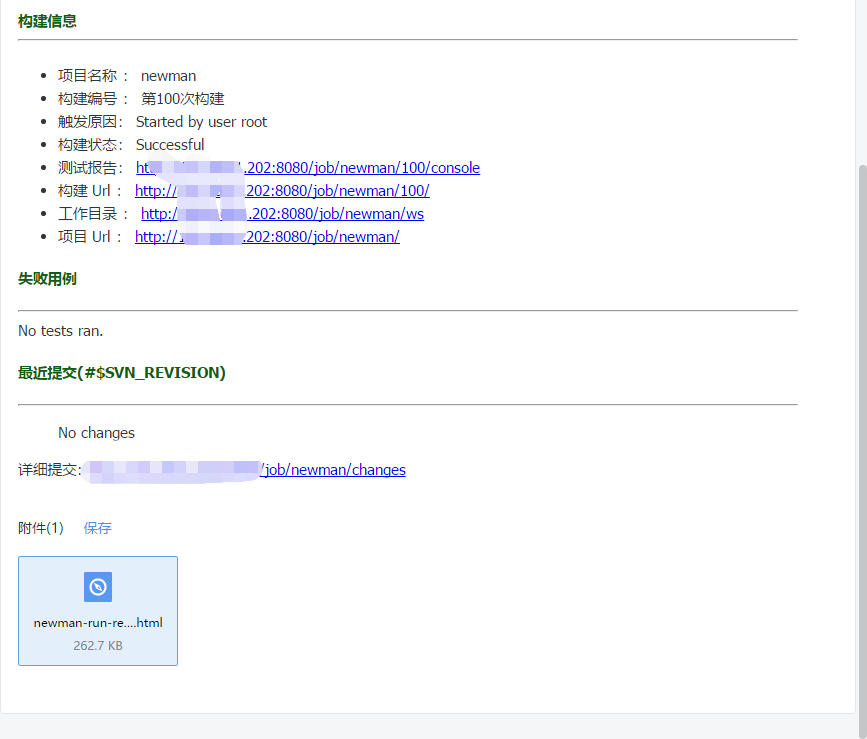
6、从工作空间中获取报告并发送
7、构建工程
六、添加定时器
1、在‘构建触发器’下选择Poll SCM(定时构建),并规定24小时执行一次
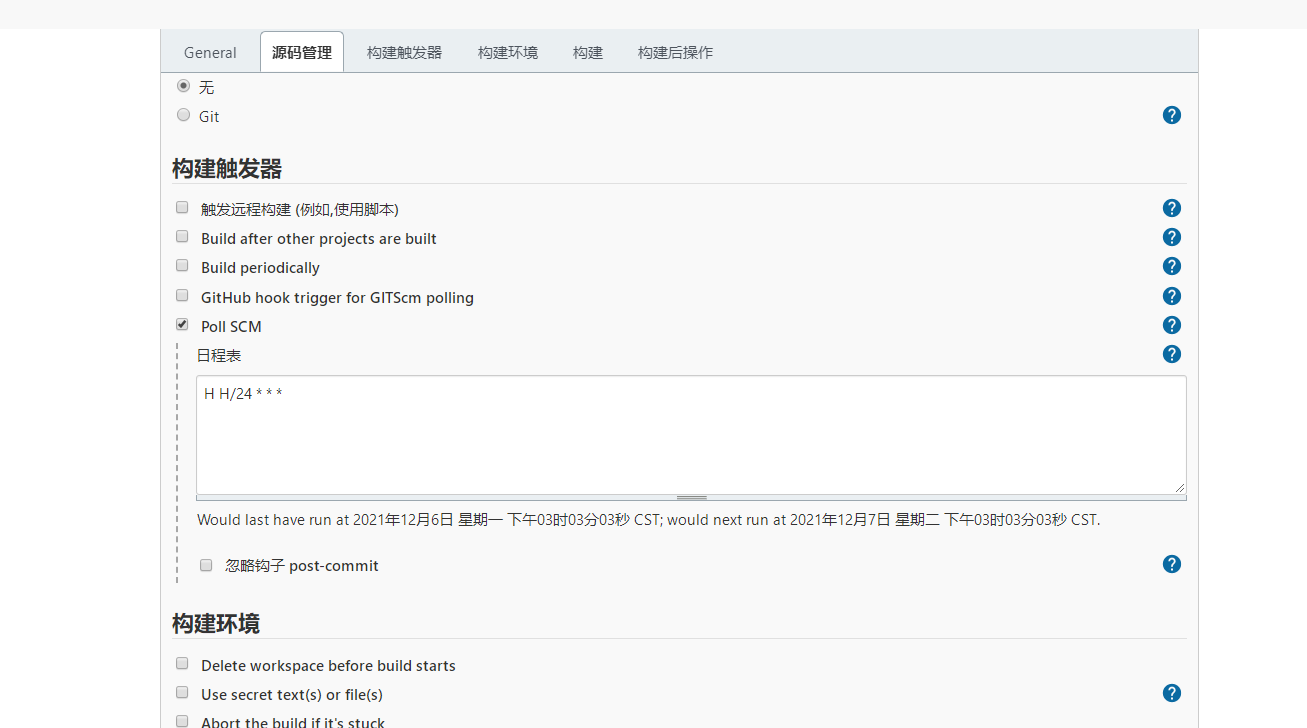
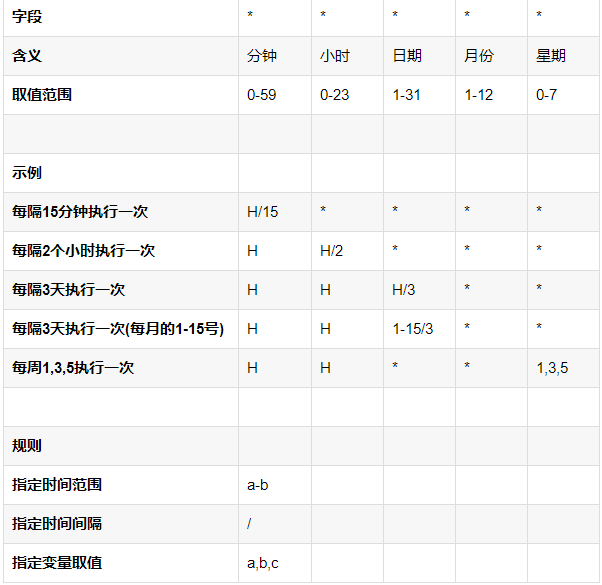
2、定时器执行规则
七、排坑
服务器无公网域名,Jenkins切勿使用docker安装
- node安装提示找不到:
1、yum install epel-release
2、sudo yum install nodejs
3、node -v .
- 版本太低需要升级:
1、清除npm缓存,执行命令
npm cache clean -f
2、n模块是专门用来管理nodejs的版本,安装n模块
npm install -g n
3、更新升级node版本选择任意一种
n stable // 把当前系统的 Node 更新成最新的 “稳定版本” n lts // 长期支持版 n latest // 最新版 n 10.14.2 // 指定安装版本
4、node -v 查看版本
- Jenkins执行脚本无法访问:
使用sudo,赋予超级管理员权限
- 邮件服务器配置后无法发送邮件:
SMTP端口使用465
邮箱密码使用授权码