方法一:
/*
    实现思维是这样的:
    1.首先拿到bitmap图片
    2.得到bitmap图片的高度 宽度,并且计算好各个画图尺寸
    3.创建一个空白的 bitmap图片: Bitmap output = Bitmap.createBitmap(width, height, Bitmap.Config.ARGB_8888);
    4.将这个空白图片导入画布里
    5.然后重点: 这个画布一定是要设置成透明的
    6.在这张透明的画布上画圆型。
    7.然后重点:设置相差裁剪属性
    8.然后在这张透明的画布上添加bitmap图片
    9.返回那张透明的bitmap
     */
    public Bitmap toRoundBitmap(Bitmap bitmap) {
        int width = bitmap.getWidth();
        int height = bitmap.getHeight();
        float roundPx;
        float left, top, right, bottom, dst_left, dst_top, dst_right, dst_bottom;
        if (width <= height) {
            roundPx = width / 2;
            left = 0;
            top = 0;
            right = width;
            bottom = width;
            height = width;
            dst_left = 0;
            dst_top = 0;
            dst_right = width;
            dst_bottom = width;
        } else {
            roundPx = height / 2;
            float clip = (width - height) / 2;
            left = clip;
            right = width - clip;
            top = 0;
            bottom = height;
            width = height;
            dst_left = 0;
            dst_top = 0;
            dst_right = height;
            dst_bottom = height;
        }

        Bitmap output = Bitmap.createBitmap(width, height, Bitmap.Config.ARGB_8888);
        Canvas canvas = new Canvas(output);

        final int color = 0xff424242;
        final Paint paint = new Paint();
        final Rect src = new Rect((int) left, (int) top, (int) right, (int) bottom);
        final Rect dst = new Rect((int) dst_left, (int) dst_top, (int) dst_right, (int) dst_bottom);
        final RectF rectF = new RectF(dst);

        paint.setAntiAlias(true);// 设置画笔无锯齿

        canvas.drawARGB(0, 0, 0, 0); // 填充整个Canvas
        paint.setColor(color);

        // 以下有两种方法画圆,drawRounRect和drawCircle
        // canvas.drawRoundRect(rectF, roundPx, roundPx, paint);// 画圆角矩形,第一个参数为图形显示区域,第二个参数和第三个参数分别是水平圆角半径和垂直圆角半径。
        canvas.drawCircle(roundPx, roundPx, roundPx, paint);

        paint.setXfermode(new PorterDuffXfermode(PorterDuff.Mode.SRC_IN));// 设置两张图片相交时的模式,参考http://trylovecatch.iteye.com/blog/1189452
        canvas.drawBitmap(bitmap, src, dst, paint); //以Mode.SRC_IN模式合并bitmap和已经draw了的Circle

        return output;
    }
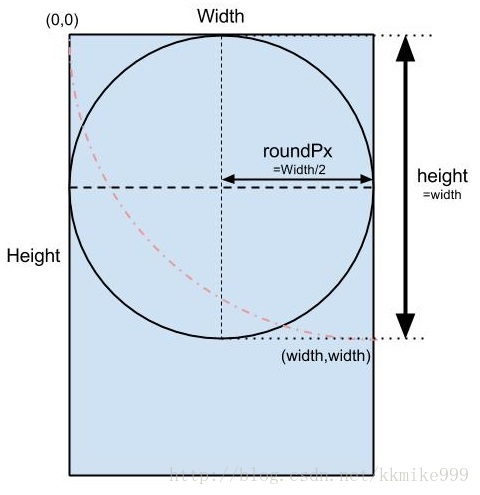
参考流程图 & 原理图: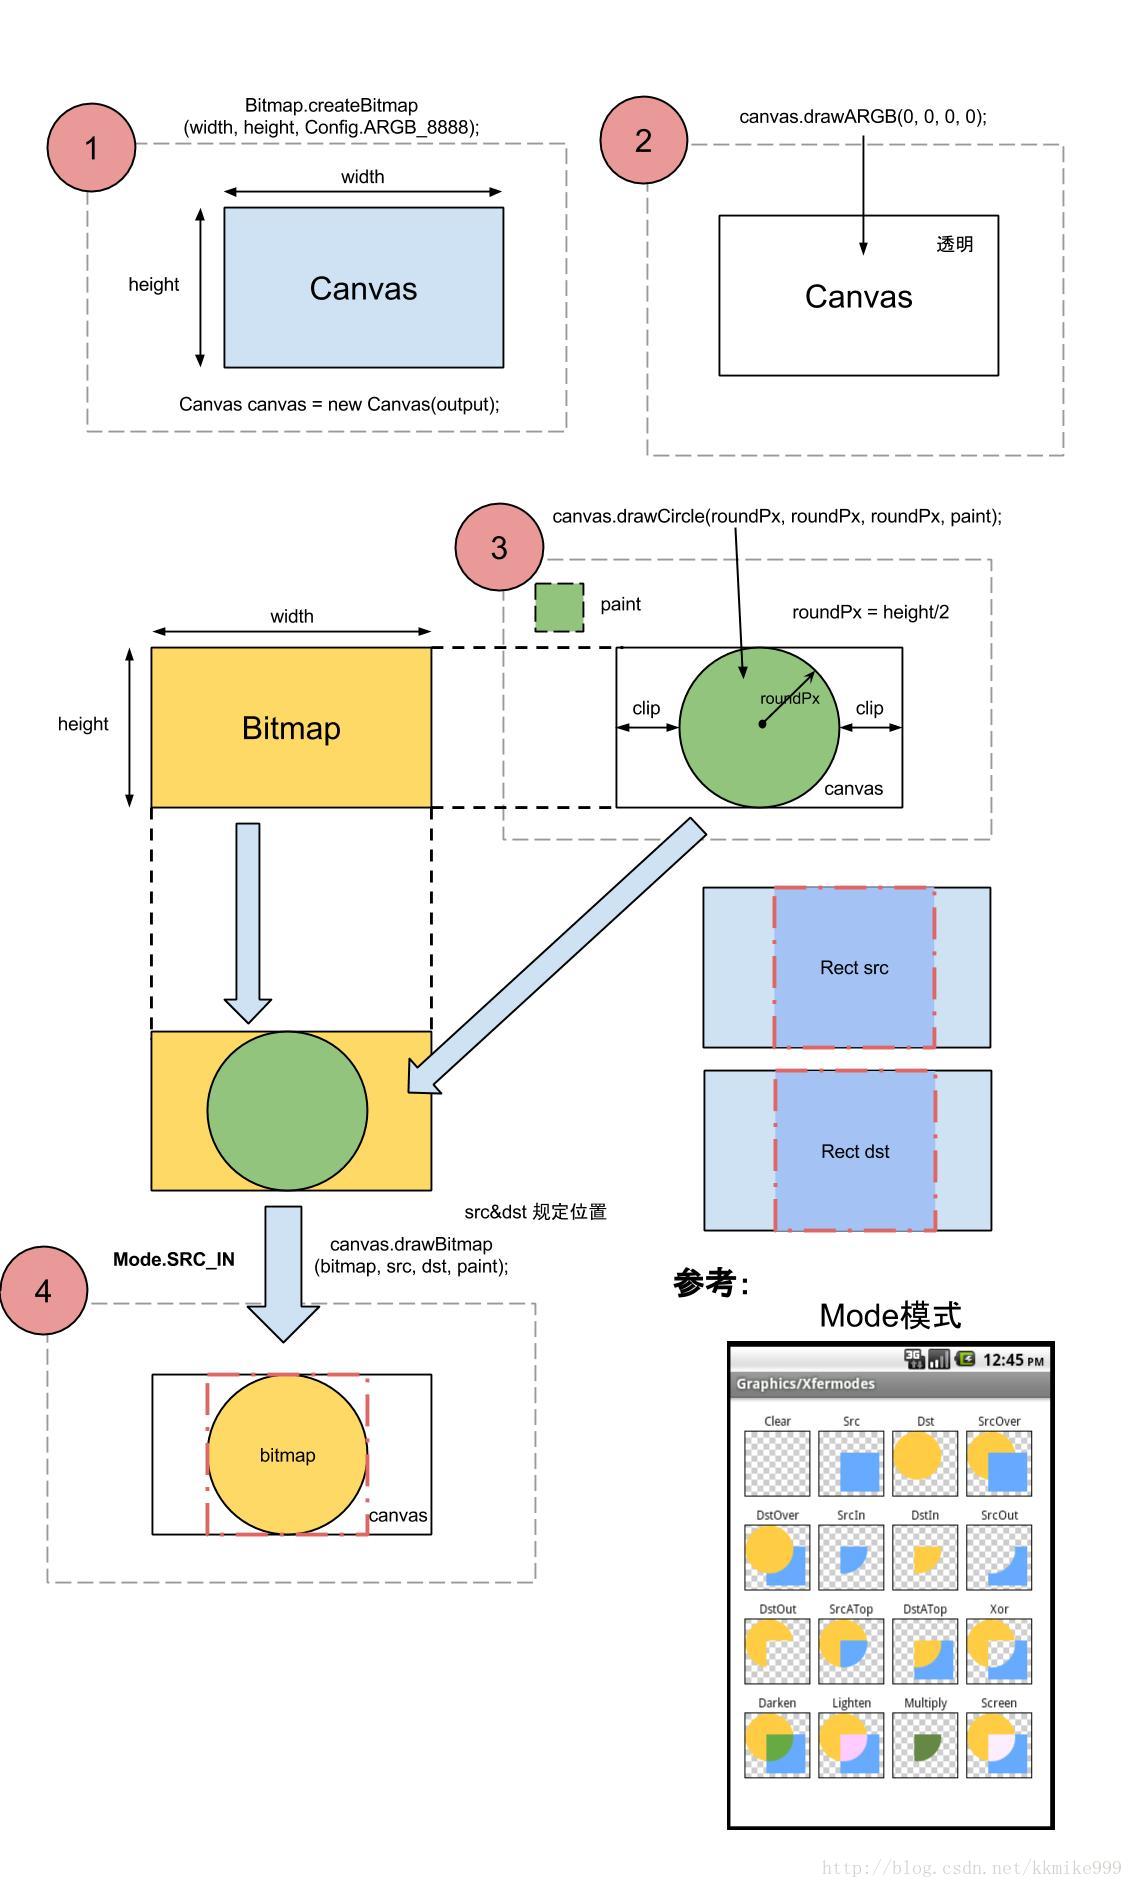
方法二:
转:https://blog.csdn.net/xingxingchance/article/details/77750546
使用clipPath()方法裁剪圆形图片。
首先,我们先看效果图:
裁剪前: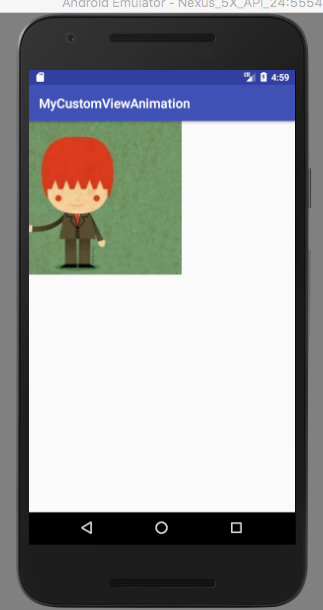
裁剪后: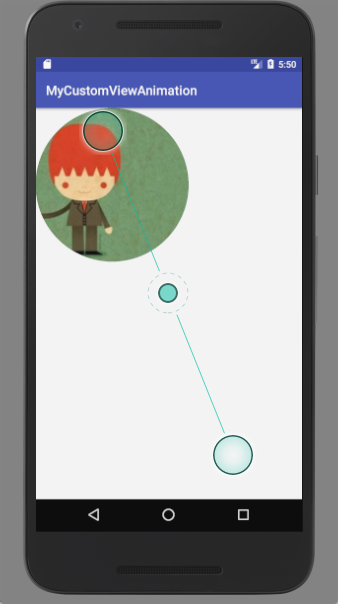
接下来,我们来一步一步的实现。
1.新建一个module
2.新建一个自定义view类,继承View,并重写两参构造器和onDrawn方法
/**
 * Created by zhaoxin on 17/8/31.
 */

public class MyAnimationView extends View {

    public MyAnimationView(Context context, @Nullable AttributeSet attrs) {
        super(context, attrs);
    }

    @Override
    protected void onDraw(Canvas canvas) {
        super.onDraw(canvas);


    }
3.新建一个布局,在布局中通过包名.类导入自定义view
<?xml version="1.0" encoding="utf-8"?>
<LinearLayout xmlns:android="http://schemas.android.com/apk/res/android"
    android:layout_width="match_parent"
    android:layout_height="match_parent">

    <com.example.zhaoxin.mycustomviewanimation.MyAnimationView
        android:layout_width="match_parent"
        android:layout_height="match_parent" />

</LinearLayout>
4.接下来就是重要的裁剪圆形图片部分
/**
 * Created by zhaoxin on 17/8/31.
 */

public class MyAnimationView extends View {

    private Bitmap mBitmap;
    private Path mPath;

    public MyAnimationView(Context context, @Nullable AttributeSet attrs) {
        super(context, attrs);
    }

    @Override
    protected void onDraw(Canvas canvas) {
        super.onDraw(canvas);

        Paint paint = new Paint();

        mBitmap = BitmapFactory.decodeResource(getResources(), R.drawable.pic);
        mPath = new Path();

        mPath.addCircle(mBitmap.getWidth() / 2, mBitmap.getHeight() / 2, mBitmap.getWidth() / 2, Path.Direction.CCW);
        canvas.clipPath(mPath);
        canvas.drawBitmap(mBitmap, 0, 0, paint);
    }
}
个人重写
/*
content:圆形图片的自定义ImageView
time:2018-8-7 17:43
build:zhouqiang
使用方法:请用setImage 方法设置图片
 */

public class CircleImageView extends View {
    private Path mPath;
    private Paint mPaint;
    private Bitmap mBitmap;

    public CircleImageView(Context context) {
        super(context);
        initPaint();
    }

    public CircleImageView(Context context, @Nullable AttributeSet attrs) {
        super(context, attrs);
        initPaint();
    }

    public CircleImageView(Context context, @Nullable AttributeSet attrs, int defStyleAttr) {
        super(context, attrs, defStyleAttr);
        initPaint();
    }

    public void initPaint(){
        mPaint = new Paint();
        mPath = new Path();
    }

    public void setImage(Bitmap bitmap){
        this.mBitmap = bitmap;


    }

    @Override
    protected void onDraw(Canvas canvas) {
        super.onDraw(canvas);
        mPaint.reset();
        mPath.addCircle(getHeight()/2,getWidth()/2,getWidth()/2.5f,Path.Direction.CW);
        mPaint.setAntiAlias(true);
        mPaint.setStyle(Paint.Style.FILL);
        canvas.clipPath(mPath);
        canvas.drawBitmap(mBitmap,
                new Rect(0,0,mBitmap.getWidth(),mBitmap.getHeight()),
                new Rect(0,0,getWidth(),getHeight()),
                mPaint);

    }
}