我们要搭建整个SSM框架,所以要继续上篇文章没有完成的工作,下面配置mybatis-geneator,自动生成mybatis代码。
在上篇文章中的pom.xml的配置文件中已经加了mybatis-geneator的依赖包,如下图:

请注意:上图的plugins是和pluginManagement是同级的,如果把mybatis.geneator的plugin放在pluginManagement就引用不到mybatis-geneator
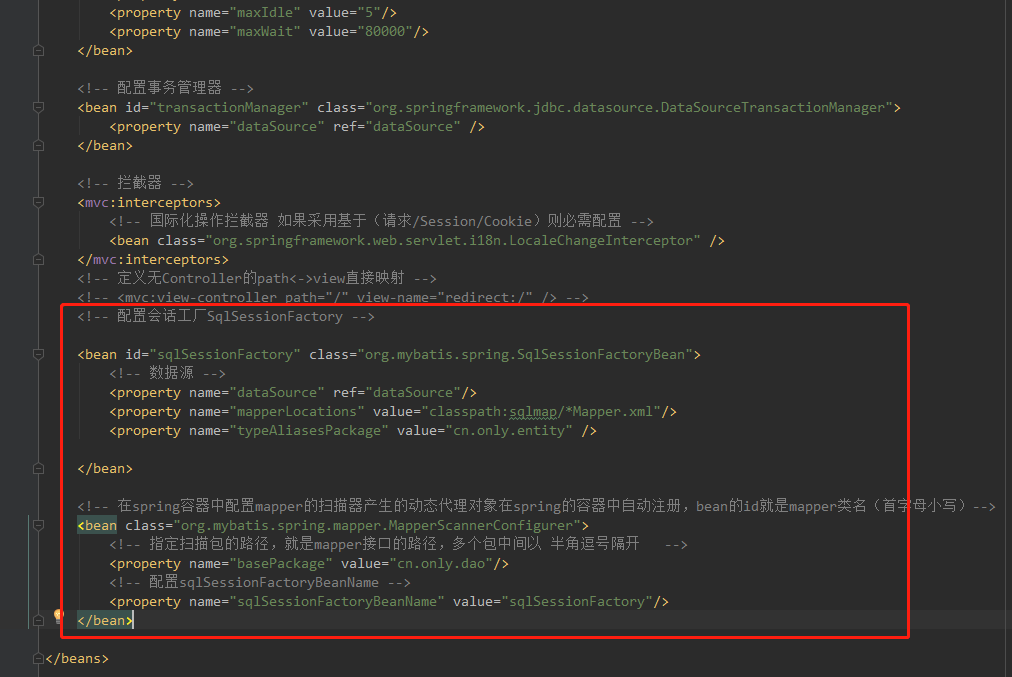
然后在 applicationContext.xml文件中添加下面代码:


<!-- 配置会话工厂SqlSessionFactory -->

    <bean id="sqlSessionFactory" class="org.mybatis.spring.SqlSessionFactoryBean">
        <!-- 数据源 -->
        <property name="dataSource" ref="dataSource"/>
        <property name="mapperLocations" value="classpath:sqlmap/*Mapper.xml"/>
        <property name="typeAliasesPackage" value="cn.only.entity" />

    </bean>

    <!-- 在spring容器中配置mapper的扫描器产生的动态代理对象在spring的容器中自动注册,bean的id就是mapper类名(首字母小写)-->
    <bean class="org.mybatis.spring.mapper.MapperScannerConfigurer">
        <!-- 指定扫描包的路径,就是mapper接口的路径,多个包中间以 半角逗号隔开   -->
        <property name="basePackage" value="cn.only.dao"/>
        <!-- 配置sqlSessionFactoryBeanName -->
        <property name="sqlSessionFactoryBeanName" value="sqlSessionFactory"/>
    </bean>
generatorConfig.xml的配置如下:
<?xml version="1.0" encoding="UTF-8" ?>
<!DOCTYPE generatorConfiguration PUBLIC "-//mybatis.org//DTD MyBatis Generator Configuration 1.0//EN"
        "http://mybatis.org/dtd/mybatis-generator-config_1_0.dtd">
<generatorConfiguration>
    <!--导入属性配置 -->
    <properties resource="generator.properties"/>

    <classPathEntry
            location="C:UsersAdministrator.m2
epositorymysqlmysql-connector-java5.0.8mysql-connector-java-5.0.8.jar" />
    <context id="context1">
        <!-- 注释 -->
        <commentGenerator>
            <property name="suppressAllComments" value="true" /><!-- 是否取消注释 -->
            <property name="suppressDate" value="true" /> <!-- 是否生成注释代时间戳 -->
        </commentGenerator>

        <jdbcConnection driverClass="${driver}"
                        connectionURL="${url}"
                        userId="${username}"
                        password="${password}" />

        <!-- 类型转换 -->
        <javaTypeResolver>
            <!-- 是否使用bigDecimal, false可自动转化以下类型(Long, Integer, Short, etc.) -->
            <property name="forceBigDecimals" value="false" />
        </javaTypeResolver>

        <javaModelGenerator targetPackage="${modelPackage}"
                            targetProject="${modelProject}" />
        <sqlMapGenerator targetPackage="${sqlPackage}" targetProject="${sqlProject}" />
        <javaClientGenerator targetPackage="${mapperPackage}"
                             targetProject="${mapperProject}" type="XMLMAPPER" />

        <!-- 如果需要通配所有表 直接用sql的通配符    %即可 -->
        <table schema="" tableName="${table}" enableCountByExample="false"
               enableUpdateByExample="false" enableDeleteByExample="false"
               enableSelectByExample="false" selectByExampleQueryId="false"/>

    </context>
</generatorConfiguration>
代码中的classPathEntry的location换成您本地的。如下图,
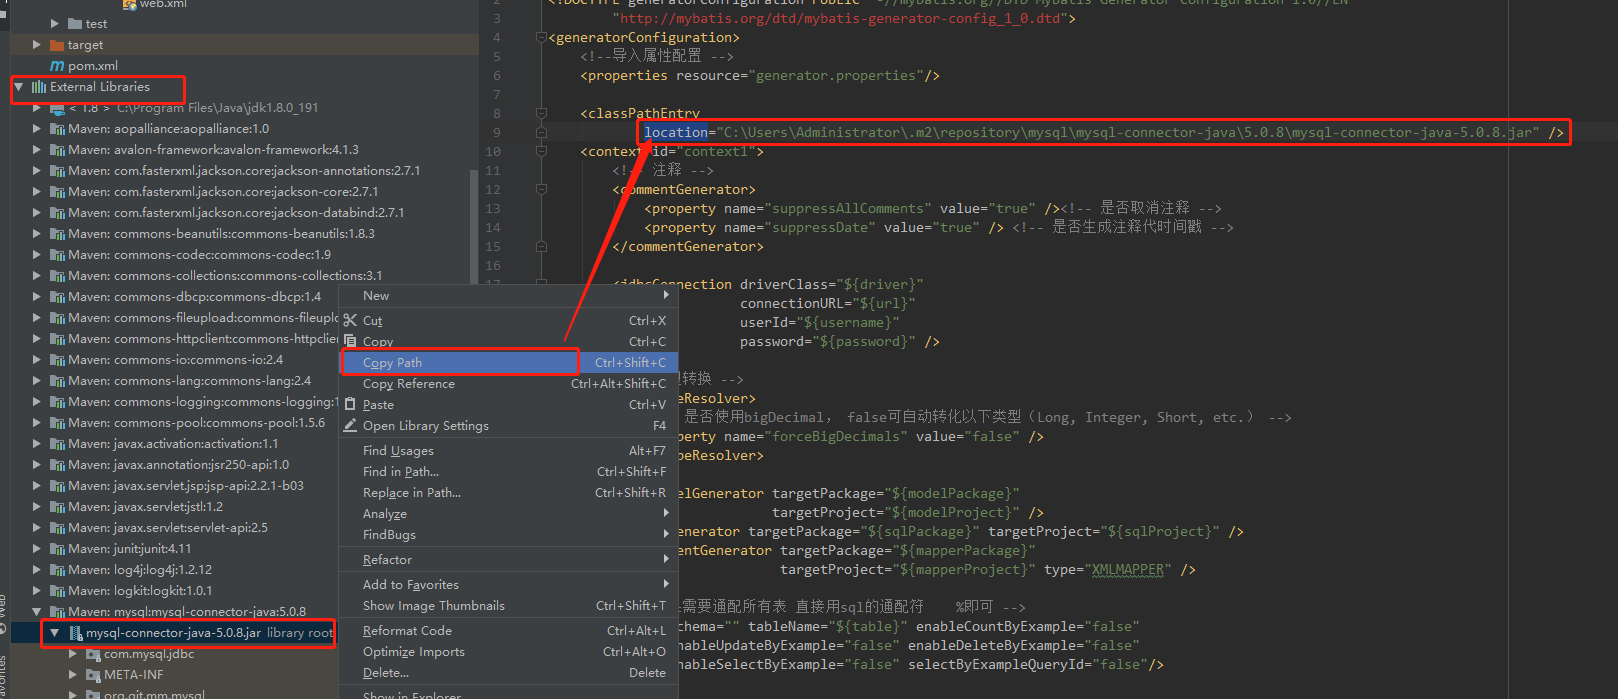
注意:如果mysql-connector-java的版本与本地的MySQL版本不配套,数据库操作会报错。
generator.properties配置
driver=com.mysql.jdbc.Driver
url=jdbc:mysql://localhost:3306/test?useUnicode=true&characterEncoding=utf-8&serverTimezone=UTC
username=root
password=******

#entity 包名和 java目录
modelPackage=cn.only.entity
modelProject=src/main/java
#sqlmap包名 和resources目录
sqlPackage=sqlmap
sqlProject=src/main/resources
#mapper包名和 java目录
mapperPackage=cn.only.dao
mapperProject=src/main/java

table=message
注意:上面的代码中如果没有serverTimezone=UTC,代码运行会报错
modelPackage:连接数据库自动生成的实体类保存的位置
sqlPackage:生成xml映射文件保存的位置
mapperPackage:生成数据库接口保存的位置
table:数据库里面表的名字
现在mybatis-geneator已经配置好了。
MySQL数据库中已经建立了数据库test和表message。
点击IntelliJ IDEA右侧边栏的Maven Projects,如下图。
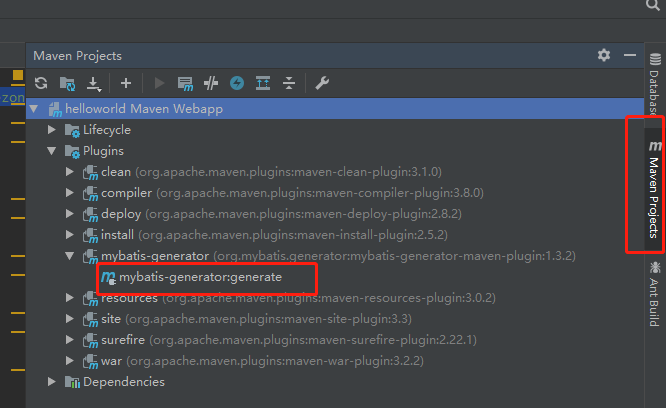
双击上图中的 mybatis-generator:generate,运行结果如下图
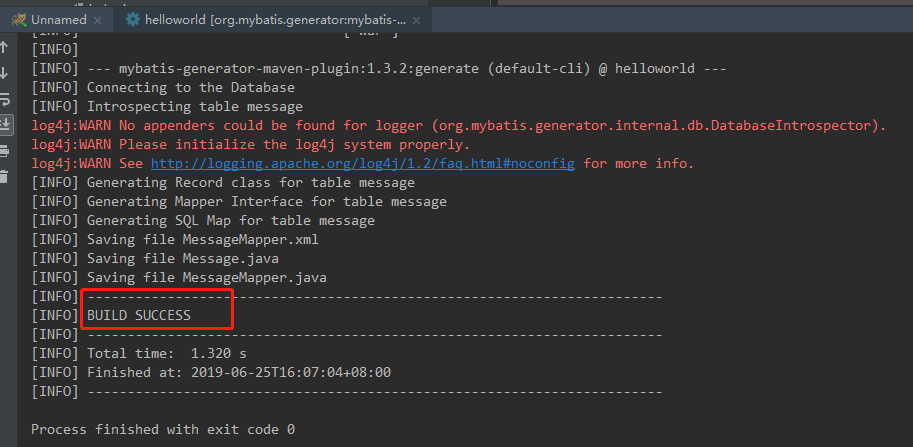
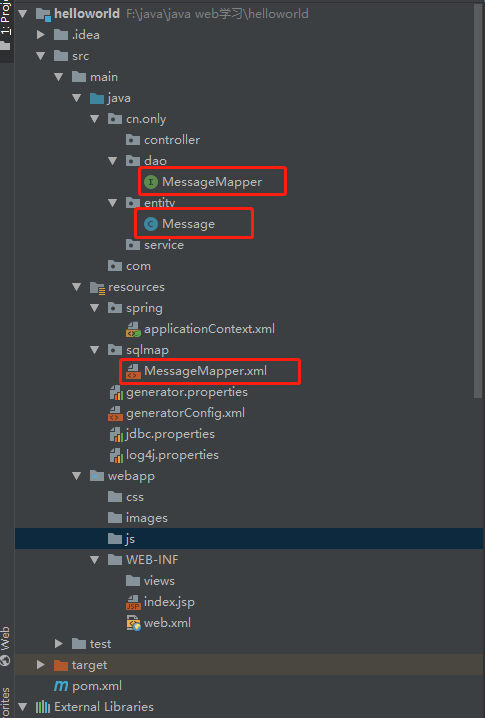
mybatis-generator运行成功以后会自动生成以下文件:
现在Spring MVC + Spring + MyBatis 的框架已经搭建好,下面就用junit测试工具,测一下数据能不能正常写入数据库。
打开MessageMapper文件,添加@Repository标签,表明这是数据访问组件,如下图
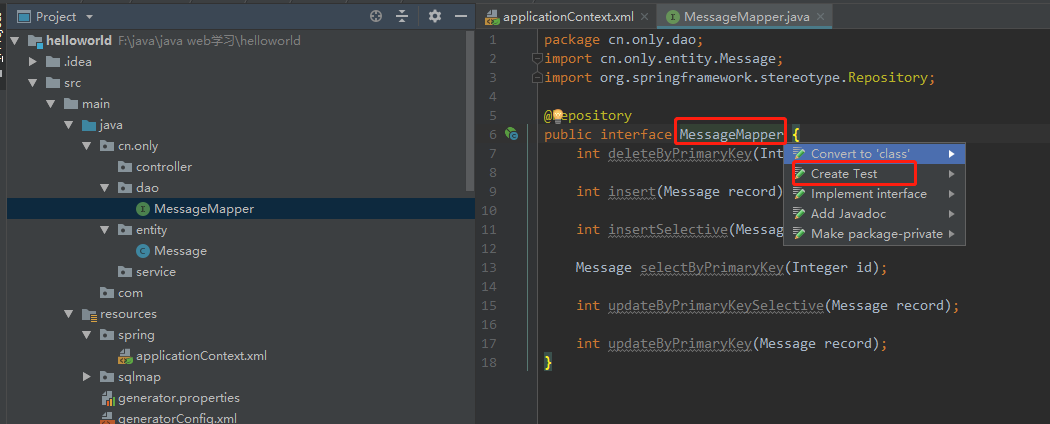
上图中鼠标放在紧跟在MessageMapper后面,按alt+enter,选择Create Test,弹窗如下图:
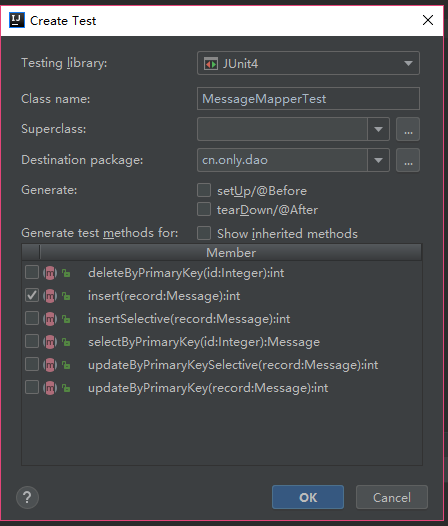
上图中选中insert,点击OK,会在test目录下生成MessageMapperTest测试文件,测试代码就写在此文件中如下:
package cn.only.dao;

import cn.only.entity.Message;
import org.junit.After;
import org.junit.Before;
import org.junit.Test;
import org.springframework.beans.factory.annotation.Autowired;
import org.springframework.context.ApplicationContext;
import org.springframework.context.support.ClassPathXmlApplicationContext;

import static org.junit.Assert.*;

public class MessageMapperTest {
    private ApplicationContext applicationContext;

    @Autowired
    private MessageMapper mapper;
    @Before
    public void setUp() throws Exception {
        // 加载spring配置文件
        applicationContext = new ClassPathXmlApplicationContext("classpath:spring/applicationContext.xml");
        // 导入需要测试的
        mapper = applicationContext.getBean(MessageMapper.class);
    }

    @After
    public void tearDown() throws Exception {
    }

    @Test
    public void insert() throws Exception{
        Message message = new Message();
        message.setCommand("做仙女");
        message.setContent("吃美食");
        message.setDescription("云游四方");
        int result = mapper.insert(message);
        System.out.println(result);
        assert (result == 1);
    }
}

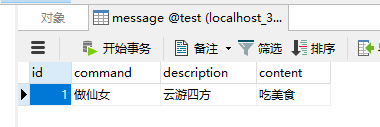
如上图点击绿色圆圈和三角形组合,点击Run ‘insert()’,运行结果如下,表示运行成功。

打开数据库查看结果如下:
好了,SSM框架已经搭建成功。
本文参照这篇文章写的:https://www.cnblogs.com/toutou/p/9015126.html#_nav_0,