Mysql5.7创建用户与赋予权限:
https://www.cnblogs.com/xujishou/p/6306765.html
官方下载5.7版本(不需要注册登录Oracle):https://dev.mysql.com/downloads/mysql/5.7.html#downloads
5.7版本Linux安装:
按照这个安装解压版mysql5.7成功:https://www.cnblogs.com/dadadechengzi/p/6723686.html
使用
service mysqld start
开启了mysql服务,然后要登录改密码:
注意5.7以上改密码字段与低版本password字段不同,为authentication_string字段,password('newpass')的意思是使用password函数加密你的密码,你的密码是字符串,所以括号里要用单引号引起来,才能插入成功。
!!注意!!
获得初始密码
[root@hdp265dnsnfs bin]# cat /root/.mysql_secret
# Password set for user 'root@localhost' at 2017-04-17 17:40:02
_pB*3VZl5T<6
修改密码

[root@hdp265dnsnfs bin]# mysql -uroot -p
Enter password:
Welcome to the MySQL monitor.  Commands end with ; or g.
Your MySQL connection id is 5
Server version: 5.7.18

Copyright (c) 2000, 2017, Oracle and/or its affiliates. All rights reserved.

Oracle is a registered trademark of Oracle Corporation and/or its
affiliates. Other names may be trademarks of their respective
owners.

Type 'help;' or 'h' for help. Type 'c' to clear the current input statement.

mysql> set PASSWORD = PASSWORD('111111');
Query OK, 0 rows affected, 1 warning (0.00 sec)

mysql> flush privileges;
Query OK, 0 rows affected (0.01 sec)
使用文中的
cat /root/.mysql_secret
方式获取初始密码登录mysql,
使用文中的
set PASSWORD = PASSWORD('root');
方式修改密码,否则无法修改,提示
ERROR 1820 (HY000): You must reset your password using ALTER USER statement before executing this statement.
改完需要使用flush privileges;刷新
其他参考:
https://blog.csdn.net/ncdx111/article/details/79818304
https://blog.csdn.net/maosilu_ice/article/details/78662847
https://www.cnblogs.com/kanyun/p/8075414.html
https://www.cnblogs.com/dengshihuang/p/8029092.html
https://www.cnblogs.com/cz-xjw/p/8006904.html
https://www.cnblogs.com/daemon-/p/9009360.html
https://www.jb51.net/article/133835.htm
RHEL7安装mysql5.7(都是rpm安装方式):
https://www.cnblogs.com/nbartchen/p/6923053.html
https://www.cnblogs.com/guozhiping/p/7684134.html
https://blog.csdn.net/momo_goder/article/details/79201146
https://blog.csdn.net/zxy987872674/article/details/81949430
Linux(Ubuntu)上安装:
https://www.cnblogs.com/bookwed/p/5896619.html
https://www.cnblogs.com/phpxiebin/p/4988156.html
缺少依赖问题(Ubuntu上解决办法):
https://blog.csdn.net/skmbw/article/details/10832757
https://www.linuxidc.com/Linux/2008-12/17818.htm
https://blog.csdn.net/qq_15783243/article/details/78565705
实际操作(1):
baigang@baigang-virtual-machine:~/softwares$ sudo cp -r mysql-5.6.26-linux-glibc2.5-x86_64 /usr/local/mysql
baigang@baigang-virtual-machine:~/softwares$ sudo groupadd mysql
groupadd: group 'mysql' already exists
baigang@baigang-virtual-machine:~/softwares$ sudo useradd -g mysql mysql
useradd: user 'mysql' already exists
baigang@baigang-virtual-machine:~/softwares$ cd /usr/local
baigang@baigang-virtual-machine:/usr/local$ ll
total 88
drwxr-xr-x 19 root root 4096 12月 4 12:22 ./
drwxr-xr-x 12 root root 4096 7月 31 08:38 ../
drwxr-xr-x 9 root root 4096 12月 1 17:03 apache-tomcat-7.0.92/
drwxr-xr-x 9 root root 4096 12月 1 17:20 apache-tomcat-8.0.53/
drwxr-xr-x 9 root root 4096 12月 1 17:39 apache-tomcat-8.0.53-8081/
drwxr-xr-x 2 root root 4096 12月 1 08:43 bin/
drwxr-xr-x 2 root root 4096 7月 31 08:30 etc/
drwxr-xr-x 2 root root 4096 7月 31 08:30 games/
drwxr-xr-x 2 root root 4096 12月 1 08:45 include/
drwxr-xr-x 7 uucp 143 4096 10月 6 20:55 jdk1.8.0_191/
drwxr-xr-x 5 root root 4096 12月 1 08:45 lib/
drwx------ 2 root root 16384 11月 30 16:14 lost+found/
lrwxrwxrwx 1 root root 9 11月 30 16:18 man -> share/man/
drwxr-xr-x 13 root root 4096 12月 4 12:23 mysql/
drwxr-xr-x 11 root root 4096 12月 4 08:38 nginx/
drwxr-xr-x 6 root root 4096 11月 30 11:17 openssl/
drwxr-xr-x 6 root root 4096 12月 4 09:43 redis/
drwxr-xr-x 2 root root 4096 7月 31 08:30 sbin/
drwxr-xr-x 9 root root 4096 12月 1 08:19 share/
drwxr-xr-x 2 root root 4096 7月 31 08:30 src/
baigang@baigang-virtual-machine:/usr/local$ cd mysql
baigang@baigang-virtual-machine:/usr/local/mysql$ sudo mkdir ./data/mysql
baigang@baigang-virtual-machine:/usr/local/mysql$ sudo chown -R mysql:mysql ./
baigang@baigang-virtual-machine:/usr/local/mysql$ sudo ./scripts/mysql_install_db --user=mysql --datadir=/usr/local/mysql/data/mysql
Installing MySQL system tables...2018-12-04 12:25:49 0 [Warning] TIMESTAMP with implicit DEFAULT value is deprecated. Please use --explicit_defaults_for_timestamp server option (see documentation for more details).
2018-12-04 12:25:49 0 [Note] ./bin/mysqld (mysqld 5.6.26) starting as process 17598 ...
2018-12-04 12:25:49 17598 [Note] InnoDB: Using atomics to ref count buffer pool pages
2018-12-04 12:25:49 17598 [Note] InnoDB: The InnoDB memory heap is disabled
2018-12-04 12:25:49 17598 [Note] InnoDB: Mutexes and rw_locks use GCC atomic builtins
2018-12-04 12:25:49 17598 [Note] InnoDB: Memory barrier is not used
2018-12-04 12:25:49 17598 [Note] InnoDB: Compressed tables use zlib 1.2.3
2018-12-04 12:25:49 17598 [Note] InnoDB: Using Linux native AIO
2018-12-04 12:25:49 17598 [Note] InnoDB: Using CPU crc32 instructions
2018-12-04 12:25:49 17598 [Note] InnoDB: Initializing buffer pool, size = 128.0M
2018-12-04 12:25:49 17598 [Note] InnoDB: Completed initialization of buffer pool
2018-12-04 12:25:49 17598 [Note] InnoDB: The first specified data file ./ibdata1 did not exist: a new database to be created!
2018-12-04 12:25:49 17598 [Note] InnoDB: Setting file ./ibdata1 size to 12 MB
2018-12-04 12:25:49 17598 [Note] InnoDB: Database physically writes the file full: wait...
2018-12-04 12:25:49 17598 [Note] InnoDB: Setting log file ./ib_logfile101 size to 48 MB
2018-12-04 12:25:49 17598 [Note] InnoDB: Setting log file ./ib_logfile1 size to 48 MB
2018-12-04 12:25:49 17598 [Note] InnoDB: Renaming log file ./ib_logfile101 to ./ib_logfile0
2018-12-04 12:25:49 17598 [Warning] InnoDB: New log files created, LSN=45781
2018-12-04 12:25:49 17598 [Note] InnoDB: Doublewrite buffer not found: creating new
2018-12-04 12:25:49 17598 [Note] InnoDB: Doublewrite buffer created
2018-12-04 12:25:49 17598 [Note] InnoDB: 128 rollback segment(s) are active.
2018-12-04 12:25:49 17598 [Warning] InnoDB: Creating foreign key constraint system tables.
2018-12-04 12:25:49 17598 [Note] InnoDB: Foreign key constraint system tables created
2018-12-04 12:25:49 17598 [Note] InnoDB: Creating tablespace and datafile system tables.
2018-12-04 12:25:49 17598 [Note] InnoDB: Tablespace and datafile system tables created.
2018-12-04 12:25:49 17598 [Note] InnoDB: Waiting for purge to start
2018-12-04 12:25:49 17598 [Note] InnoDB: 5.6.26 started; log sequence number 0
2018-12-04 12:25:50 17598 [Note] Binlog end
2018-12-04 12:25:50 17598 [Note] InnoDB: FTS optimize thread exiting.
2018-12-04 12:25:50 17598 [Note] InnoDB: Starting shutdown...
2018-12-04 12:25:51 17598 [Note] InnoDB: Shutdown completed; log sequence number 1625977
OK
Filling help tables...2018-12-04 12:25:51 0 [Warning] TIMESTAMP with implicit DEFAULT value is deprecated. Please use --explicit_defaults_for_timestamp server option (see documentation for more details).
2018-12-04 12:25:51 0 [Note] ./bin/mysqld (mysqld 5.6.26) starting as process 17621 ...
2018-12-04 12:25:51 17621 [Note] InnoDB: Using atomics to ref count buffer pool pages
2018-12-04 12:25:51 17621 [Note] InnoDB: The InnoDB memory heap is disabled
2018-12-04 12:25:51 17621 [Note] InnoDB: Mutexes and rw_locks use GCC atomic builtins
2018-12-04 12:25:51 17621 [Note] InnoDB: Memory barrier is not used
2018-12-04 12:25:51 17621 [Note] InnoDB: Compressed tables use zlib 1.2.3
2018-12-04 12:25:51 17621 [Note] InnoDB: Using Linux native AIO
2018-12-04 12:25:51 17621 [Note] InnoDB: Using CPU crc32 instructions
2018-12-04 12:25:51 17621 [Note] InnoDB: Initializing buffer pool, size = 128.0M
2018-12-04 12:25:51 17621 [Note] InnoDB: Completed initialization of buffer pool
2018-12-04 12:25:51 17621 [Note] InnoDB: Highest supported file format is Barracuda.
2018-12-04 12:25:51 17621 [Note] InnoDB: 128 rollback segment(s) are active.
2018-12-04 12:25:51 17621 [Note] InnoDB: Waiting for purge to start
2018-12-04 12:25:51 17621 [Note] InnoDB: 5.6.26 started; log sequence number 1625977
2018-12-04 12:25:51 17621 [Note] Binlog end
2018-12-04 12:25:51 17621 [Note] InnoDB: FTS optimize thread exiting.
2018-12-04 12:25:51 17621 [Note] InnoDB: Starting shutdown...
2018-12-04 12:25:53 17621 [Note] InnoDB: Shutdown completed; log sequence number 1625987
OK
To start mysqld at boot time you have to copy
support-files/mysql.server to the right place for your system
PLEASE REMEMBER TO SET A PASSWORD FOR THE MySQL root USER !
To do so, start the server, then issue the following commands:
./bin/mysqladmin -u root password 'new-password'
./bin/mysqladmin -u root -h baigang-virtual-machine password 'new-password'
Alternatively you can run:
./bin/mysql_secure_installation
which will also give you the option of removing the test
databases and anonymous user created by default. This is
strongly recommended for production servers.
See the manual for more instructions.
You can start the MySQL daemon with:
cd . ; ./bin/mysqld_safe &
You can test the MySQL daemon with mysql-test-run.pl
cd mysql-test ; perl mysql-test-run.pl
Please report any problems at http://bugs.mysql.com/
The latest information about MySQL is available on the web at
http://www.mysql.com
Support MySQL by buying support/licenses at http://shop.mysql.com
New default config file was created as ./my.cnf and
will be used by default by the server when you start it.
You may edit this file to change server settings
baigang@baigang-virtual-machine:/usr/local/mysql$ ll
total 184
drwxr-xr-x 13 mysql mysql 4096 12月 4 12:25 ./
drwxr-xr-x 19 root root 4096 12月 4 12:22 ../
drwxr-xr-x 2 mysql mysql 4096 12月 4 12:22 bin/
-rw-r--r-- 1 mysql mysql 17987 12月 4 12:23 COPYING
drwxr-xr-x 4 mysql mysql 4096 12月 4 12:24 data/
drwxr-xr-x 2 mysql mysql 4096 12月 4 12:23 docs/
drwxr-xr-x 3 mysql mysql 4096 12月 4 12:22 include/
-rw-r--r-- 1 mysql mysql 104897 12月 4 12:23 INSTALL-BINARY
drwxr-xr-x 3 mysql mysql 4096 12月 4 12:23 lib/
drwxr-xr-x 4 mysql mysql 4096 12月 4 12:23 man/
-rw-r--r-- 1 root root 943 12月 4 12:25 my.cnf
drwxr-xr-x 10 mysql mysql 4096 12月 4 12:23 mysql-test/
-rw-r--r-- 1 mysql mysql 2496 12月 4 12:23 README
drwxr-xr-x 2 mysql mysql 4096 12月 4 12:23 scripts/
drwxr-xr-x 28 mysql mysql 4096 12月 4 12:23 share/
drwxr-xr-x 4 mysql mysql 4096 12月 4 12:23 sql-bench/
drwxr-xr-x 2 mysql mysql 4096 12月 4 12:23 support-files/
baigang@baigang-virtual-machine:/usr/local/mysql$ cd data
baigang@baigang-virtual-machine:/usr/local/mysql/data$ ll
total 16
drwxr-xr-x 4 mysql mysql 4096 12月 4 12:24 ./
drwxr-xr-x 13 mysql mysql 4096 12月 4 12:25 ../
drwxr-xr-x 5 mysql mysql 4096 12月 4 12:25 mysql/
drwxr-xr-x 2 mysql mysql 4096 12月 4 12:23 test/
baigang@baigang-virtual-machine:/usr/local/mysql/data$ cd mysql
baigang@baigang-virtual-machine:/usr/local/mysql/data/mysql$ ll
total 110612
drwxr-xr-x 5 mysql mysql 4096 12月 4 12:25 ./
drwxr-xr-x 4 mysql mysql 4096 12月 4 12:24 ../
-rw-rw---- 1 mysql mysql 12582912 12月 4 12:25 ibdata1
-rw-rw---- 1 mysql mysql 50331648 12月 4 12:25 ib_logfile0
-rw-rw---- 1 mysql mysql 50331648 12月 4 12:25 ib_logfile1
drwx------ 2 mysql mysql 4096 12月 4 12:25 mysql/
drwx------ 2 mysql mysql 4096 12月 4 12:25 performance_schema/
drwx------ 2 mysql mysql 4096 12月 4 12:25 test/
baigang@baigang-virtual-machine:/usr/local/mysql/data/mysql$ cd ../
安装为服务后无法启动服务的问题解决:Ubuntu上需要先使用sudo systemctl enable mysqld.service使新添加的mysqld服务生效!!--实际是将/usr/lib/systemd/system中的服务链接到开机服务启动目录!!
在rhel7上,执行上述操作提示:
[root@localhost local]# systemctl enable mysqld.service
mysqld.service is not a native service, redirecting to /sbin/chkconfig.
Executing /sbin/chkconfig mysqld on
查看/etc/systemd/system/multi-user.target.wants/目录,也没有mysqld对应的服务链接。
说明mysql是按旧版rhel6上开机启动配置的脚本,需要使用:
[root@localhost rc3.d]# chkconfig --add mysqld
[root@localhost rc3.d]# chkconfig mysqld on
这种方式设置mysql服务开机启动!!
https://blog.csdn.net/langzi7758521/article/details/51200834
https://blog.csdn.net/chszs/article/details/38758713
实际操作(接上1):
baigang@baigang-virtual-machine:/usr/local/mysql$ sudo cp support-files/mysql.server /etc/init.d/mysqld
[sudo] password for baigang:
baigang@baigang-virtual-machine:/usr/local/mysql$ sudo chmod 755 /etc/init.d/mysqld
baigang@baigang-virtual-machine:/usr/local/mysql$ sudo cp support-files/my-default.cnf /etc/my.cnf
baigang@baigang-virtual-machine:/usr/local/mysql$ sudo vim /etc/init.d/mysqld
这里修改mysqld文本:
basedir=/usr/local/mysql/
datadir=/usr/local/mysql/data/mysql
baigang@baigang-virtual-machine:/usr/local/mysql$ sudo service mysqld start
Failed to start mysqld.service: Unit mysqld.service not found.
baigang@baigang-virtual-machine:/usr/local/mysql$ service mysqld start
Failed to start mysqld.service: Unit mysqld.service not found.
baigang@baigang-virtual-machine:/usr/local/mysql$ systemctl start mysqld.service
Failed to start mysqld.service: Unit mysqld.service not found.
baigang@baigang-virtual-machine:/usr/local/mysql$ sudo systemctl start mysqld.service
Failed to start mysqld.service: Unit mysqld.service not found.
baigang@baigang-virtual-machine:/usr/local/mysql$ /etc/init.d/mysqld start
[....] Starting mysqld (via systemctl): mysqld.serviceFailed to start mysqld.service: Unit mysqld.service not found.
failed!
baigang@baigang-virtual-machine:/usr/local/mysql$ sudo /etc/init.d/mysqld start
[....] Starting mysqld (via systemctl): mysqld.serviceFailed to start mysqld.service: Unit mysqld.service not found.
failed!
baigang@baigang-virtual-machine:/usr/local/mysql$ sudo systemctl enable mysqld.service
mysqld.service is not a native service, redirecting to systemd-sysv-install
Executing /lib/systemd/systemd-sysv-install enable mysqld
baigang@baigang-virtual-machine:/usr/local/mysql$ sudo service mysqld start
baigang@baigang-virtual-machine:/usr/local/mysql$ ps aux|grep mysqld
root 19138 0.1 0.0 4504 1732 ? S 13:18 0:00 /bin/sh /usr/local/mysql//bin/mysqld_safe --datadir=/usr/local/mysql/data/mysql --pid-file=/usr/local/mysql/data/mysql/baigang-virtual-machine.pid
mysql 19252 5.1 22.5 978116 454564 ? Sl 13:18 0:00 /usr/local/mysql/bin/mysqld --basedir=/usr/local/mysql --datadir=/usr/local/mysql/data/mysql --plugin-dir=/usr/local/mysql/lib/plugin --user=mysql --log-error=/usr/local/mysql/data/mysql/baigang-virtual-machine.err --pid-file=/usr/local/mysql/data/mysql/baigang-virtual-machine.pid
baigang 19284 0.0 0.0 21296 940 pts/1 S+ 13:19 0:00 grep --color=auto mysqld
baigang@baigang-virtual-machine:/usr/local/mysql$ ll
total 184
drwxr-xr-x 13 mysql mysql 4096 12月 4 12:25 ./
drwxr-xr-x 19 root root 4096 12月 4 12:22 ../
drwxr-xr-x 2 mysql mysql 4096 12月 4 12:22 bin/
-rw-r--r-- 1 mysql mysql 17987 12月 4 12:23 COPYING
drwxr-xr-x 4 mysql mysql 4096 12月 4 12:24 data/
drwxr-xr-x 2 mysql mysql 4096 12月 4 12:23 docs/
drwxr-xr-x 3 mysql mysql 4096 12月 4 12:22 include/
-rw-r--r-- 1 mysql mysql 104897 12月 4 12:23 INSTALL-BINARY
drwxr-xr-x 3 mysql mysql 4096 12月 4 12:23 lib/
drwxr-xr-x 4 mysql mysql 4096 12月 4 12:23 man/
-rw-r--r-- 1 root root 943 12月 4 12:25 my.cnf
drwxr-xr-x 10 mysql mysql 4096 12月 4 12:23 mysql-test/
-rw-r--r-- 1 mysql mysql 2496 12月 4 12:23 README
drwxr-xr-x 2 mysql mysql 4096 12月 4 12:23 scripts/
drwxr-xr-x 28 mysql mysql 4096 12月 4 12:23 share/
drwxr-xr-x 4 mysql mysql 4096 12月 4 12:23 sql-bench/
drwxr-xr-x 2 mysql mysql 4096 12月 4 12:23 support-files/
baigang@baigang-virtual-machine:/usr/local/mysql$ cd bin
baigang@baigang-virtual-machine:/usr/local/mysql/bin$ mysql -uroot
Welcome to the MySQL monitor. Commands end with ; or g.
Your MySQL connection id is 1
Server version: 5.6.26 MySQL Community Server (GPL)
Copyright (c) 2000, 2015, Oracle and/or its affiliates. All rights reserved.
Oracle is a registered trademark of Oracle Corporation and/or its
affiliates. Other names may be trademarks of their respective
owners.
Type 'help;' or 'h' for help. Type 'c' to clear the current input statement.
mysql>
mysql>
mysql>
mysql> show databases;
+--------------------+
| Database |
+--------------------+
| information_schema |
| mysql |
| performance_schema |
| test |
+--------------------+
4 rows in set (0.13 sec)
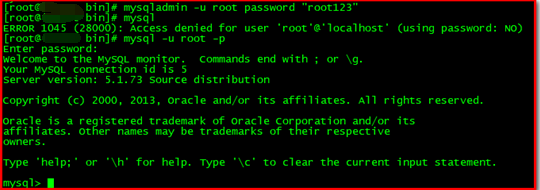
Mysql安装后需要做的
Mysql安装成功后,默认的root用户密码为空,你可以使用以下命令来创建root用户的密码:
mysqladmin -u root password "root"
现在你可以通过以下命令来连接到Mysql服务器:
mysql -u root -p
Enter password:*******
注意:在输入密码时,密码是不会显示了,你正确输入即可。
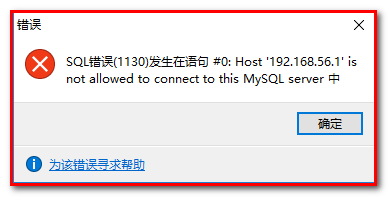
开启mysql远程访问:
链接mysql出错,因为没有开启远程访问!!!
使用mysql表,先查看原始权限数据:

更新权限:
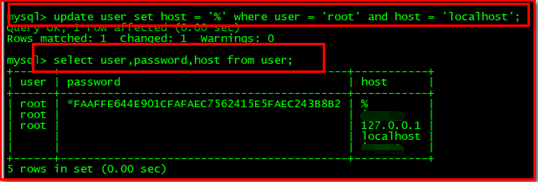
刷新更新好的权限配置:flush privileges

可以使用了:
RHEL7新防火墙造成的mysql无法远程访问问题:
查看RHEL6以前的老防火墙状态:
[root@localhost rc.d]# service iptables status
Redirecting to /bin/systemctl status iptables.service
● iptables.service - IPv4 firewall with iptables
Loaded: loaded (/usr/lib/systemd/system/iptables.service; disabled; vendor preset: disabled)
Active: inactive (dead)
说明旧防火墙是关闭的,使用旧式不好使。
参照帖子https://blog.csdn.net/qq_39591494/article/details/77387650
查看新防火墙firewalld组件:
[root@localhost rc.d]# rpm -q firewalld
firewalld-0.3.9-7.el7.noarch
查看新防火墙firewall的状态:
[root@localhost rc.d]# firewall-cmd --state
running
说明新防火墙是开启生效的。
查看运行的mysqld服务网络端口等信息:
[root@localhost rc.d]# netstat -anpt|grep mysqld
tcp6 0 0 :::3306 :::* LISTEN 7772/mysqld
说明mysql正常提供网络服务。
先试图将mysqld加入drop区域,提示:
[root@localhost rc.d]# firewall-cmd --zone=drop --add-service=mysqld
Error: INVALID_SERVICE: mysqld
这是因为mysql服务脚本并没有按照rhel7的开机启动脚本方式安装,而是旧式安装,使用/etc/rc.d目录,造成rhel7找不到这个服务。
所以要用放行端口的方式:
[root@localhost init.d]# firewall-cmd --zone=drop --add-port=3306/tcp
success
然而仍然无法访问,原因是没有将drop域设置为默认域,当然设置drop不生效:
[root@localhost init.d]# firewall-cmd --get-default-zone
public
[root@localhost init.d]# firewall-cmd --set-default-zone=drop
success
[root@localhost init.d]# firewall-cmd --get-default-zone
drop
这时远程访问成功!
Mysql配置了上述远程访问造成的本地无法访问问题:
不是密码设置失效,也不是配置文件问题,而是mysql.user表对应root用户的host配置成'%'后,本地无法直接访问localhost了!!
所以配置了远程访问后,mysqladmin和mysql -uroot -p都无法(默认)登录localhost,造成修改密码和登录均失败!
解决方案:
办法1.使用mysql -h 本地ip -uroot -p登录
办法2.停止mysqld服务,临时修改/etc/my.cnf文件,在[mysqld]下加上skip-grant-tables重启服务,mysql -uroot -p免密登录,
把root用户的host改回'localhost',注意也要使用flush privileges;刷新生效!!这时就不能远程访问了,但本地mysql -uroot -p密码登录成功恢复!!
实际操作:
现象:配置了远程登录后本地无法使用mysqladmin改密
baigang@baigang-virtual-machine:/opt/mycat/conf$ mysqladmin -u root password "root"
Warning: Using a password on the command line interface can be insecure.
mysqladmin: unable to change password; error: 'Can't find any matching row in the user table'
baigang@baigang-virtual-machine:/opt/mycat/conf$ service mysqld stop
baigang@baigang-virtual-machine:/opt/mycat/conf$ mysqladmin -u root password "root"
mysqladmin: connect to server at 'localhost' failed
error: 'Can't connect to local MySQL server through socket '/tmp/mysql.sock' (2)'
Check that mysqld is running and that the socket: '/tmp/mysql.sock' exists!
临时修改配置文件免密登录:
baigang@baigang-virtual-machine:/opt/mycat/conf$ sudo vim /etc/my.cnf
baigang@baigang-virtual-machine:/opt/mycat/conf$ service mysqld start
baigang@baigang-virtual-machine:/opt/mycat/conf$ mysql -uroot -p
Enter password:
Welcome to the MySQL monitor. Commands end with ; or g.
Your MySQL connection id is 1
Server version: 5.6.26 MySQL Community Server (GPL)
Copyright (c) 2000, 2015, Oracle and/or its affiliates. All rights reserved.
Oracle is a registered trademark of Oracle Corporation and/or its
affiliates. Other names may be trademarks of their respective
owners.
Type 'help;' or 'h' for help. Type 'c' to clear the current input statement.
mysql> use mysql;
Reading table information for completion of table and column names
You can turn off this feature to get a quicker startup with -A
Database changed
把root用户的host改回'localhost':
mysql> update user set host='localhost' where user='root' and host='%';
Query OK, 1 row affected (0.04 sec)
Rows matched: 1 Changed: 1 Warnings: 0
别忘了刷新:
mysql> flush privileges;
Query OK, 0 rows affected (0.02 sec)
mysql> select user,password,host from user;
+------+-------------------------------------------+-------------------------+
| user | password | host |
+------+-------------------------------------------+-------------------------+
| root | *81F5E21E35407D884A6CD4A731AEBFB6AF209E1B | localhost |
| root | | baigang-virtual-machine |
| root | | 127.0.0.1 |
| root | | ::1 |
| | | localhost |
| | | baigang-virtual-machine |
+------+-------------------------------------------+-------------------------+
6 rows in set (0.00 sec)
mysql> quit;
Bye
baigang@baigang-virtual-machine:/opt/mycat/conf$ service mysqld stop
恢复配置文件,删除skip-grant-tables行:
baigang@baigang-virtual-machine:/opt/mycat/conf$ sudo vim /etc/my.cnf
baigang@baigang-virtual-machine:/opt/mycat/conf$ service mysqld start
重启后可以本地正常密码登录了:
baigang@baigang-virtual-machine:/opt/mycat/conf$ mysql -uroot -p
Enter password:
Welcome to the MySQL monitor. Commands end with ; or g.
Your MySQL connection id is 1
Server version: 5.6.26 MySQL Community Server (GPL)
Copyright (c) 2000, 2015, Oracle and/or its affiliates. All rights reserved.
Oracle is a registered trademark of Oracle Corporation and/or its
affiliates. Other names may be trademarks of their respective
owners.
Type 'help;' or 'h' for help. Type 'c' to clear the current input statement.
mysql> show databases;
+--------------------+
| Database |
+--------------------+
| information_schema |
| mysql |
| performance_schema |
| test |
+--------------------+
4 rows in set (0.00 sec)
mysql> use mysql;
Reading table information for completion of table and column names
You can turn off this feature to get a quicker startup with -A
Database changed
mysql>
实际操作:再次配置远程访问
mysql> update user set host='%' where user='root' and host='localhost';
Query OK, 1 row affected (0.07 sec)
Rows matched: 1 Changed: 1 Warnings: 0
刷新:
mysql> flush privileges;
Query OK, 0 rows affected (0.02 sec)
mysql> quit;
Bye
本地又一次无法密码登录了:
baigang@baigang-virtual-machine:/opt/mycat/conf$ mysql -uroot -p
Enter password:
ERROR 1045 (28000): Access denied for user 'root'@'localhost' (using password: YES)
baigang@baigang-virtual-machine:/opt/mycat/conf$ mysql -h 172.20.10.2 -uroot
ERROR 1045 (28000): Access denied for user 'root'@'172.20.10.2' (using password: NO)
但通过指定-h参数为本机ip,可以正常密码登录:
baigang@baigang-virtual-machine:/opt/mycat/conf$ mysql -h 172.20.10.2 -uroot -p
Enter password:
Welcome to the MySQL monitor. Commands end with ; or g.
Your MySQL connection id is 7
Server version: 5.6.26 MySQL Community Server (GPL)
Copyright (c) 2000, 2015, Oracle and/or its affiliates. All rights reserved.
Oracle is a registered trademark of Oracle Corporation and/or its
affiliates. Other names may be trademarks of their respective
owners.
Type 'help;' or 'h' for help. Type 'c' to clear the current input statement.
mysql> use mysql;
Reading table information for completion of table and column names
You can turn off this feature to get a quicker startup with -A
Database changed
mysql> select user,password,host from user;
+------+-------------------------------------------+-------------------------+
| user | password | host |
+------+-------------------------------------------+-------------------------+
| root | *81F5E21E35407D884A6CD4A731AEBFB6AF209E1B | % |
| root | | baigang-virtual-machine |
| root | | 127.0.0.1 |
| root | | ::1 |
| | | localhost |
| | | baigang-virtual-machine |
+------+-------------------------------------------+-------------------------+
6 rows in set (0.00 sec)
mysql>
其他密码登录失败问题参考:
注意我上面遇见的问题不是这里的密码问题,这里没解决我的问题,所以仅供参考!!
注意5.7以上改密码字段可能与低版本password字段不同,为authentication_string字段,password('newpass')的意思是使用password函数加密你的密码,你的密码是字符串,所以括号里要用单引号引起来,才能插入成功。
!!注意!!改完需要使用flush privileges;刷新
然后把配置文件中的skip-grant-tables删除,重启服务。
https://blog.csdn.net/leeyue_1982/article/details/80985329
https://www.cnblogs.com/gumuzi/p/5711495.html
rhel7下正常启动服务,连接报错问题:
ERROR 2002 (HY000): Can't connect to local MySQL server through socket '/var/lib/mysql/mysql.sock' (2)
经查没有这个文件。网上查到的目录权限不能解决这个问题,于是找到帖子:
https://chinacheng.iteye.com/blog/1100999
从/tmp中发现文件mysql.sock,建立软连接:
ln -s /tmp/mysql.sock /var/lib/mysql/mysql.sock
然后可以正常连接。
修改mysql.user表的root密码无法生效问题:忘了上面提醒的flush privileges;
其他安装参考:
https://www.cnblogs.com/lichangyun/p/9088139.html
http://www.cnblogs.com/fnlingnzb-learner/p/5830622.html
https://www.cnblogs.com/xinjing-jingxin/p/8025805.html
https://www.cnblogs.com/shizhongyang/p/8464876.html
https://blog.csdn.net/wwd0501/article/details/71171614
Mysql
MyCat+Mysql主从:
https://blog.csdn.net/change_on/article/details/75134657
从库配置的UUID与主库冲突导致主从配置失败问题:
https://blog.csdn.net/cug_jiang126com/article/details/46846031
https://www.cnblogs.com/datalife/p/8026928.html
实际操作:
失败状态:
mysql> show slave status G
*************************** 1. row ***************************
Slave_IO_State:
Master_Host: 172.20.10.2
Master_User: wen
Master_Port: 3306
Connect_Retry: 60
Master_Log_File: mysql-bin.000001
Read_Master_Log_Pos: 388
Relay_Log_File: baigang-virtual-machine-relay-bin.000001
Relay_Log_Pos: 4
Relay_Master_Log_File: mysql-bin.000001
Slave_IO_Running: No
Slave_SQL_Running: Yes
Replicate_Do_DB:
Replicate_Ignore_DB:
Replicate_Do_Table:
Replicate_Ignore_Table:
Replicate_Wild_Do_Table:
Replicate_Wild_Ignore_Table:
Last_Errno: 0
Last_Error:
Skip_Counter: 0
Exec_Master_Log_Pos: 388
Relay_Log_Space: 120
Until_Condition: None
Until_Log_File:
Until_Log_Pos: 0
Master_SSL_Allowed: No
Master_SSL_CA_File:
Master_SSL_CA_Path:
Master_SSL_Cert:
Master_SSL_Cipher:
Master_SSL_Key:
Seconds_Behind_Master: NULL
Master_SSL_Verify_Server_Cert: No
Last_IO_Errno: 1593
Last_IO_Error: Fatal error: The slave I/O thread stops because master and slave have equal MySQL server UUIDs; these UUIDs must be different for replication to work.
Last_SQL_Errno: 0
Last_SQL_Error:
Replicate_Ignore_Server_Ids:
Master_Server_Id: 2
Master_UUID:
Master_Info_File: /usr/local/mysql/data/mysql/master.info
SQL_Delay: 0
SQL_Remaining_Delay: NULL
Slave_SQL_Running_State: Slave has read all relay log; waiting for the slave I/O thread to update it
Master_Retry_Count: 86400
Master_Bind:
Last_IO_Error_Timestamp: 181205 18:19:36
Last_SQL_Error_Timestamp:
Master_SSL_Crl:
Master_SSL_Crlpath:
Retrieved_Gtid_Set:
Executed_Gtid_Set:
Auto_Position: 0
1 row in set (0.00 sec)
因为是克隆虚拟机方式,从库所有东西和主库一样,导致冲突。将配置的数据存放目录/usr/local/mysql/data/mysql目录下auto.cnf中UUID改为不一样即可。
重启mysqld服务。
注意要start slave;
配置成功的slave状态:
mysql> start slave;
Query OK, 0 rows affected (0.18 sec)
mysql> show slave status G
*************************** 1. row ***************************
Slave_IO_State: Waiting for master to send event
Master_Host: 172.20.10.2
Master_User: wen
Master_Port: 3306
Connect_Retry: 60
Master_Log_File: mysql-bin.000001
Read_Master_Log_Pos: 388
Relay_Log_File: baigang-virtual-machine-relay-bin.000002
Relay_Log_Pos: 283
Relay_Master_Log_File: mysql-bin.000001
Slave_IO_Running: Yes
Slave_SQL_Running: Yes
Replicate_Do_DB:
Replicate_Ignore_DB:
Replicate_Do_Table:
Replicate_Ignore_Table:
Replicate_Wild_Do_Table:
Replicate_Wild_Ignore_Table:
Last_Errno: 0
Last_Error:
Skip_Counter: 0
Exec_Master_Log_Pos: 388
Relay_Log_Space: 474
Until_Condition: None
Until_Log_File:
Until_Log_Pos: 0
Master_SSL_Allowed: No
Master_SSL_CA_File:
Master_SSL_CA_Path:
Master_SSL_Cert:
Master_SSL_Cipher:
Master_SSL_Key:
Seconds_Behind_Master: 0
Master_SSL_Verify_Server_Cert: No
Last_IO_Errno: 0
Last_IO_Error:
Last_SQL_Errno: 0
Last_SQL_Error:
Replicate_Ignore_Server_Ids:
Master_Server_Id: 2
Master_UUID: 162cf8a6-f784-11e8-ab88-000c290ae8dd
Master_Info_File: /usr/local/mysql/data/mysql/master.info
SQL_Delay: 0
SQL_Remaining_Delay: NULL
Slave_SQL_Running_State: Slave has read all relay log; waiting for the slave I/O thread to update it
Master_Retry_Count: 86400
Master_Bind:
Last_IO_Error_Timestamp:
Last_SQL_Error_Timestamp:
Master_SSL_Crl:
Master_SSL_Crlpath:
Retrieved_Gtid_Set:
Executed_Gtid_Set:
Auto_Position: 0
1 row in set (0.00 sec)
其余按文中配置、测试即可。
Mycat配置问题:
1.目前发现server.xml中配置的schemas名称及schema.xml中配置的schema名称需要与实际数据库名称一致,否则使用Navicat连接Mycat,打开数据库表出现错误:不存在schema.xxx表(因为不一致的话,schema这个库实际不存在),所以这里设置成了和实际存在的xiaobai数据库一样的名称!!
2.schema.xml中的schema标签里面默认配置的各种table全部注释掉!!否则无法正常连接Mycat.
3.schema.xml中的schema标签需要指定dataNode,且和下面dataNode标签指定的名称一致。
4.dataNode标签目前只指定一个,dataHost和下面dataHost标签指定名称一致,database是实际存在的需要使用Mycat连接的数据库。
其他按照文中配置操作、测试即可。
实际运行、插入、同步成功的Mycat配置参考:
server.xml:
<user name="root">
<property name="password">123456</property>
<property name="schemas">xiaobai</property>
<!-- 表级 DML 权限设置 -->
<!--
<privileges check="false">
<schema name="TESTDB" dml="0110" >
<table name="tb01" dml="0000"></table>
<table name="tb02" dml="1111"></table>
</schema>
</privileges>
-->
</user>
<user name="user">
<property name="password">user</property>
<property name="schemas">xiaobai</property>
<property name="readOnly">true</property>
</user>
schema.xml:
<schema name="xiaobai" checkSQLschema="false" sqlMaxLimit="100" dataNode="dn1">
</schema>
<dataNode name="dn1" dataHost="master" database="xiaobai" />
<dataHost name="master" maxCon="1000" minCon="10" balance="1"
writeType="0" dbType="mysql" dbDriver="native" switchType="1" slaveThreshold="100">
<heartbeat>show slave status</heartbeat>
<!-- can have multi write hosts -->
<writeHost host="host2" url="172.20.10.2:3306" user="root"
password="root">
<!-- can have multi read hosts -->
<!-- <readHost host="hostS2" url="192.168.1.200:3306" user="root" password="xxx" />-->
</writeHost>
<writeHost host="host3" url="172.20.10.3:3306" user="root"
password="root" />
<!-- <writeHost host="hostM2" url="localhost:3316" user="root" password="123456"/> -->
</dataHost>
MyCat分库分表、读写分离、主从复制:
http://blog.51cto.com/13476134/2114125
分库分表实践:
https://blog.csdn.net/u011277123/article/details/77876955/
分库分表参考:
http://www.cnblogs.com/sunny3096/p/8595058.html
https://www.cnblogs.com/mfmdaoyou/p/7246711.html
Haproxy+KeepAlived+Mysql负载均衡集群:
https://www.cnblogs.com/phpstudy2015-6/p/6706465.html
http://www.cnblogs.com/phpstudy2015-6/p/6485819.html#_label7
Haproxy+KeepAlived+MyCat负载均衡集群:(均引自龙果学院Dubbo基础视频教程)
https://blog.csdn.net/l1028386804/article/details/76397064
https://www.jianshu.com/p/f4b02609a500
个人改进想法,实现Haproxy+KeepAlived双机热备+MyCat负载均衡集群+分库分表+主从复制:
第一层:Haproxy+KeepAlived双机热备,Haproxy接收读写请求,负载均衡到MyCat集群的每个节点
第二层:各个MyCat节点均等,均可读写,各个MyCat配置同样的分库分表+主从复制策略
第三层:分库分表的Mysql均配置主从复制或双主复制,整体数据包括每个分库分表Mysql的数据总和
如此:
第一层Haproxy挂了可以通过KeepAlived自动切换到另一台
第二层只要有一个好用MyCat,就可都负载到这个MyCat上面实现读写,MyCat里面已经配置了每个分库分表Mysql组的读写分离,主Mysql中读写,从Mysql中只读
当多个MyCat可用时将读写请求负载到不同MyCat,因为每个MyCat配置的都是相同的分库分表+主从复制策略,保证所有请求即使通过不同的MyCat,也均能写入和读取到全量分库分表Mysql库,不会造成数据遗漏
第三层在正常情况下可以完成每个分库分表Mysql库的全量备份,当出现主库异常时,从库可以自动成为主库且有全量数据,继续无缝承担分库分表数据的读写,主库恢复后又可通过MyCat配置结合Mysql主从配置的方式,继续实现读写分离,全量备份
这个想法的MyCat分库分表+读写分离+主从备份部分,参照上面的http://blog.51cto.com/13476134/2114125,再结合上面的https://blog.csdn.net/l1028386804/article/details/76397064中第二个图(注意!!是文章的第二个图!!在第四部分中!!除了第一层加了KeepAlived双机热备,第二层的MyCat集群也由读写分离改成了对等的全部可读写!!这样只需第二层每个MyCat完全一样地配置第三层为分库分表+主从复制+读写分离就可实现这个想法),应该可以实现这种最大高并发+高可用的正确性。
Nginx代理Mysql:
https://www.cnblogs.com/heruiguo/p/8962243.html#_label2
https://www.cnblogs.com/Charles-Yuan/p/9738023.html
MyCat的ZooKeeper集群:
https://blog.csdn.net/ygqygq2/article/details/78292828
Mysql字符集修改:
https://www.cnblogs.com/cugb-2013/p/3294893.html
Mysql的索引key过长的错误问题:5.6版本存在,5.7版本不存在,
仔细阅读博文,仔细理解,操作,注意到除了文中mysql的设置外,在建表时,需要在建表语句中加入ROW_FORMAT=DYNAMIC,示例:
-- ----------------------------
-- Table structure for `JOB_STATUS_TRACE_LOG`
-- ----------------------------
DROP TABLE IF EXISTS `JOB_STATUS_TRACE_LOG`;
CREATE TABLE `JOB_STATUS_TRACE_LOG` (
`id` varchar(40) NOT NULL,
`job_name` varchar(100) NOT NULL,
`original_task_id` varchar(255) NOT NULL,
`task_id` varchar(255) NOT NULL,
`slave_id` varchar(50) NOT NULL,
`source` varchar(50) NOT NULL,
`execution_type` varchar(20) NOT NULL,
`sharding_item` varchar(100) NOT NULL,
`state` varchar(20) NOT NULL,
`message` varchar(4000) DEFAULT NULL,
`creation_time` timestamp NULL DEFAULT NULL,
PRIMARY KEY (`id`),
KEY `TASK_ID_STATE_INDEX` (`task_id`,`state`)
) ROW_FORMAT=DYNAMIC ENGINE=InnoDB DEFAULT CHARSET=utf8mb4;
参照:
https://www.cnblogs.com/kerrycode/p/9680881.html
https://www.2cto.com/kf/201804/738365.html
http://www.cnblogs.com/littleatp/p/4612896.html
https://blog.csdn.net/bigdataf/article/details/78921409
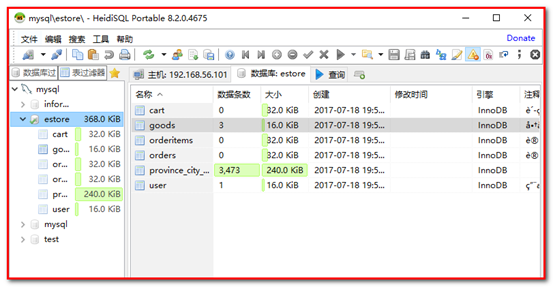
mysql导入导出数据库、表:
http://www.cnblogs.com/yuwensong/p/3955834.html
Win解压版MySQL5.7安装配置:
https://blog.csdn.net/recky_wiers/article/details/79243804
https://www.cnblogs.com/robin2ML/p/6866469.html