1.组件装配
2.@Autowired注解
构造器,普通字段(即使是非public),一切具有参数的方法都可以应用@Autowired注解放在构造器上也是没有问题的。
1 private UserService userService;
2 @Autowired
3 public void setUserService(UserService userService) {
4     this.userService = userService;
5 }
则会报错,注意@Autowired是按照类型注入的。
2)默认情况下,所有使用autowired注解的属性都需要被设置,当spring找不到配置的bean装配属性时,会抛出异常,某一属性允许不被设置,可以设置
3)@Autowired注解的required属性为false
4)默认情况下,当IOC容器里存在多个类型兼容的bean(同一类型或子类)时,通过类型自动装配将无法工作,此时可以在@Qualifiter注解里提供Bean的名称,如果是在方法中使用可以加在方法参数前面,Spring允许对方法的入参标注@Qualifiter已指定注入bean的名称。
5)@Autowired注解也可以应用在数组类型的属性上,此时Spring将会把所有匹配的bean进行装配。
6)@Autowired注解也可以应用在集合属性上,此时spring读取集合的类型信息,然后自动装配所有与之兼容的bean
7)@Autowired注解在java.util.Map上时,若该Map的键值为String,那么Spring将自动装配与之Map值类型兼容的Bean,此时Bean的名称成为键值。
8)如果@Autowired注解自动装配时有多个同类型的bean那么就会按照名称去找。
下面我们对@Autowired注解进行应用,在我们项目当中,一般都是Controller类中会注入Service,Service类会注入Respository,我们就用上一篇文章中的代码,对各个类按照这个顺序进行注入,并且调用注入bean的方法。
UserController类:注入UserService类
 1 @Controller
 2 public class UserController {
 3     private UserService userService;
 4     @Autowired
 5     public void setUserService(@Qualifier("userService") UserService userService) {
 6         this.userService = userService;
 7     }
 8
 9     public void execute() {
10         System.out.println("UserController execute....");
11         userService.add();
12     }
13 }
UserService类:注入UserRepositoryImpl类
1 @Service
2 public class UserService {
3     @Autowired
4     private UserRepository userRepository;
5     public void add() {
6         System.out.println("UserService add...");
7         userRepository.save();
8     }
9 }
UserRepositoryImpl类
@Repository(value = "userRepository")
public class UserRepositoryImpl implements UserRepository {

    public void save() {
        System.out.println("UserRepository Save。。。。");
    }
}
运行测试类:
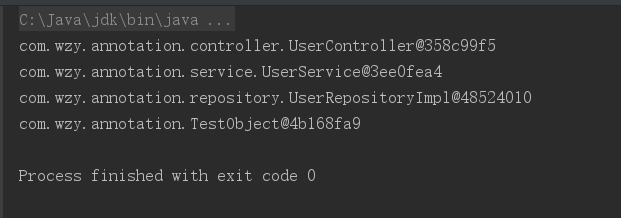
 1 public class Main {
 2     public static void main(String[] args) {
 3         ApplicationContext ctx = new ClassPathXmlApplicationContext("beans-annotation.xml");
 4         UserController userController = (UserController) ctx.getBean("userController");
 5         System.out.println(userController);
 6
 7         UserService userService = (UserService) ctx.getBean("userService");
 8         System.out.println(userService);
 9
10         UserRepository userRepository = (UserRepository) ctx.getBean("userRepository");
11         System.out.println(userRepository);
12
13         TestObject testObject = (TestObject) ctx.getBean("testObject");
14         System.out.println(testObject);
15     }
16 }
输出结果:我们可以发现可以成功的输出四个对象,证明我们的注入式成功的。
3.使用@Resource或@Inject自动装配Bean
@Resource:注解要求提供一个Bean名称的属性,若该属性为空,则自动采用标注处的变量或方法名作为Bean的名称,并且它并不是Spring提供的注解而是import javax.annotation.Resource中的注解。
@Inject和:@Autowired注解一样是按类型匹配注入的Bean,但是没有required属性。
最后建议使用@Autowired注解。