导入依赖
from tensorflow import keras
from matplotlib import pyplot as plt
from tensorflow.keras.layers import Conv2D, MaxPool2D, Flatten, Dense
下载数据集
mnist数据集是一个公共的手写数字数据集,一共有7W张28*28像素点的0-9手写数字图片和标签,其中有6W张是训练集,1W张是测试集。
mnist = tf.keras.datasets.mnist
(x_train, y_train), (x_test, y_test) = mnist.load_data()
其中,x_train为训练集特征,y_train为训练集标签,x_test为测试集特征,y_test为测试集标签。
数据归一化
使本来是0-255之间的灰度值,变为0-1之间的数值,从而让梯度变得平缓,更容易收敛找到最优解。
x_train, x_test = x_train / 255.0, x_test / 255.0
增加维度
给数据集增加一个维度,使其变为6W张28*28的单通道数据,让卷积核进行特征提取。
x_train = x_train.reshape(x_train.shape[0], 28, 28, 1)
x_test = x_test.reshape(x_test.shape[0], 28, 28, 1)
独热码
y_train = keras.utils.to_categorical(y_train, 10)
y_test = keras.utils.to_categorical(y_test, 10)
进行独热编码后,每个分类对应一个状态码,1为是,0为否。 如某张图片标签是6,则独热码为:0 0 0 0 0 0 1 0 0 0
切分验证集
从训练集中拿出5000个样本来作为验证集,验证集用于参与训练更新梯度。
x_validation = x_train[:5000]
y_validation = y_train[:5000]
x_train = x_train[5000:]
y_train = y_train[5000:]
搭建网络结构
使用三层卷积两层全连接的网络结构,第一层卷积使用32个3*3的卷积核,第二三层卷积使用64个3*3的卷积核,卷积的目的是提取图片的空间特征,最大池化是为了抑制过拟合。
model = keras.models.Sequential([
    Conv2D(32, (3, 3), activation='relu',input_shape=(28, 28, 1)),
    MaxPool2D((2, 2)),
    Conv2D(64, (3, 3), activation='relu'),
    MaxPool2D((2, 2)),
    Conv2D(64, (3, 3), activation='relu'),
    Flatten(),
    Dense(64, activation='relu'),
    Dense(10, activation='softmax')
])
编译模型
使用多分类类别交叉熵损失函数,优化器选择rmsprop,正常情况下都可以选择此优化器,它不会令你失望,这也是默认缺省优化器。
model.compile(loss='categorical_crossentropy', optimizer='rmsprop',metrics=['accuracy'])
保存模型
checkpoint_save_path = "./checkpoint/mnist2.ckpt"
cp_callback = tf.keras.callbacks.ModelCheckpoint(filepath=checkpoint_save_path,save_weights_only=True, save_best_only=True)
执行训练
数据集按32个为一批喂入神经网络,总共迭代7次,每迭代一次测试一次准确率。
history = model.fit(x_train, y_train, batch_size=32, epochs=7, verbose=1, validation_data=(x_validation,y_validation),validation_freq=1,callbacks=[cp_callback])
评估模型
score = model.evaluate(x_test, y_test, verbose=0, batch_size=32)
print('测试准确率:{}, 测试loss值: {}'.format(score[1], score[0]))
可视化acc和loss曲线
plt.rcParams['font.sans-serif']=['SimHei']
acc = history.history['accuracy']
val_acc = history.history['val_accuracy']
loss = history.history['loss']
val_loss = history.history['val_loss']

plt.subplot(1, 2, 1)
plt.plot(acc, label='训练Acc')
plt.plot(val_acc, label='测试Acc')
plt.title('Acc曲线')
plt.legend()

plt.subplot(1, 2, 2)
plt.plot(loss, label='训练Loss')
plt.plot(val_loss, label='测试Loss')
plt.title('Loss曲线')
plt.legend()
plt.show()
此时运行程序,待训练完成后,会显示出acc和loss的训练图像,同时当前目录下会出现checkpoint文件夹。
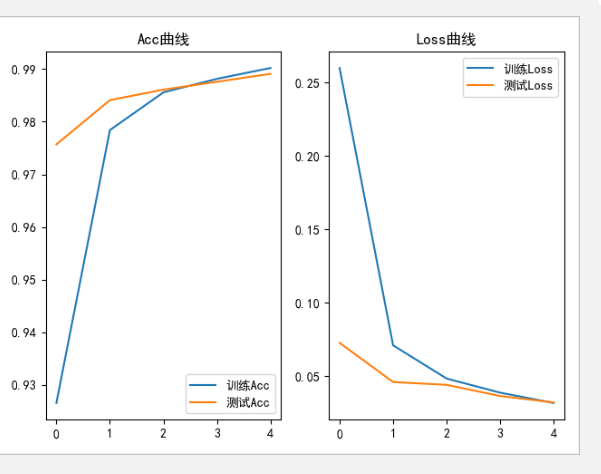
可以看到,加入了卷积计算的神经网络,效果有了一定提升,模型测试的准确率达到了99%。
复现网络结构
训练完成之后,接下来应该编写一个应用程序,用来接收图片,识别图片,返回识别结果。
因此我这里新开一个py文件
from PIL import Image
import numpy as np
import tensorflow as tf
from tensorflow import keras
from tensorflow.keras.layers import Conv2D,  MaxPool2D, Flatten, Dense
首先要复现训练时的网络结构
model = keras.models.Sequential([
    Conv2D(32, (3, 3), activation='relu',input_shape=(28, 28, 1)),
    MaxPool2D((2, 2)),
    Conv2D(64, (3, 3), activation='relu'),
    MaxPool2D((2, 2)),
    Conv2D(64, (3, 3), activation='relu'),
    Flatten(),
    Dense(64, activation='relu'),
    Dense(10, activation='softmax')
])
加载模型
model_save_path = './checkpoint/mnist2.ckpt'
model.load_weights(model_save_path)
图片识别
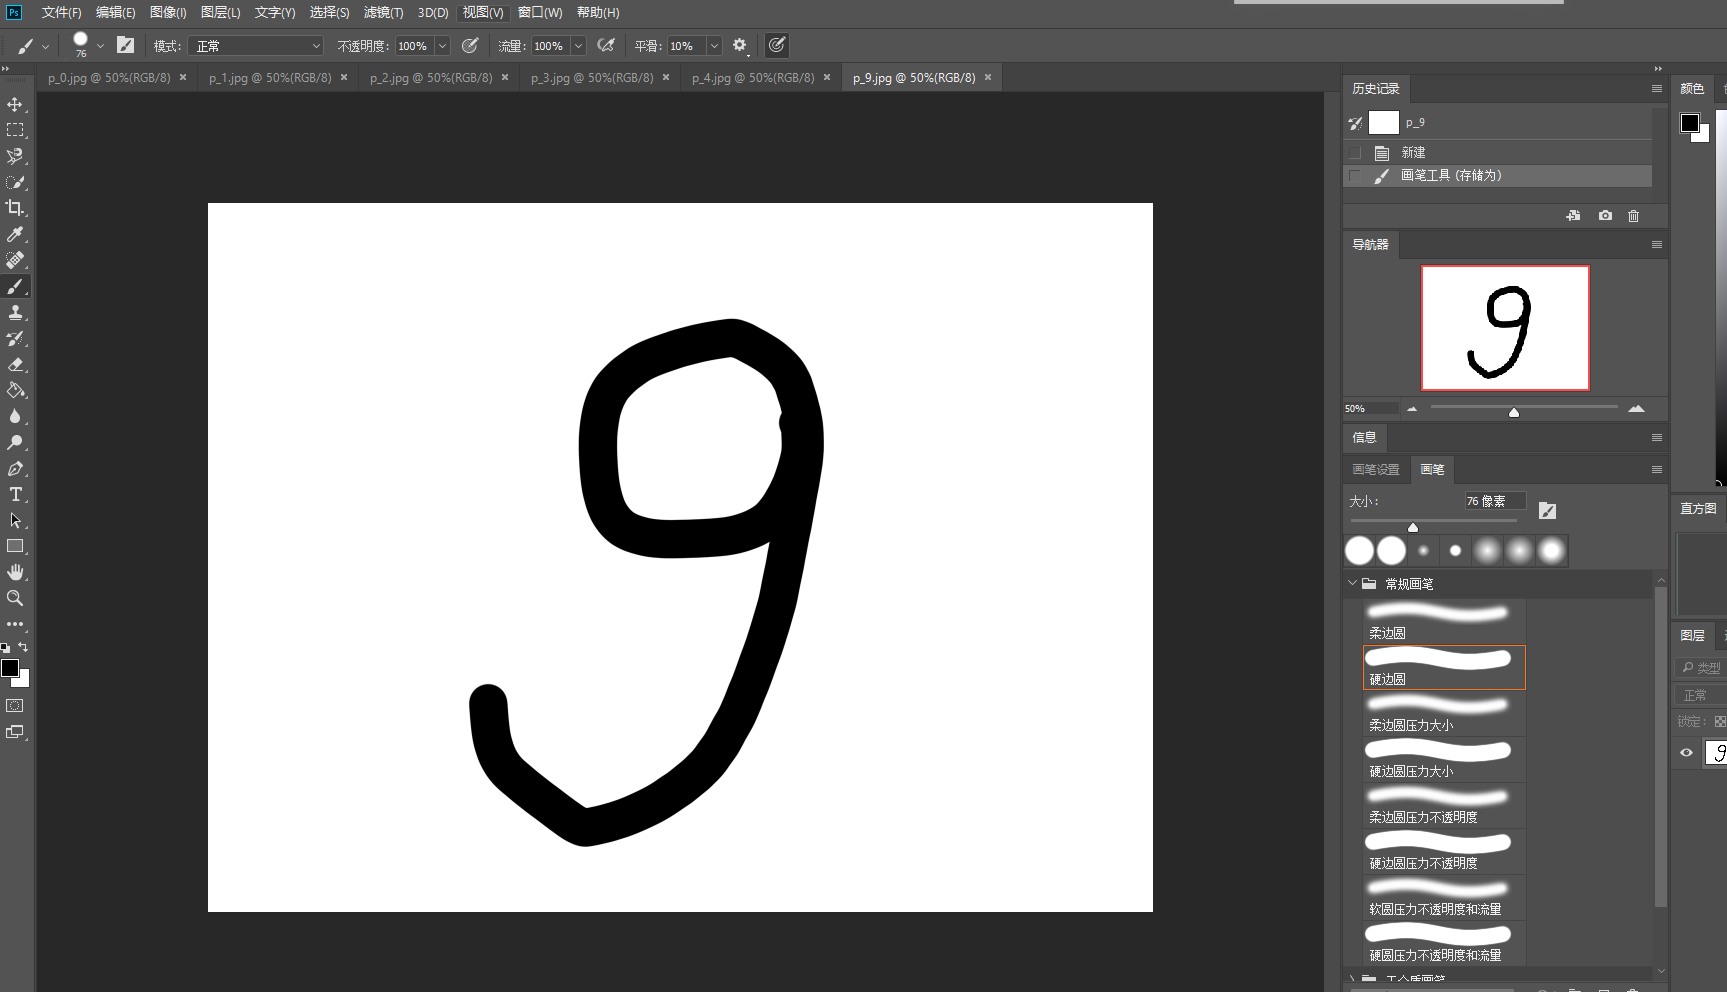
我用Photoshop画了十张图,用来进行识别

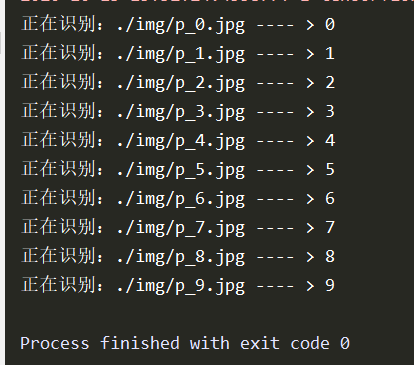
imgs = ['./img/p_0.jpg','./img/p_1.jpg','./img/p_2.jpg','./img/p_3.jpg','./img/p_4.jpg','./img/p_5.jpg','./img/p_6.jpg','./img/p_7.jpg','./img/p_8.jpg','./img/p_9.jpg']

for path in imgs:

    #读取图片
    img = Image.open(path)
    img = img.resize((28, 28), Image.ANTIALIAS)
    img_arr = np.array(img.convert('L'))

    #训练的图片是黑底白字,但是我们识别的图片是白底黑字,所以需要颜色取反
    #将像素值转化为0和255两个极端值 在保留图片有用信息的同时 滤掉背景噪声 使图片更干净
    for i in range(28):
        for j in range(28):
            if img_arr[i][j] < 150:
                img_arr[i][j] = 255
            else:
                img_arr[i][j] = 0

    # 归一化
    img_arr = img_arr / 255.0

    # 添加一个维度
    x_predict = img_arr.reshape(1, 28, 28, 1)

    # 识别
    result = model.predict(x_predict)
    pred = tf.argmax(result[0])
    print('正在识别:{} ---- > {}'.format(path, pred))
运行结果: