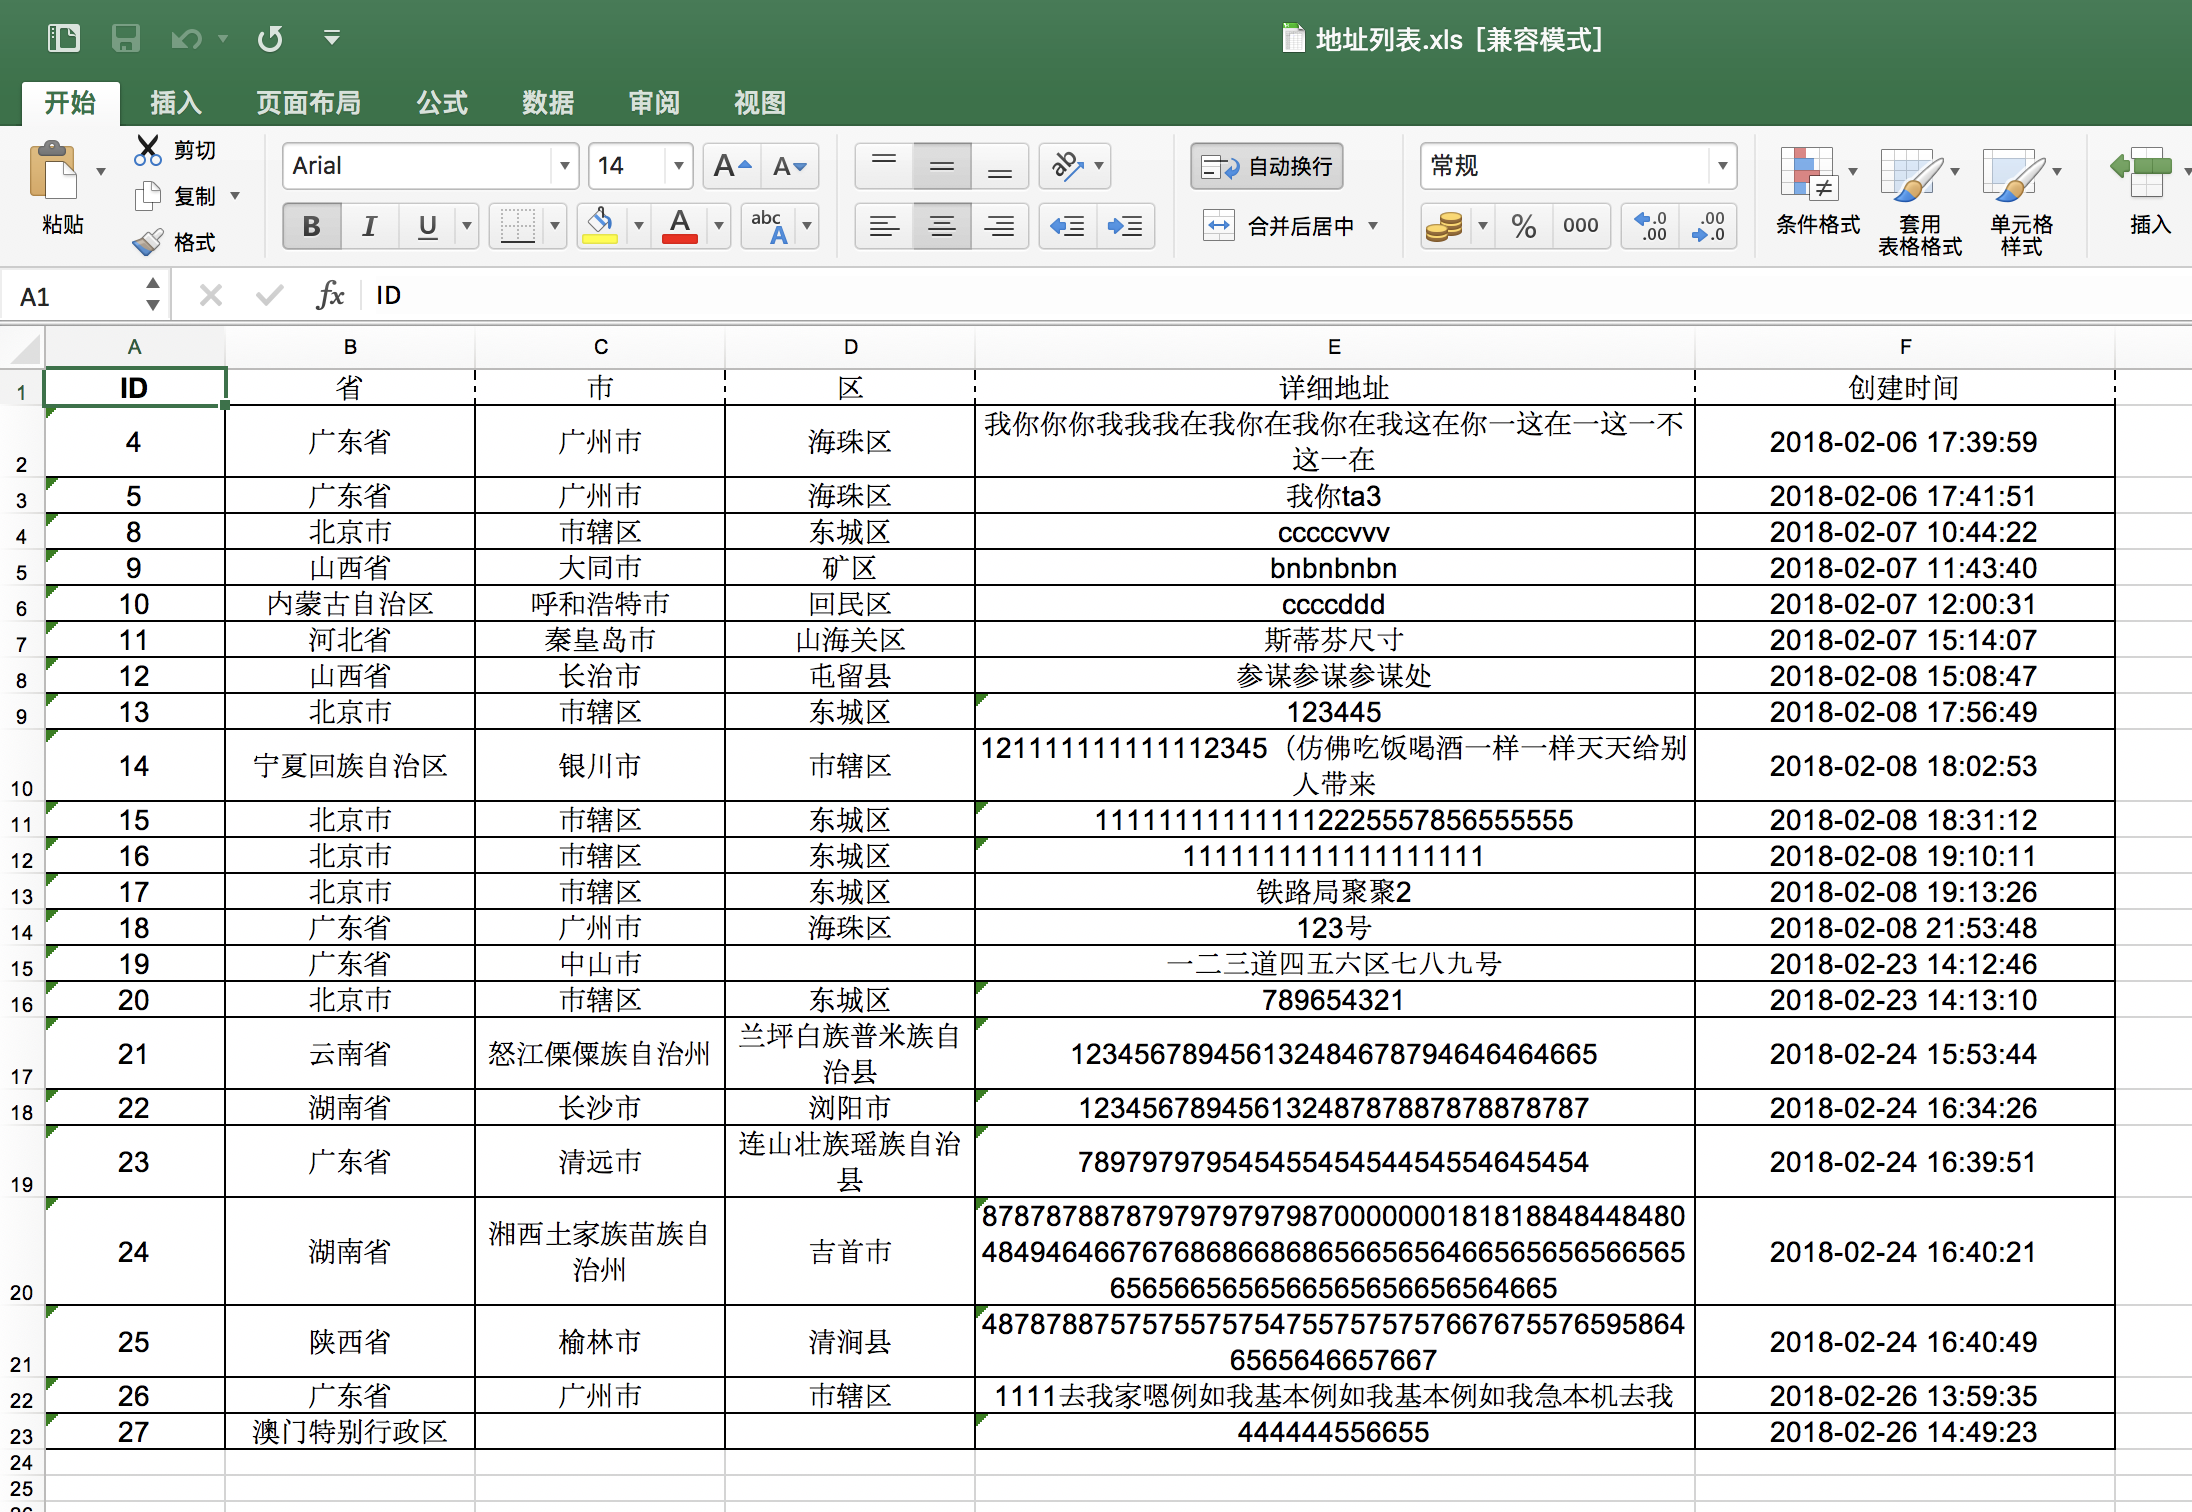
在网上随手一搜,可以搜到很多java生成excel文件相关的博客,但每个都有不同,核心点说清楚了,但具体运用的时候,相信大家或多或少都没法一次直接运用,这样每次去找并且运用的时候很费时间,所以这也是我觉得有必要写这个博客的原因
1、导入所需要的jar包
<!-- excel 引用包 -->
<dependency>
   <groupId>net.sourceforge.jexcelapi</groupId>
    <artifactId>jxl</artifactId>
    <version>2.6.12</version>
</dependency>
2、编写所需要的类
package com.test.demo.controllers;

import com.test.demo.domain.entities.Address;
import com.test.demo.services.ExcelService;
import jxl.Workbook;
import jxl.format.Alignment;
import jxl.format.Border;
import jxl.format.BorderLineStyle;
import jxl.format.Colour;
import jxl.format.*;
import jxl.format.VerticalAlignment;
import jxl.write.*;
import org.springframework.beans.factory.annotation.Autowired;
import org.springframework.web.bind.annotation.RequestMapping;
import org.springframework.web.bind.annotation.RestController;
import org.springframework.web.context.request.RequestContextHolder;
import org.springframework.web.context.request.ServletRequestAttributes;

import javax.servlet.http.HttpServletRequest;
import javax.servlet.http.HttpServletResponse;
import java.io.File;
import java.io.FileInputStream;
import java.io.InputStream;
import java.io.OutputStream;
import java.text.SimpleDateFormat;
import java.util.List;

/**
 * @author dyh
 * @create 2018-07-14 下午8:20
 * @desc excle表格功能编写
 **/
@RestController
@RequestMapping("/excel")
public class ExcelController {

    @Autowired
    private ExcelService excelService;

    /**
     * 下载文件
     *
     * @return
     */
    @RequestMapping({"/download"})
    public void download() {
        ServletRequestAttributes requestAttributes = (ServletRequestAttributes) RequestContextHolder.getRequestAttributes();
        HttpServletResponse response = requestAttributes.getResponse();
        HttpServletRequest request = requestAttributes.getRequest();

        // 文件名
        String filename = "地址列表.xls";

        try {

            // 写到服务器上
            String path = request.getSession().getServletContext().getRealPath("") + "/" + filename;

            // 写到服务器上(这种测试过,在本地可以,放到linux服务器就不行)
            //String path =  this.getClass().getClassLoader().getResource("").getPath()+"/"+filename;

            File name = new File(path);
            // 创建写工作簿对象
            WritableWorkbook workbook = Workbook.createWorkbook(name);
            // 工作表
            WritableSheet sheet = workbook.createSheet("地址列表", 0);
            // 设置字体;
            WritableFont font = new WritableFont(WritableFont.ARIAL, 14, WritableFont.BOLD, false, UnderlineStyle.NO_UNDERLINE, Colour.BLACK);

            WritableCellFormat cellFormat = new WritableCellFormat(font);
            // 设置背景颜色;
            cellFormat.setBackground(Colour.WHITE);
            // 设置边框;
            cellFormat.setBorder(Border.ALL, BorderLineStyle.DASH_DOT);
            // 设置文字居中对齐方式;
            cellFormat.setAlignment(Alignment.CENTRE);
            // 设置垂直居中;
            cellFormat.setVerticalAlignment(VerticalAlignment.CENTRE);
            // 分别给1,5,6列设置不同的宽度;
            sheet.setColumnView(0, 15);
            sheet.setColumnView(4, 60);
            sheet.setColumnView(5, 35);
            // 给sheet电子版中所有的列设置默认的列的宽度;
            sheet.getSettings().setDefaultColumnWidth(20);
            // 给sheet电子版中所有的行设置默认的高度,高度的单位是1/20个像素点,但设置这个貌似就不能自动换行了
            // sheet.getSettings().setDefaultRowHeight(30 * 20);
            // 设置自动换行;
            cellFormat.setWrap(true);

            // 单元格
            Label label0 = new Label(0, 0, "ID", cellFormat);
            Label label1 = new Label(1, 0, "省", cellFormat);
            Label label2 = new Label(2, 0, "市", cellFormat);
            Label label3 = new Label(3, 0, "区", cellFormat);
            Label label4 = new Label(4, 0, "详细地址", cellFormat);
            Label label5 = new Label(5, 0, "创建时间", cellFormat);

            sheet.addCell(label0);
            sheet.addCell(label1);
            sheet.addCell(label2);
            sheet.addCell(label3);
            sheet.addCell(label4);
            sheet.addCell(label5);

            // 给第二行设置背景、字体颜色、对齐方式等等;
            WritableFont font2 = new WritableFont(WritableFont.ARIAL, 14, WritableFont.NO_BOLD, false, UnderlineStyle.NO_UNDERLINE, Colour.BLACK);
            WritableCellFormat cellFormat2 = new WritableCellFormat(font2);
            // 设置文字居中对齐方式;
            cellFormat2.setAlignment(Alignment.CENTRE);
            // 设置垂直居中;
            cellFormat2.setVerticalAlignment(VerticalAlignment.CENTRE);
            cellFormat2.setBackground(Colour.WHITE);
            cellFormat2.setBorder(Border.ALL, BorderLineStyle.THIN);
            cellFormat2.setWrap(true);

            // 记录行数
            int n = 1;

            // 查找所有地址
            List<Address> addressList = excelService.findAll();
            if (addressList != null && addressList.size() > 0) {

                // 遍历
                for (Address a : addressList) {

                    SimpleDateFormat sdf = new SimpleDateFormat("yyyy-MM-dd HH:mm:ss");
                    String createTime = sdf.format(a.getCreateTime());

                    Label lt0 = new Label(0, n, a.getId() + "", cellFormat2);
                    Label lt1 = new Label(1, n, a.getProvince(), cellFormat2);
                    Label lt2 = new Label(2, n, a.getCity(), cellFormat2);
                    Label lt3 = new Label(3, n, a.getArea(), cellFormat2);
                    Label lt4 = new Label(4, n, a.getAddress(), cellFormat2);
                    Label lt5 = new Label(5, n, createTime, cellFormat2);

                    sheet.addCell(lt0);
                    sheet.addCell(lt1);
                    sheet.addCell(lt2);
                    sheet.addCell(lt3);
                    sheet.addCell(lt4);
                    sheet.addCell(lt5);

                    n++;
                }
            }

            //开始执行写入操作
            workbook.write();
            //关闭流
            workbook.close();

        } catch (Exception e) {
            e.printStackTrace();
        }
        // 第六步,下载excel

        OutputStream out = null;
        try {

            // 1.弹出下载框,并处理中文
            /** 如果是从jsp页面传过来的话,就要进行中文处理,在这里action里面产生的直接可以用
             * String filename = request.getParameter("filename");
             */
            /**
             if (request.getMethod().equalsIgnoreCase("GET")) {
             filename = new String(filename.getBytes("iso8859-1"), "utf-8");
             }
             */

            response.addHeader("content-disposition", "attachment;filename="
                    + java.net.URLEncoder.encode(filename, "utf-8"));

            // 2.下载
            out = response.getOutputStream();
            String path3 = request.getSession().getServletContext().getRealPath("") + "/" + filename;

            // inputStream:读文件,前提是这个文件必须存在,要不就会报错
            InputStream is = new FileInputStream(path3);

            byte[] b = new byte[4096];
            int size = is.read(b);
            while (size > 0) {
                out.write(b, 0, size);
                size = is.read(b);
            }
            out.close();
            is.close();
        } catch (Exception e) {
            e.printStackTrace();
        }
    }
}
package com.test.demo.services;

import com.test.demo.domain.entities.Address;
import com.test.demo.domain.entities.AddressRepository;
import org.springframework.beans.factory.annotation.Autowired;
import org.springframework.stereotype.Service;

import java.util.List;

/**
 * @author dyh
 * @create 2018-07-14 下午9:21
 * @desc excel测试类
 **/

@Service
public class ExcelService {

    @Autowired
    private AddressRepository addressRepository;

    /**
     * 得到所有地址列表
     *
     * @return
     */
    public List<Address> findAll(){
        return addressRepository.findAll();
    }
}
3、配置文件
server.port=8025

spring.datasource.max-idle=10
spring.datasource.max-wait=10000
spring.datasource.min-idle=1
spring.datasource.initial-size=1
spring.datasource.validation-query=SELECT 1
spring.datasource.test-on-borrow=false
spring.datasource.test-while-idle=true
spring.datasource.time-between-eviction-runs-millis=18800

spring.datasource.url=@db.dyh2020.url@
spring.datasource.username=@db.dyh2020.username@
spring.datasource.password=@db.dyh2020.password@
spring.datasource.driver-class-name=com.mysql.jdbc.Driver

spring.jpa.database=MYSQL
# 显示后台处理的SQL语句
spring.jpa.show-sql=true
# 自动检查实体和数据库表是否一致,如果不一致则会进行更新数据库表
spring.jpa.hibernate.ddl-auto=none
写好代码之后本地运行,在浏览器输入地址:http://localhost:8025/excel/download 即可看到下载的文件

github代码地址:https://github.com/DYH2020/springBootDemo