Spring搭建RPC环境
第一,下载所需要的jar包,下载地址:https://yunpan.cn/cPErQeANrSMyB (提取码:63e5),见下图:
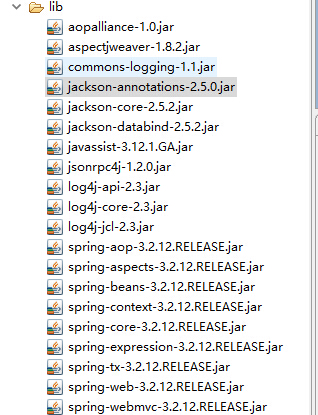
第二,新建动态WebProject,把所下载的jar包,放入lib目录下;
第三,新建远程调用接口;
package com.cvicse.ump.rpc;

public interface HelloWorld {
    public String sayHello(String name);

}
第四,添加接口的实现;
package com.cvicse.ump.rpc.imp;

import com.cvicse.ump.rpc.HelloWorld;

public class HelloWorldImp implements HelloWorld {

    @Override
    public String sayHello(String name) {
        return "hello,"+name;
    }

}
第五,配置Spring和RPC,修改web.xml文件,内容如下:
<?xml version="1.0" encoding="UTF-8"?>
<web-app xmlns:xsi="http://www.w3.org/2001/XMLSchema-instance" xmlns="http://java.sun.com/xml/ns/javaee" xmlns:web="http://java.sun.com/xml/ns/javaee/web-app_2_5.xsd" xsi:schemaLocation="http://java.sun.com/xml/ns/javaee http://java.sun.com/xml/ns/javaee/web-app_3_0.xsd" id="WebApp_ID" version="3.0">
  <display-name>SpringRPC</display-name>

  <!-- Spring相关配置 -->
  <context-param>
      <param-name>contextConfigLocation</param-name>
      <param-value>/WEB-INF/applicationContext.xml</param-value>
  </context-param>

  <listener>
      <listener-class>org.springframework.web.context.ContextLoaderListener</listener-class>
  </listener>


  <!-- RPC Servlet相关配置 -->
  <servlet>
      <servlet-name>rpcServlet</servlet-name>
      <servlet-class>org.springframework.web.servlet.DispatcherServlet</servlet-class>
      <init-param>
          <param-name>contextConfigLocation</param-name>
          <param-value>/WEB-INF/spring-service.xml</param-value>
      </init-param>
      <load-on-startup>1</load-on-startup>
  </servlet>

  <servlet-mapping>
      <servlet-name>rpcServlet</servlet-name>
      <url-pattern>/rpcService/*</url-pattern>
  </servlet-mapping>

  <welcome-file-list>
    <welcome-file>index.jsp</welcome-file>
  </welcome-file-list>
</web-app>
第六,新建Spring和rpc的配置文件,applicationContext.xml和spring-service.xml
applicationContext.xml内容如下:
<?xml version="1.0" encoding="UTF-8"?>
<beans xmlns="http://www.springframework.org/schema/beans"
    xmlns:xsi="http://www.w3.org/2001/XMLSchema-instance" xmlns:context="http://www.springframework.org/schema/context"
    xmlns:mvc="http://www.springframework.org/schema/mvc"
    xsi:schemaLocation="http://www.springframework.org/schema/mvc http://www.springframework.org/schema/mvc/spring-mvc-3.0.xsd
 http://www.springframework.org/schema/beans http://www.springframework.org/schema/beans/spring-beans-3.0.xsd
 http://www.springframework.org/schema/context http://www.springframework.org/schema/context/spring-context-3.0.xsd">
    <description>Spring Context Configuration</description>
</beans>
spring-service.xml内容如下:
<?xml version="1.0" encoding="UTF-8"?>
<beans xmlns="http://www.springframework.org/schema/beans"
    xmlns:xsi="http://www.w3.org/2001/XMLSchema-instance"
    xsi:schemaLocation="http://www.springframework.org/schema/beans http://www.springframework.org/schema/beans/spring-beans-3.2.xsd">

    <description>Spring Service Configuration</description>

    <bean id="helloWorldImp" class="com.cvicse.ump.rpc.imp.HelloWorldImp" />
    <bean id="/HelloWorld" class="com.googlecode.jsonrpc4j.spring.JsonServiceExporter">
        <property name="service" ref="helloWorldImp" />
        <property name="serviceInterface" value="com.cvicse.ump.rpc.HelloWorld" />
    </bean>

    <bean
        class="org.springframework.web.servlet.handler.BeanNameUrlHandlerMapping" />

</beans>
第七步,添加rpc相关的js文件:jsonrpcjs-0.1.8.min.js,下载地址:https://yunpan.cn/cPExdMGxm2kuK (提取码:bdf2)
在WebContent目录下,新建js文件夹,把jsonrpcjs-0.1.8.min.js放到该文件夹下
第八步,编写前台jsp文件
<%@ page language="java" contentType="text/html; charset=UTF-8"
    pageEncoding="UTF-8"%>
<!DOCTYPE html PUBLIC "-//W3C//DTD HTML 4.01 Transitional//EN" "http://www.w3.org/TR/html4/loose.dtd">
<html>
<head>
<meta http-equiv="Content-Type" content="text/html; charset=UTF-8">
<title>Spring RPC TEST</title>
    <script src="js/jquery-1.11.1.min.js"></script>
    <script src="js/jsonrpcjs-0.1.8.min.js"></script>
    <script type="text/javascript">
        var rpc = new jsonrpc.JsonRpc("rpcService/HelloWorld");

function ceshi(){
    var name = document.getElementById("name").value;
    rpc.call('sayHello',name, {
        success : function(r) {
            alert(r);
        },
        failure : function(reason) {
            alert("false");
        },
    });
}

    </script>
</head>
<body>

<h1>Spring RPC 测试</h1>
请输入姓名:<input type="text" id="name" size="17">
<input type="button" value="Hello" id="but1" onclick="ceshi()">
</body>
</html>
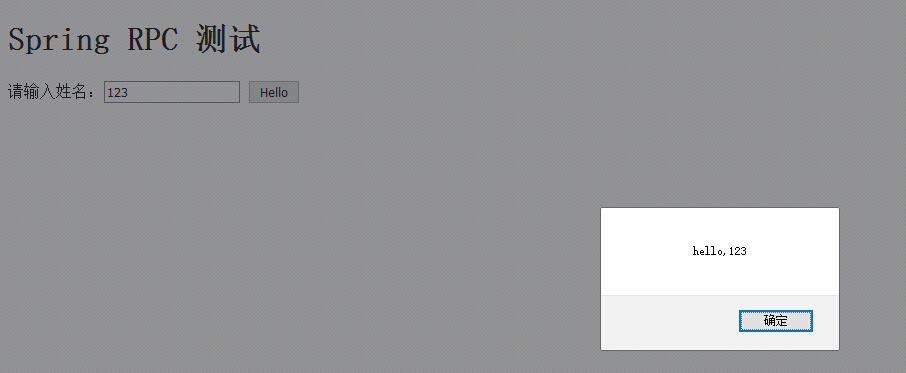
运行结果如下图所示:
工程源码下载:https://yunpan.cn/cPExEEpEwjSUp (提取码:7a2b)