获取nexus包
https://sonatype-download.global.ssl.fastly.net/nexus/3/latest-unix.tar.gz
https://download.sonatype.com/nexus/3/latest-unix.tar.gz
添加用户
useradd nexus
echo "123456" | passwd nexus --stdin
解压nexus的包
tar -zxvf nexus-3.9.0-01-unix.tar.gz
mv nexus-3.9.0-01 nexus
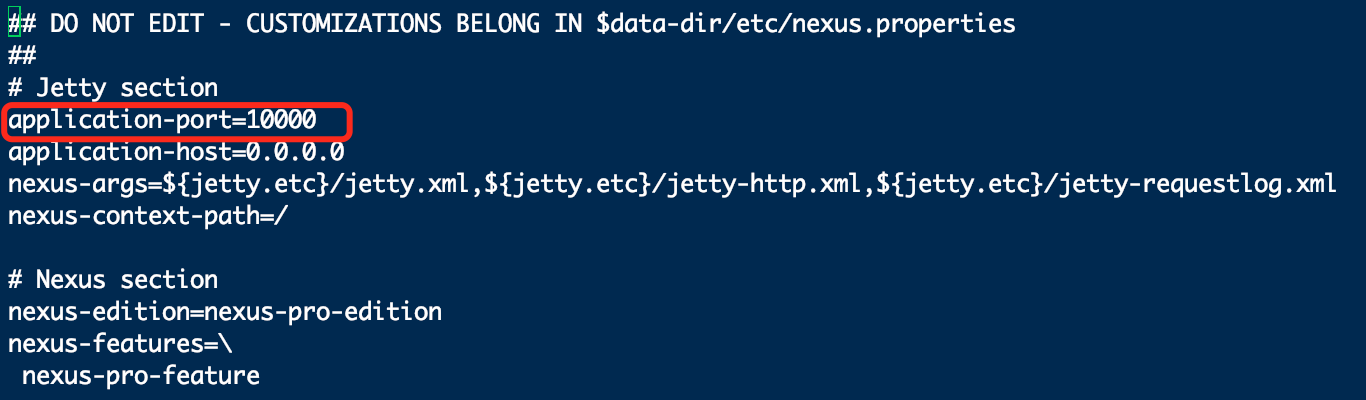
配置nexus
vi nexus/etc/nexus-default.properties
vi nexus/bin/nexus

设置nexus环境变量
NEXUS_HOME=/usr/local/nexus/bin
PATH=$PATH:$NEXUS_HOME
export PATH NEXUS_HOME
设置开机启动
vi /etc/rc.d/rc.local 添加 /usr/local/nexus/bin/nexus start
chmod 755 /etc/rc.d/rc.local
登录nexus界面
http://192.168.188.133:10000/
默认用户名/密码:admin/admin123


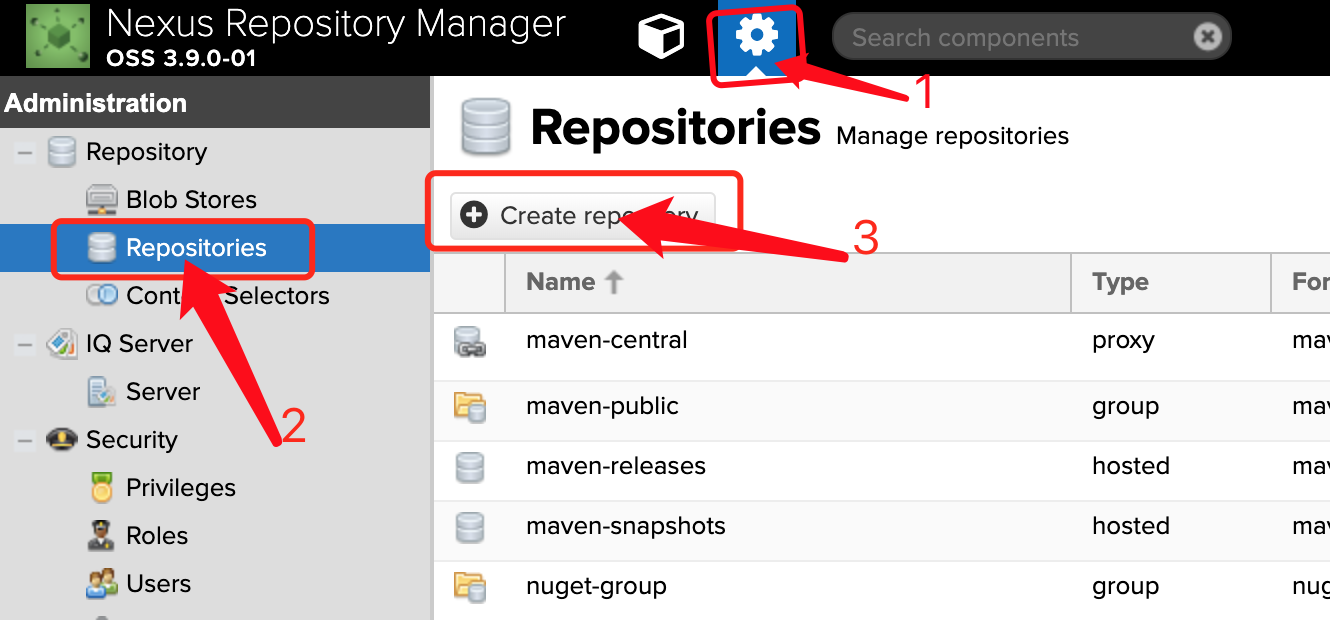
配置docker私有仓库
1.点击设置按钮,2.点击Repositories,3.点击create repository
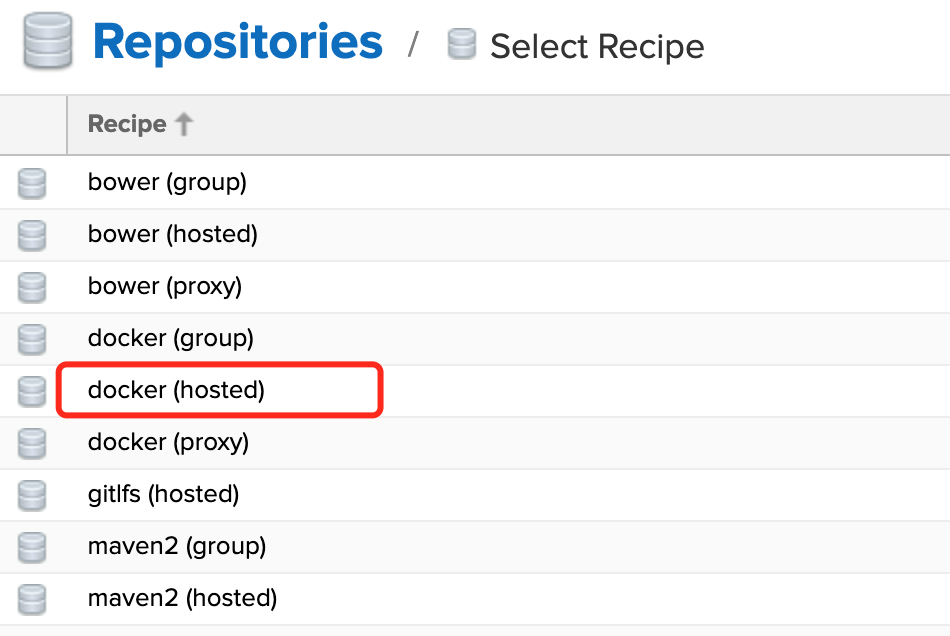
选择仓库类型
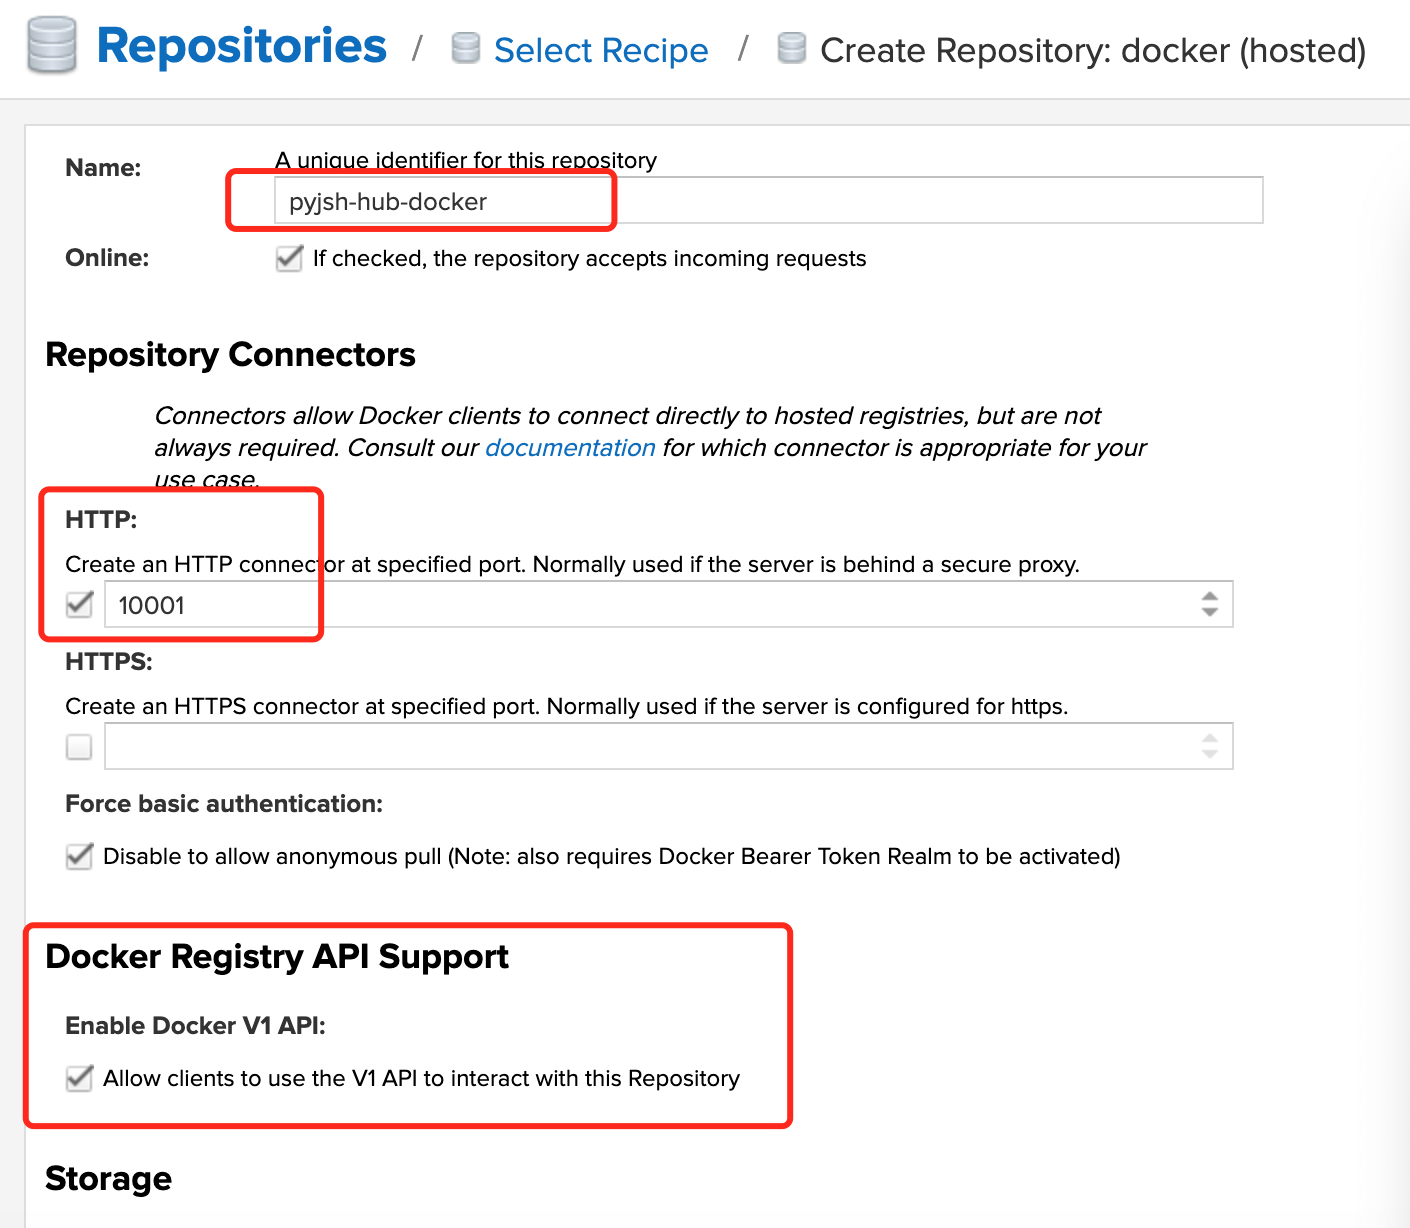
然后输入仓库名称,勾选HTTP并输入端口号,勾选允许交互的API,最后点击create按钮
docker配置:
vi /etc/docker/daemon.json 添加
{
    "insecure-registries": ["http://192.168.188.133:10001"]
}
登录仓库
docker login -u admin -p admin123 192.168.188.133:10001
------------------------------------------------------------------------------
WARNING! Using --password via the CLI is insecure. Use --password-stdin.
WARNING! Your password will be stored unencrypted in /root/.docker/config.json.
Configure a credential helper to remove this warning. See
https://docs.docker.com/engine/reference/commandline/login/#credentials-store
Login Succeeded
上传镜像
docker tag quay.io/coreos/configmap-reload:v0.0.1 192.168.188.133:10001/configmap-reload:0.1
docker push 192.168.188.133:10001/configmap-reload:0.1
---------------------------------------------------------------------------------------------
The push refers to repository [192.168.188.133:10001/configmap-reload]
5f70bf18a086: Pushed
91bd48b9e0b0: Pushed
0.1: digest: sha256:50c53db55ece9a6e1a7274e497f308bcc24164bdb4c0885524037c1b8e4e758d size: 734
然后去页面可以搜索到刚刚上传的镜像
