前言
该项目是一个javaweb项目,基于Servlet、JSP等技术的初等项目,项目使用反射来控制类方法的调用。
项目开始时,我们首先看看效果图,再考虑是否进行下去。
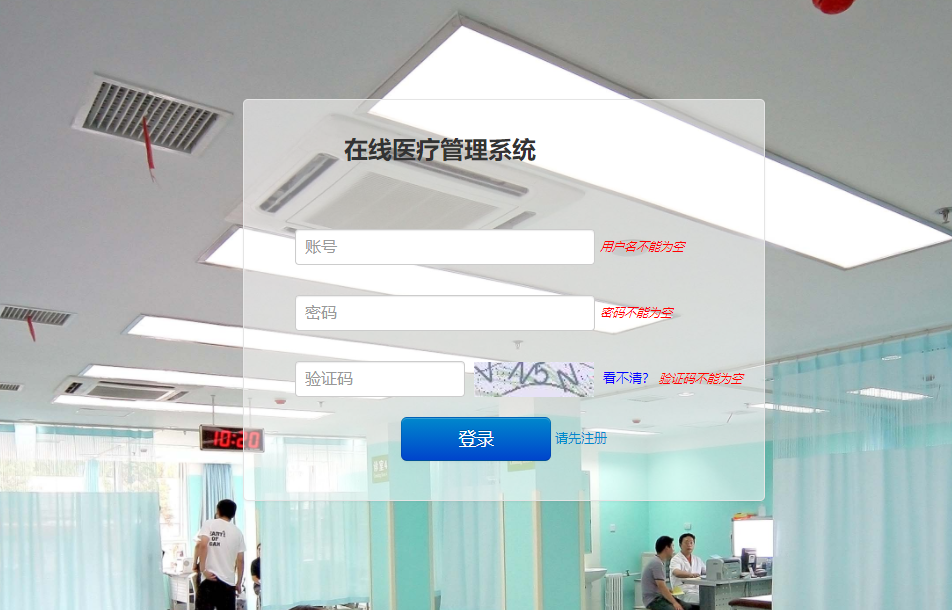
登录页:
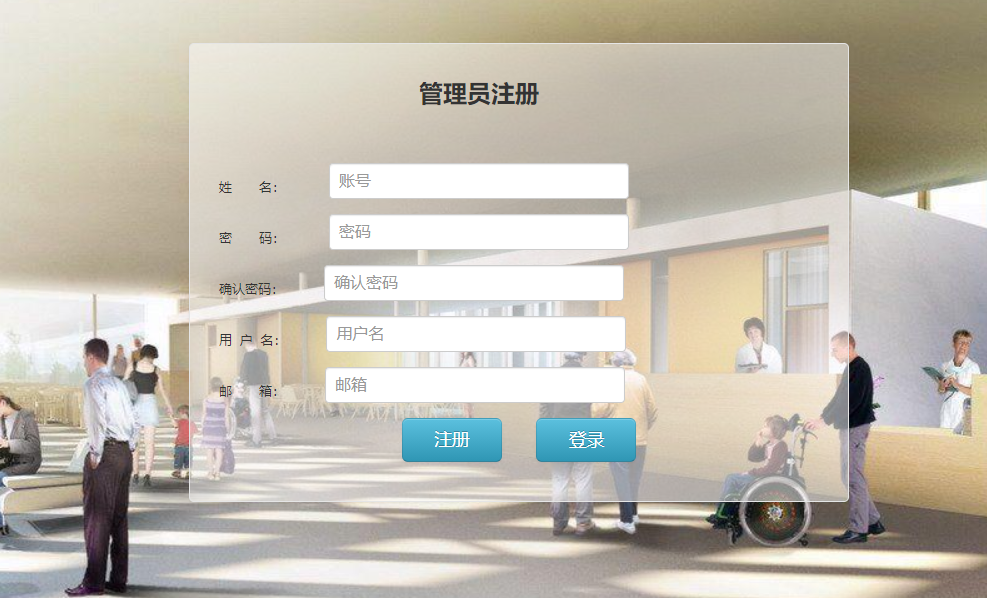
注册页:
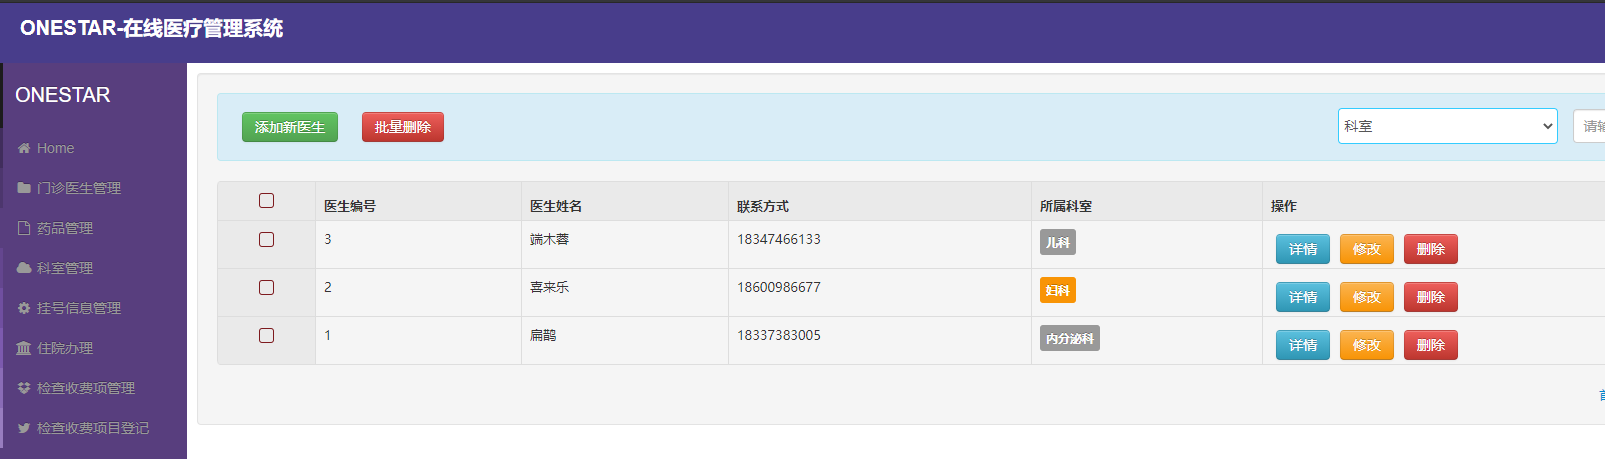
后台主页:
后面的页面还在更改中,我期望改的漂亮些,再晒出来。
如果你感兴趣,那我们就可以接下来构建项目了。
一、创建项目,创建各层包
1. 新建项目
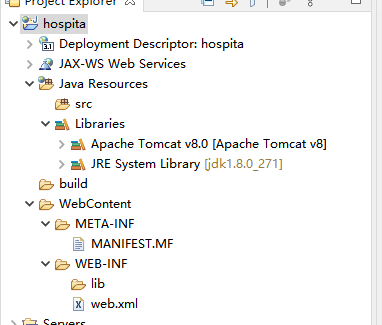
1.1 、 在eclipse 中 依次点击 File --> New --> Dynamic Web project, 项目名称 :hospital ,(前提是eclipse中配置好tomcat8),不要着急直接点击Finish,你需要先点击 Next --> Next , 此时来到 Web Module 页面,将 Generate web.xml deployment descriptor 勾选,之后再点击Finish,此时初始项目创建成功。我们来看看项目初始骨架。(刚发现项目名少打了l,就不改了,望注意。)
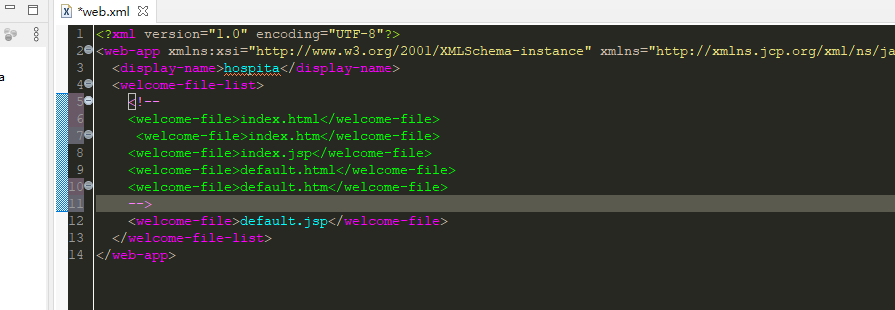
1.2、项目创建成功后,我们首先看看,web.xml 中的内容,web.xml中只给我们生成了
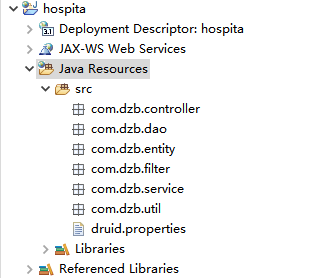
2. 构建我们项目的分层包
2.1 、我们编写项目,通常已经习惯于分层的设计,此处也不例外。每层我不一一介绍了,由于该项目中和数据库的连接使用的是druid连接池,所以首先建立一个druid.properties配置文件,放置在src 下。如图。
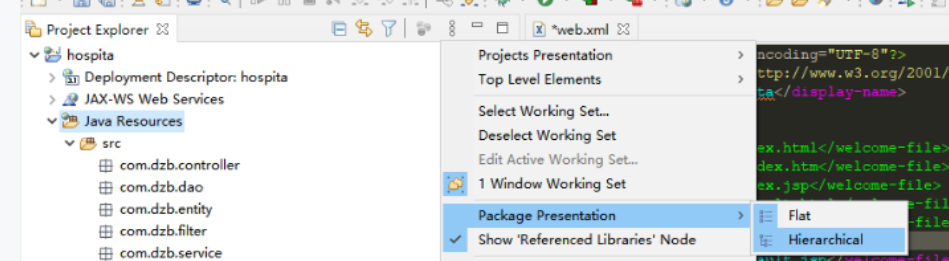
注:这里提示一下,如果建立的包看起来有些混乱,明明是在src下建立的包,却和Libraries并列,放心,这是显示的问题。 点击下图中,竖着显示的三个点的按钮,即可更正。
此处使用mysql8,驱动为 mysql-connector-java-8.0.18.jar,用到的jar包直接复制粘贴在WebContent/WEB-INF/lib中,之后选中lib文件夹中的所以jar包,右键Build Path ---> Add to Build Path ,将jar 包添加进路径中。druid.properties 中的内容为:(添加备用)
driverClassName=com.mysql.cj.jdbc.Driver
url=jdbc:mysql://127.0.0.1:3306/hospitaldb?serverTimezone=UTC&characterEncoding=utf-8
username=root
password=root
validationQuery=select 1
二、基于反射,实现类方法的调用
1. 反射调用原理
1.1、首先,我们在filter包下创建BackServletFilter过滤器,继承javax.servlet.Filter;在controller中创建BaseServlet类,继承javax.servlet.http.HttpServlet;解释一下,项目启动后,根路径地址默认为: localhost:8080/hospital ,当我们访问项目路径时,Filter过滤器首先拦截这些请求,其次才会分发到Servlet层,调用相应的方法,进行路由校验与资源请求。
1.2 、基于这样的原理,我们首先在controller下建立UserServlet ,继承BaseServlet,该类的路由@WebServlet("/user/")。我们期许这样的设计:当我们访问 localhost:8080/hospital/user/list、localhost:8080/hospital/user/add、localhost:8080/hospital/user/delete 等路径时,BackServletFilter过滤器解析出路径中的add、delete方法名,BaseServlet 类中调用反射方法,因为我们访问的是localhost:8080/hospital/user/ * 路径,因此触发UserServlet 类中的add和delete方法。那么我们就实现了一个简单的反射调用的框架了。
2. BackServletFilter、BaseServlet、UserServlet 代码
我们既然明白了方法的调用原理,那我们就可以粘贴代码实现一下自己体验一下了。
2.1 BackServletFilter 代码
@WebFilter("/*")
public class BackServletFilter implements Filter {

        public BackServletFilter() {}

	/**
	 * @see Filter#doFilter(ServletRequest, ServletResponse, FilterChain)
	 */
	public void doFilter(ServletRequest servletRequest, ServletResponse servletResponse, FilterChain chain) throws IOException, ServletException {
		System.out.println("servletFilter过滤器......................................");

		// 强制转换为HttpServletRequest,HttpServletResponse类型的请求和响应
		HttpServletRequest request = (HttpServletRequest) servletRequest;
		HttpServletResponse response = (HttpServletResponse) servletResponse;

		// 获得根容器资源
		String contextPath = request.getServletContext().getContextPath();
		System.out.println("根容器资源路径为:" + contextPath);

		String uri = request.getRequestURI();

		System.out.println("URI======:" +uri);


		if(uri.endsWith("/")) {
			uri = uri.substring(0, uri.length() - 1);
		}

		List<String> url = Arrays.asList(uri.split("/"));

		String methodName = url.get(url.size()-1);
		System.out.println("method:"+methodName);
		request.setAttribute("method", methodName);

		chain.doFilter(request, response);
	}


	public void init(FilterConfig fConfig) throws ServletException {
		// TODO Auto-generated method stub
	}

	public void destroy() {
		// TODO Auto-generated method stub
	}


}
2.2 BaseServlet 代码
public class BaseServlet extends HttpServlet{


	// 重写方法 service
	@Override
	protected void service(HttpServletRequest req, HttpServletResponse resp) throws ServletException, IOException {
		// 设置UTF-8 格式
		req.setCharacterEncoding("UTF-8");
		resp.setCharacterEncoding("UTF-8");

		String methodName = (String) req.getAttribute("method");
		System.out.println("反射接收的方法为:" + methodName);

		System.out.println("触发的方法:" + methodName);
		// 获取类的对象
		Class<? extends BaseServlet> clzz = this.getClass();

		System.out.println("请求的类:" + clzz.getName() + "," + "请求的方法:" + methodName);

		// 获取该类的方法
		try {
			Method method = clzz.getMethod(methodName, HttpServletRequest.class,HttpServletResponse.class);

			try {
				method.invoke(this, req,resp);
			} catch (IllegalAccessException e) {
				System.out.println("IllegalAccessException:" + e);
			} catch (IllegalArgumentException e) {
				System.out.println("IllegalArgumentException:" + e);
			} catch (InvocationTargetException e) {
				System.out.println("InvocationTargetException:" + e);
			}
		} catch (NoSuchMethodException | SecurityException e) {
			System.out.println("没有找到对应的方法。");
//			req.getRequestDispatcher("/error/404.jsp").forward(req, resp);

		}

	}

}
2.3 UserServlet 代码
@WebServlet("/user/*")
public class UserServlet extends BaseServlet {
private static final long serialVersionUID = 1L;
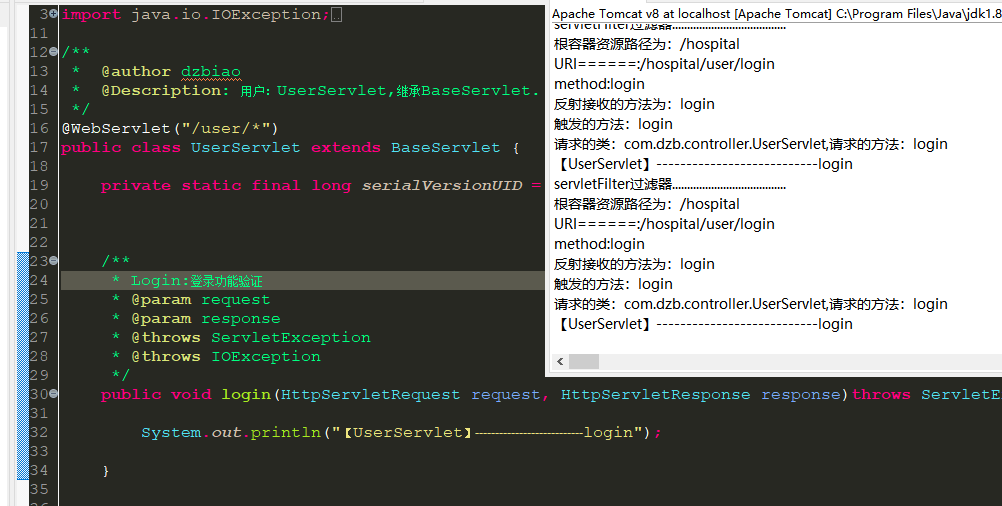
public void login(HttpServletRequest request, HttpServletResponse response)throws ServletException, IOException {
System.out.println("【UserServlet】---------------------------login");
}
public void register(HttpServletRequest request, HttpServletResponse response)throws ServletException, IOException {
System.out.println("【UserServlet】---------------------------register");
}
public void logout(HttpServletRequest request, HttpServletResponse response)throws ServletException, IOException {
System.out.println("【UserServlet】---------------------------logout");
}
}
结尾
到此,我们初始的项目框架就算搭出来了,我们可以通过访问:http://localhost:8080/hospital/user/login 和 http://localhost:8080/hospital/user/register 看看后台是否如实调用对应方法,并打印出对应信息。如果和我们预期一样,恭喜你,初始小框架就成功了。