一、Handler消息传递机制
进程和线程:
首先来回顾一下这两个概念
① 进程:一个Android应用就是一个进程,每个应用在各自的进程中进行。例如手机里的app,每一个就是一个进程。
② 线程:比线程更小的独立运行的基本单位,一个进程可以包含多个线程,且分为一个主线程和多个子线程(子线程也叫Worker线程)
以下例子表示通过子线程运行更改界面内容
            public void onClick(View v) {
                //创建线程
                Thread thread = new Thread(new Runnable() {
                    @Override
                    public void run() {
                        textView.setText("你今天的努力是幸运的伏笔,当下的付出是明日的花开。");
                    }
                });
                thread.start();//开启线程
            }
但运行是失败的,说明子线程不允许操作主线程的组件。那我们该怎么做呢?
Android提供了Handler对象,我们可以在点击更改组件按钮时通知给Handler对象,然后由Handler更新文本框组件。
首先创建Handler
        final Handler handler = new Handler(){
            @Override
            public void handleMessage(@NonNull Message msg) {
                super.handleMessage(msg);
            }
        };
然后发送消息,Handler有很多send方法,依次介绍。
handler.sendMessage(Message msg);//发送一个Message对象
handler.sendEmptyMessage(int what);//发送空消息,what表示消息代码
handler.sendEmptyMessageDelayed(int what,long delayMillis);//表示隔一定时间发送消息 等等。
这样设置好消息后,可以在之前的handler实例化过程添加下列更换组件信息的代码。
                if(msg.what==0x123){
                    textView.setText("你今天的努力是幸运的伏笔,当下的付出是明日的花开。");
                }
即可达成预期效果。
总结:
Handler是Android提供的一个消息处理机制。
作用:可在任意线程中发送消息,并且可在主线程中获取消息做出调整。
二、Handler、Looper和MessageQueue的关系
在Android中Handler不是单独工作的,一起工作的还有Looper,这是一个循环器,主要负责管理MessageQueue(消息队列,采用先进先出的方式管理消息),Message则在MessageQueue中,在一个线程中,一个handler对象对应一个looper对象,一个looper对象对应一个MessageQueue对象,MessageQueue中存放多个Message。
我们通过Handler获取Message,将其发送给Looper管理的MessageQueue,此消息处于消息队列的队尾,而Looper则会不断尝试从MessageQueue中取出未处理的消息,按照队列先进先出的原则,取出并传递给Handler,直到全部消息被取出。
1、Message是怎么携带消息的呢?
通过Message对象的属性来实现的,属性如下:
1、arg0和arg1属性,存放整型数据。
2、obj属性,存放Object类型的数据。
3、replyTo:指定Message发向何处。
4、what:指定用户自定义的消息代码,可以使用十六进制的整型。
2、创建Message对象
首先获取Message对象,但一般不用方法new Message(),用Message对象提供的Message.obtain()或者使用Handler.obtainMessage()来实现。可以避免分配对象,减少内存开发。
实例:实现轮播效果
package com.example.handler_2;

import androidx.annotation.NonNull;
import androidx.appcompat.app.AppCompatActivity;

import android.os.Bundle;
import android.os.Handler;
import android.os.Message;
import android.view.animation.Animation;
import android.view.animation.AnimationUtils;
import android.widget.ImageView;
import android.widget.ViewFlipper;

public class MainActivity extends AppCompatActivity {

    final int FLAG_MSG = 0x001;    //定义要发送的消息代码
    private ViewFlipper flipper;   //定义ViewFlipper
    private Message message;        //声明消息对象
    //定义图片数组
    private int[] images = new int[]{R.drawable.img1, R.drawable.img2, R.drawable.img3,
            R.drawable.img4, R.drawable.img5, R.drawable.img6, R.drawable.img7, R.drawable.img8};
    private Animation[] animation = new Animation[2];  //定义动画数组,为ViewFlipper指定切换动画

    @Override
    protected void onCreate(Bundle savedInstanceState) {
        super.onCreate(savedInstanceState);
        setContentView(R.layout.activity_main);

        /*通过ViewFlipper组件播放广告*/
        flipper = (ViewFlipper)findViewById(R.id.viewFlipper);
        for(int i=0;i<images.length;i++){
            ImageView imageView = new ImageView(this);//创建对象
            imageView.setImageResource(images[i]);//将遍历的图片保存在ImageView中
            flipper.addView(imageView);//加载图片
        }
        //初始化动画数组
        animation[0] = AnimationUtils.loadAnimation(this,R.anim.slide_in_right);
        animation[1] = AnimationUtils.loadAnimation(this,R.anim.slide_out_left);


        flipper.setInAnimation(animation[0]);//设置进入动画效果
        flipper.setOutAnimation(animation[1]);//设置退出动画效果

        //开启广告轮播
        message = Message.obtain();//获取Message
        message.what = FLAG_MSG;//设置消息代码
        handler.sendMessage(message);//发送消息
    }

    /*创建Handler对象,实现3秒更新一次图片*/
    Handler handler = new Handler(){
        @Override
        public void handleMessage(@NonNull Message msg) {
            super.handleMessage(msg);
            if (msg.what == FLAG_MSG) {
                flipper.showPrevious();                //切换到下一张图片
            }
            message = handler.obtainMessage(FLAG_MSG);//获取message
            handler.sendMessageDelayed(msg,3000);//延迟3秒发送消息
        }
    };
}
二、 Service服务
1、定义
能够在后台长期运行,并且没有用户界面的应用程序组件。
2、基本应用
在后台进行下载,播放音乐或定位服务。
3、分类
分为Started Service和Bound Service。
① Started Service:是指调用startService()启动的Service。此Service不会自动启动,只有在相应的Activity调用startService()方法才会启动。
② Bound Service:是指在Activity中调用bindService()方法启动的Service,使得Service与Activity绑定在一起,若Activity停止,Service也会停止。
4、Service的基本用法
① 创建与配置Service
Android Studio为我们提供了创建Service的向导,我们通过这个可以很方便的创建和使用Service。
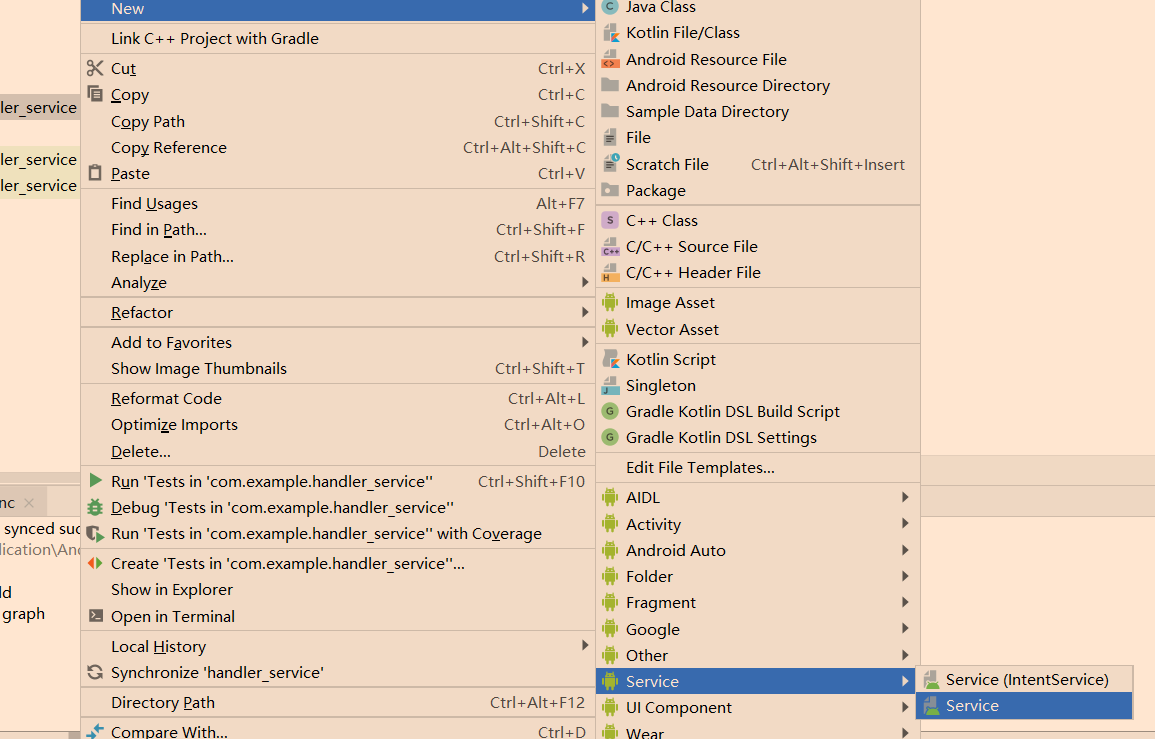
第一个选项Service(IntentService)表示创建一个继承自IntentService的Servie,后续介绍。
点击Service后,如下界面。
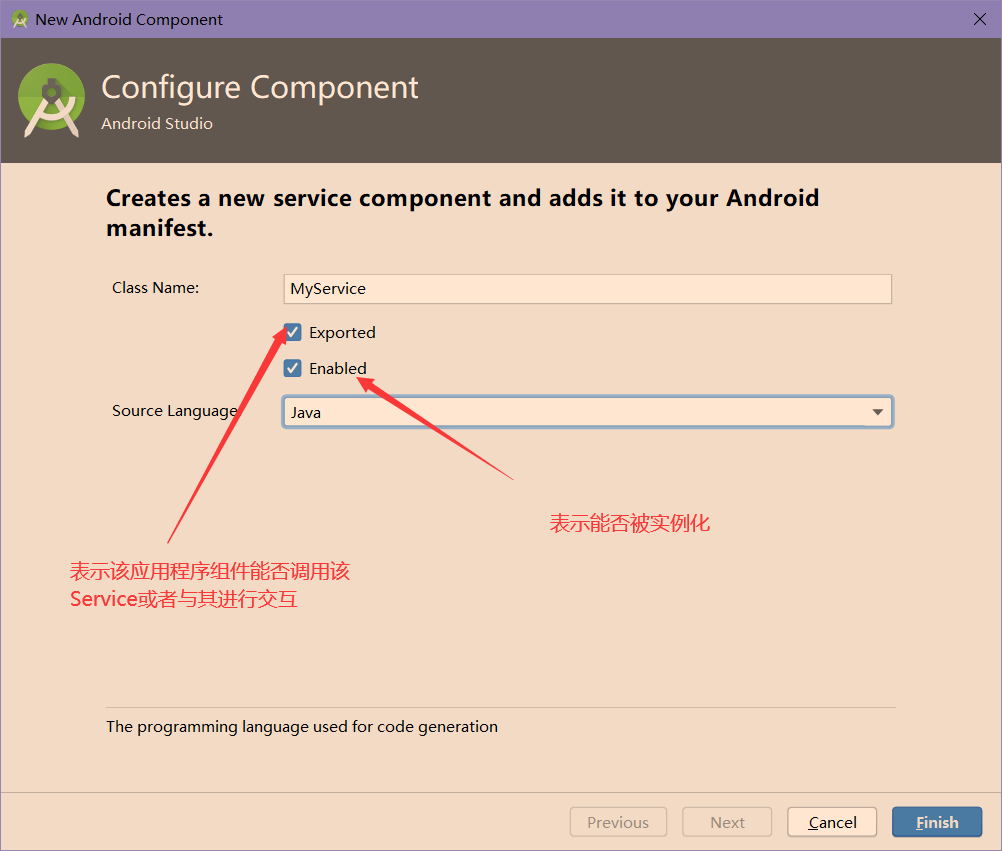
即可创建Service,需要注意的是,如果手动创建类,不用这种方法,需要在AndroidManifest.xml中注册Service服务,在<application>中添加如下代码:
        <service
            android:name=".MyService"
            android:enabled="true"
            android:exported="true"></service>
② 启动和停止Service
通过startService(Intent intent)和stopService(Intent intent)方法实现,需要Intent类型参数,Intent intent = new Intent(MainActivity.this,MyService.class); startService(intent) 即可启动,stopService(intent)即可停止Service。
③ Service的生命周期
Service 类中定义了一系列和自身生命周期相关的方法,在此不一一介绍,最经常使用的有以下三个方法:
- onCreate():当 Service 第一次被创建时,系统调用该方法。
- onStartCommand(Intent intent,int flags,int startId):当通过 startService() 方法启动 Service 时,该方法被调用。
- onDestroy():当 Service 不再使用时,系统调用该方法。
④ Bound Service
上面介绍的是startService,而当我们需要实现Service与Activity交换数据时,则选择使用Bound Service。
生命周期:调用bindService()后,调用onCreate()方法,然后调用onBind()方法绑定Service,可以通过unbindService()的onUnBind()方法解除绑定,然后onDestroy方法销毁。