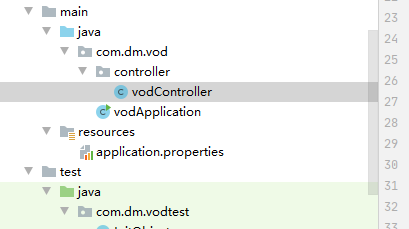
1.创建如图所示结构
2.controller
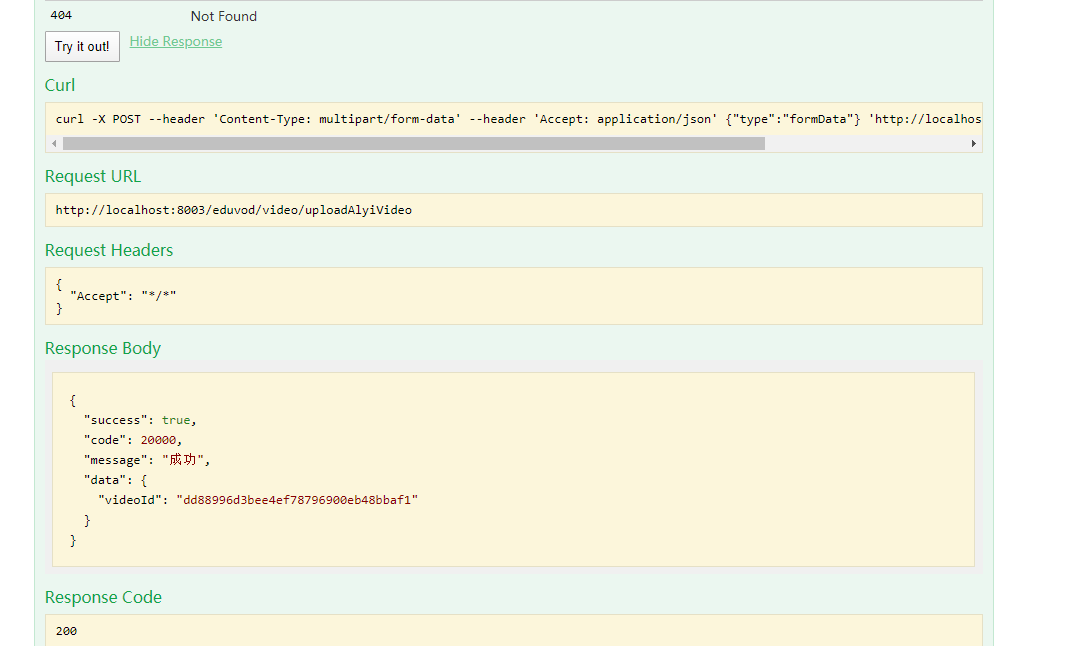
@RestController
@CrossOrigin
@RequestMapping("/eduvod/video")
public class vodController {

    //上传视频到阿里云
    @PostMapping("uploadAlyiVideo")
    public R uploadAlyiVideo(MultipartFile file) {
        String videoId = null;
        //返回上传视频id
        try {
            //accessKeyId, accessKeySecret
            //fileName:上传文件原始名称
            // 01.03.09.mp4
            String fileName = file.getOriginalFilename();
            //title:上传之后显示名称
            String title = fileName.substring(0, fileName.lastIndexOf("."));
            //inputStream:上传文件输入流
            InputStream inputStream = file.getInputStream();
            UploadStreamRequest request = new UploadStreamRequest("LTAI4G6wT9rRbhacy6YBj9Lt","04jdcJDdAgEJWD0pqLyf4smnW0Xou7", title, fileName, inputStream);

            UploadVideoImpl uploader = new UploadVideoImpl();
            UploadStreamResponse response = uploader.uploadStream(request);
            if (response.isSuccess()) {
                videoId = response.getVideoId();
            } else { //如果设置回调URL无效,不影响视频上传,可以返回VideoId同时会返回错误码。其他情况上传失败时,VideoId为空,此时需要根据返回错误码分析具体错误原因
                videoId = response.getVideoId();
            }
        }catch(Exception e) {
            e.printStackTrace();
            return null;
        }
        return R.OK().data("videoId",videoId);
    }
}
2.
vodApplication
@SpringBootApplication(exclude = DataSourceAutoConfiguration.class)
@ComponentScan(basePackages = {"com.dm"})
public class vodApplication {
    public static void main(String[] args) {
        SpringApplication.run(vodApplication.class);
    }
}
3. 配置
# 服务端口
server.port=8003

# 服务名
spring.application.name=service-vod

# 环境设置:dev、test、prod
spring.profiles.active=dev

# 最大上传单个文件大小:默认1M
spring.servlet.multipart.max-file-size=1024MB

# 最大置总上传的数据大小 :默认10M
spring.servlet.multipart.max-request-size=1024MB
4,测试