1 安装 Nginx
安装 sudo apt-get install nginx
启动 service nginx start
浏览器测试是否安装成功 http://192.168.2.173/
2 安装 PHP5
sudo apt-get install php5-fpm
3 安装 MySQL 5 数据库
sudo apt-get install mysql-server mysql-client
4 让 PHP5 支持 MySQL
sudo apt-get install php5-mysql php5-curl php5-gd php5-intl php-pear php5-imagick php5-imap php5-mcrypt php5-memcache php5-ming php5-ps php5-pspell php5-recode php5-snmp php5-sqlite php5-tidy php5-xmlrpc php5-xsl php-apc
5 配置 nginx
原配置文件 /etc/nginx/nginx.conf 配置不是很容易明白,可以参考: http://wiki.nginx.org/NginxFullExample和 http://wiki.nginx.org/NginxFullExample2
这里主要写下配置默认虚拟主机
文件位置 /etc/nginx/sites-available/default
修改前先备份 cp /etc/nginx/sites-available/default /etc/nginx/sites-available/default_bak
下面展示下我个人的配置内容
# You may add here your
# server {
#       ...
# }
# statements for each of your virtual hosts to this file

##
# You should look at the following URL's in order to grasp a solid understanding
# of Nginx configuration files in order to fully unleash the power of Nginx.
# http://wiki.nginx.org/Pitfalls
# http://wiki.nginx.org/QuickStart
# http://wiki.nginx.org/Configuration
#
# Generally, you will want to move this file somewhere, and start with a clean
# file but keep this around for reference. Or just disable in sites-enabled.
#
# Please see /usr/share/doc/nginx-doc/examples/ for more detailed examples.
##

server {
        listen 80 default_server;
        listen [::]:80 default_server ipv6only=on;

        root /home/ming/www;
        index index.php  index.html index.htm;  #添加了index.php

        # Make site accessible from http://localhost/
        server_name localhost;

        location / {
                # First attempt to serve request as file, then
                # as directory, then fall back to displaying a 404.
                try_files $uri $uri/ =404;
                # Uncomment to enable naxsi on this location
                # include /etc/nginx/naxsi.rules
        }

        # Only for nginx-naxsi used with nginx-naxsi-ui : process denied requests
        #location /RequestDenied {
        #       proxy_pass http://127.0.0.1:8080;
        #}

        #error_page 404 /404.html;

        # redirect server error pages to the static page /50x.html
        #
        #error_page 500 502 503 504 /50x.html;
        location = /50x.html {
                root /home/ming/www;   #我的网站目录
        }
	# pass the PHP scripts to FastCGI server listening on 127.0.0.1:9000
        #
        location ~ .php$ {
                try_files $uri = 404;#增加这行,用于避免0day漏洞
                fastcgi_split_path_info ^(.+.php)(/.+)$;
        #       # NOTE: You should have "cgi.fix_pathinfo = 0;" in php.ini
        #
        #       # With php5-cgi alone:
        #       fastcgi_pass 127.0.0.1:9000;
        #       # With php5-fpm:
                fastcgi_pass unix:/var/run/php5-fpm.sock;
                fastcgi_index index.php;
                include fastcgi_params;
        }

        # deny access to .htaccess files, if Apache's document root
        # concurs with nginx's one
        #
        #location ~ /.ht {
        #       deny all;
        #}
}


# another virtual host using mix of IP-, name-, and port-based configuration
#
#server {
#       listen 8000;
#       listen somename:8080;
#       server_name somename alias another.alias;
#       root html;
#       index index.html index.htm;
#
#       location / {
#               try_files $uri $uri/ =404;
#       }
#}
如何配置多域名的虚拟主机
例如 建立虚拟域名 linux.test.kunming.com
1 在/etc/nginx/sites-available目录下建立文件 linux.test.kunming.com
vim linux.test.kunming.com
添加如下内容
server {
        listen 80 default_server;
        listen [::]:80 default_server ipv6only=on;

        root /home/ming/www/linux.test.kunming.com;   #这里就是域名指向的网站目录
        index index.php  index.html index.htm;

        # Make site accessible from http://localhost/
        server_name linux.test.kunming.com;     #虚拟域名

        location / {
                # First attempt to serve request as file, then
                # as directory, then fall back to displaying a 404.
                try_files $uri $uri/ =404;
                # Uncomment to enable naxsi on this location
                # include /etc/nginx/naxsi.rules
        }

        # Only for nginx-naxsi used with nginx-naxsi-ui : process denied requests
        #location /RequestDenied {
        #       proxy_pass http://127.0.0.1:8080;
        #}

        #error_page 404 /404.html;

        # redirect server error pages to the static page /50x.html
        #
        #error_page 500 502 503 504 /50x.html;
        location = /50x.html {
                root /home/ming/www;
        }

        # pass the PHP scripts to FastCGI server listening on 127.0.0.1:9000
        #
        location ~ .php$ {
                try_files $uri = 404;#增加这行,用于避免0day漏洞
                fastcgi_split_path_info ^(.+.php)(/.+)$;
        #       # NOTE: You should have "cgi.fix_pathinfo = 0;" in php.ini
        #
        #       # With php5-cgi alone:
        #       fastcgi_pass 127.0.0.1:9000;
        #       # With php5-fpm:
                fastcgi_pass unix:/var/run/php5-fpm.sock;
                fastcgi_index index.php;
                include fastcgi_params;
        }

        # deny access to .htaccess files, if Apache's document root
        # concurs with nginx's one
        #
        #location ~ /.ht {
        #       deny all;
        #}
}
2 建立软连接 并重启服务器
sudo ln -s /etc/nginx/sites-available/linux.test.kunming.com /etc/nginx/sites-enabled/linux.test.kunming.com
sudo service ngnix restart
3 测试 在 网站目录下 /home/ming/www目录下建立文件夹 linux.test.kunming.com
cd /home/ming/www
mkdir linux.test.kunming.com
cd linux.test.kunming.com
vim index.php
键入测试内容
<?php
echo 1111;
4 因为linux是在本地虚拟机里安装的 要在本地环境下的host中作解析
修改 C:WindowsSystem32driversetchosts文件 添加如下内容
192.168.2.173 linux.test.kunming.com
5 在浏览器输入 linux.test.kunming.com出现如下
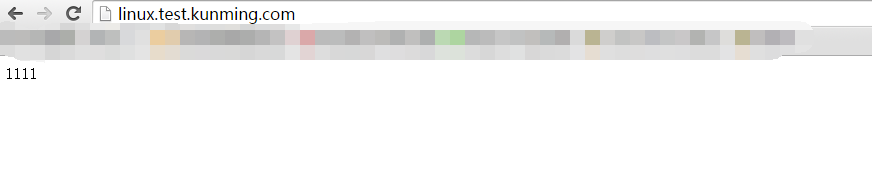
说明 测试成功