1.官网链接:https://dev.mysql.com/downloads/windows/installer/5.7.html
2.网页写的很清楚:在线安装选择安装包小的,本地安装选大的,为了避免网络原因安装失败,选择离线安装:
Choosing the right file:
- If you have an online connection while running the MySQL Installer, choose the
mysql-installer-web-communityfile. - If you do NOT have an online connection while running the MySQL Installer, choose the
mysql-installer-communityfile.

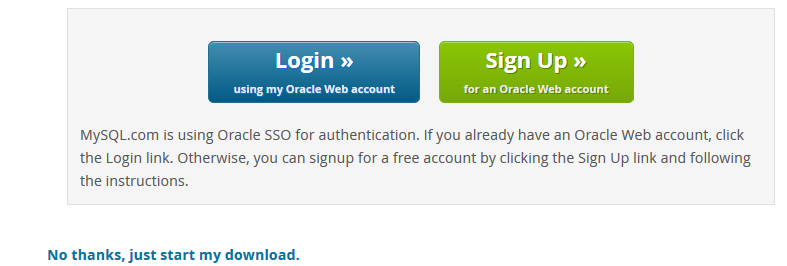
3.都是套路:点击 No thanks,just start my download
4.点击msi安装包,启动后选择default就好:
* MySQL Server
* MySQL Shell
The new MySQL client application to manage MySQL Servers and InnoDB cluster instances.
* MySQL Router
High availability router daemon for InnoDB cluster setups to be installed on application nodes.
* MySQL Workbench
The GUI application to develop for and manage the server.
* MySQL for Excel
Excel plug-in to easily access and manipulate MySQL data.
* MySQL for Visual Studio
To work with the MySQL Server from VS.
* MySQL Connectors
Connector/Net, Java, C/C++, OBDC and others.
* Examples and tutorials
To help you get started with your development.
* Documentation
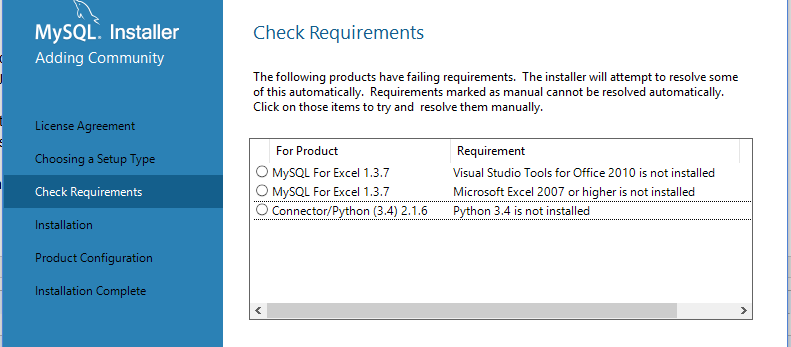
5.这里提示我没有安装Excel和python3.4版本,确实没有,谁还用3.4啊!没有就没有呗:
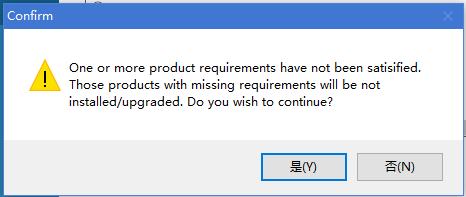
6.不安装我还能咋滴???直接是:
7.剩下的一大堆就是要安装的东西:
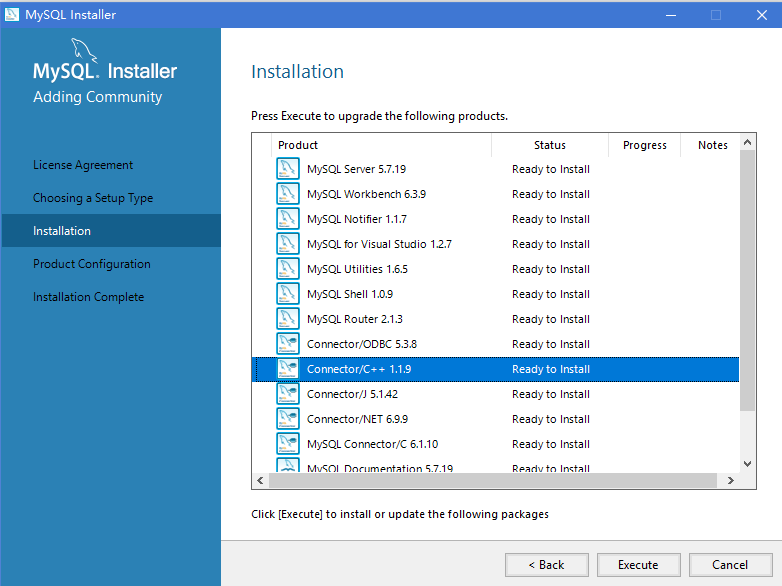
8.然而!安装到这里我突然就后悔了,因为,实在是特么的太多了!/伤心的看看c盘容量.jpg。于是在第二个安装完成之后(前面的笔变成绿色对勾),我机智的
点击cancel暂停了:)!即使是这样还是安装了一大堆东西:(。。。
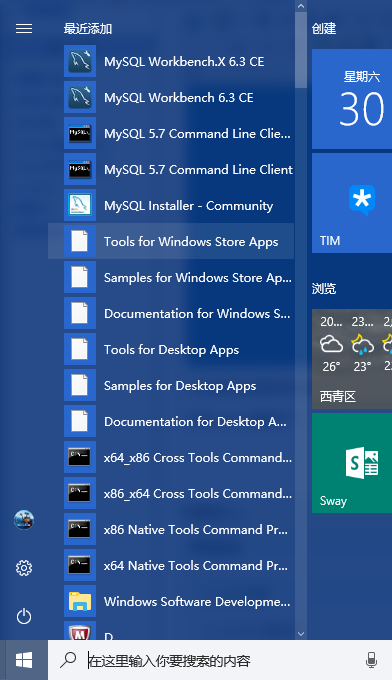
9.点击MySQL Install-community,只保留下面两个,其余的不要!不要的选中后点击Remove:
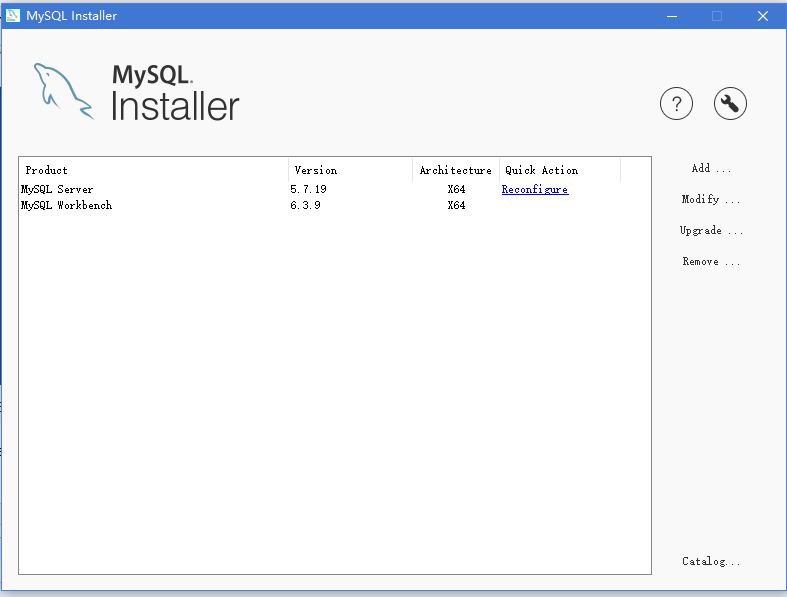
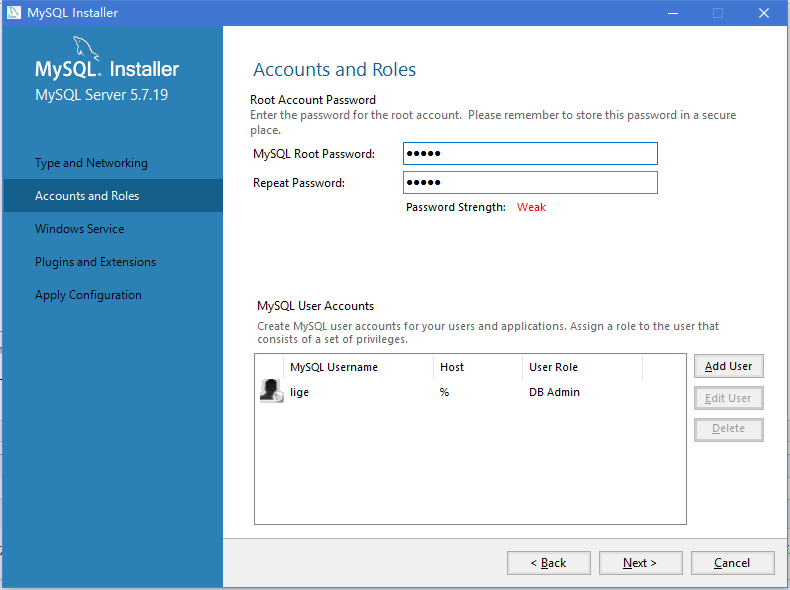
10.点击reconfigure。这一步设置的是管理员密码,一定要记住!!!,下面可以添加其他用户,不会就不加了。
11.点击execute执行:
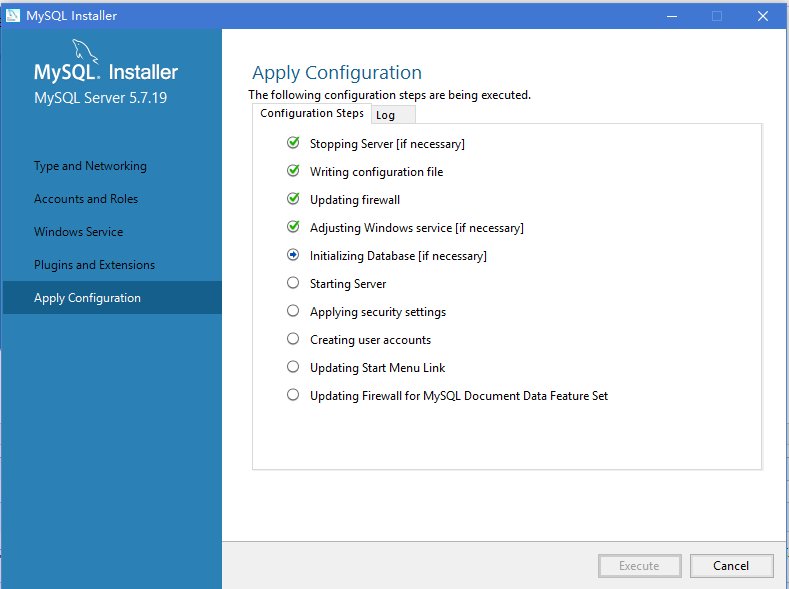
经过漫长无聊的等待。。。。。。等所有圈圈都绿了
12.MySQL安装在C:Program FilesMySQLMySQL Server 5.7,在地址栏输入cmd打开控制台:
输入mysql -uroot -p回车后提示输入密码,然后,令人激动的提示符出现了!:
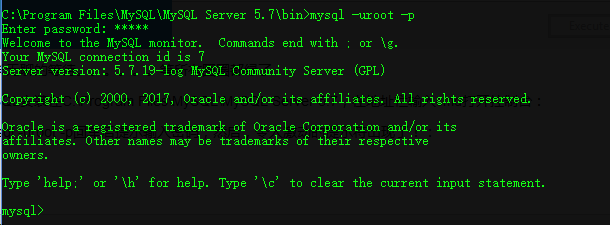
这就说明mysql安装已经成功了,后面是前端工具workbench的使用:
13.打开

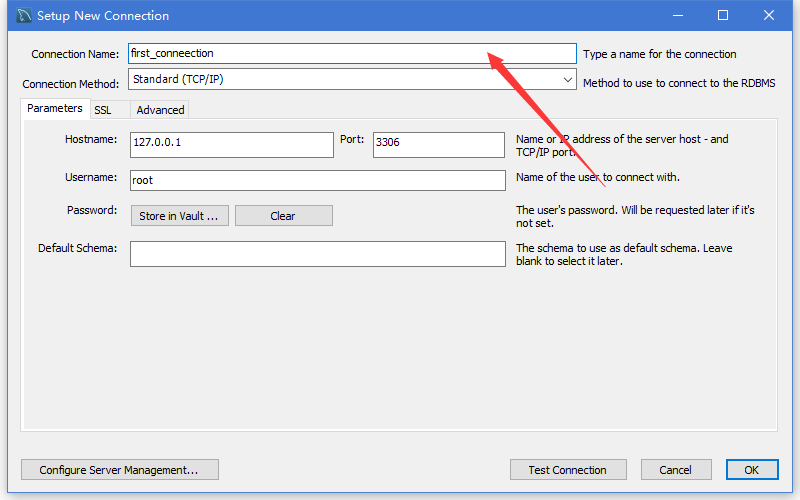
14.打开之后,点击+号:

15.给连接起个名字:
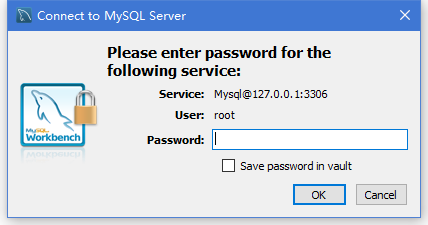
16.点击OK之后页面会出现一个标签,点击:

17.会提示输入密码:
18.鸡冻人心的界面出现了!:
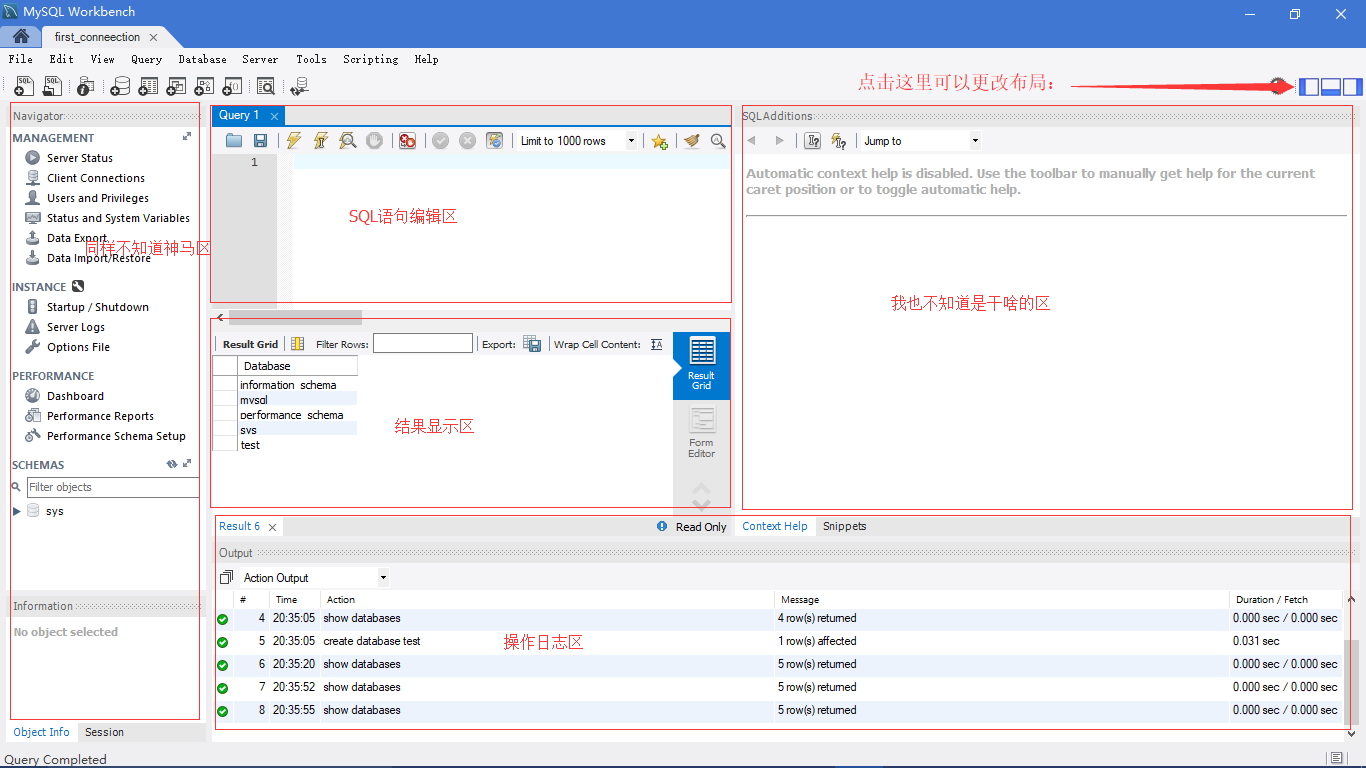
真的是,很费劲!