在这个例子中,我在服务器和客户端连接被创立时发送一个消息,然后在客户端解析收到的消息并输出。并且,在这个项目中我使用 POJO 代替 ByteBuf 来作为传输对象。
一、服务器实现
1. 首先我们自定义传输数据对象
 1 package com.coder.client;
 2
 3 import java.util.Date;
 4
 5 /**
 6  * 自定义时间数据类
 7  * @author Coder
 8  *
 9  */
10 public class Time {
11     private final long value;
12
13     public Time() {
14         // 除以1000是为了使时间精确到秒
15         this(System.currentTimeMillis() / 1000L);
16     }
17
18     public Time(long value) {
19         this.value = value;
20     }
21
22     public long value() {
23         return value;
24     }
25
26     @Override
27     public String toString() {
28         return new Date((value()) * 1000L).toString();
29     }
30 }
2. 然后我们需要自定义服务器数据编码类
 1 package com.coder.server;
 2
 3 import com.coder.client.Time;
 4
 5 import io.netty.buffer.ByteBuf;
 6 import io.netty.channel.ChannelHandlerContext;
 7 import io.netty.handler.codec.MessageToByteEncoder;
 8
 9 /**
10  * 服务器数据编码类
11  * @author Coder
12  *
13  */
14 public class TimeEncoderPOJO extends MessageToByteEncoder<Time> {
15
16     // 发送数据时调用
17     @Override
18     protected void encode(ChannelHandlerContext ctx, Time msg, ByteBuf out) throws Exception {
19         // 只传输当前时间,精确到秒
20         out.writeInt((int)msg.value());
21     }
22
23 }
3. 也需要自定义服务器的业务逻辑类,如下:
 1 package com.coder.server;
 2
 3 import com.coder.client.Time;
 4
 5 import io.netty.channel.ChannelFuture;
 6 import io.netty.channel.ChannelFutureListener;
 7 import io.netty.channel.ChannelHandlerContext;
 8 import io.netty.channel.ChannelInboundHandlerAdapter;
 9
10 /**
11  * 服务器解码器
12  * 连接建立时发送当前时间
13  * @author Coder
14  *
15  */
16 public class TimeServerHandlerPOJO extends ChannelInboundHandlerAdapter {
17     /**
18      * 连接建立的时候并且准备进行通信时被调用
19      */
20     @Override
21     public void channelActive(final ChannelHandlerContext ctx) throws Exception {
22         // 发送当前时间信息
23         ChannelFuture f = ctx.writeAndFlush(new Time());
24         // 发送完毕之后关闭 Channel
25         f.addListener(ChannelFutureListener.CLOSE);
26     }
27
28     @Override
29     public void exceptionCaught(ChannelHandlerContext ctx, Throwable cause) throws Exception {
30         cause.printStackTrace();
31         ctx.close();
32     }
33 }
4. 有了上面的代码,我们就可以实现服务器程序了,如下:
 1 package com.coder.server;
 2
 3 import io.netty.bootstrap.ServerBootstrap;
 4 import io.netty.channel.ChannelFuture;
 5 import io.netty.channel.ChannelInitializer;
 6 import io.netty.channel.ChannelOption;
 7 import io.netty.channel.EventLoopGroup;
 8 import io.netty.channel.nio.NioEventLoopGroup;
 9 import io.netty.channel.socket.SocketChannel;
10 import io.netty.channel.socket.nio.NioServerSocketChannel;
11
12 public class TimeServerPOJO {
13 private int port;
14
15     public TimeServerPOJO(int port) {
16         this.port = port;
17     }
18
19     public void run() throws Exception {
20         EventLoopGroup bossGroup = new NioEventLoopGroup();        // 用来接收进来的连接
21         EventLoopGroup workerGroup = new NioEventLoopGroup();    // 用来处理已经被接收的连接
22         System.out.println("准备运行端口:" + port);
23
24         try {
25             ServerBootstrap b = new ServerBootstrap();        // 启动NIO服务的辅助启动类
26             b.group(bossGroup, workerGroup)
27             .channel(NioServerSocketChannel.class)            // 这里告诉Channel如何接收新的连接
28             .childHandler( new ChannelInitializer<SocketChannel>() {
29                 @Override
30                 protected void initChannel(SocketChannel ch) throws Exception {
31                     // 自定义处理类
32                     // 注意添加顺序
33                     ch.pipeline().addLast(new TimeEncoderPOJO(),new TimeServerHandlerPOJO());
34                 }
35             })
36             .option(ChannelOption.SO_BACKLOG, 128)
37             .childOption(ChannelOption.SO_KEEPALIVE, true);
38
39             // 绑定端口,开始接收进来的连接
40             ChannelFuture f = b.bind(port).sync();
41
42             // 等待服务器socket关闭
43             f.channel().closeFuture().sync();
44         } catch (Exception e) {
45             workerGroup.shutdownGracefully();
46             bossGroup.shutdownGracefully();
47         }
48     }
49
50     public static void main(String[] args) throws Exception {
51         int port = 8080;
52         new TimeServer(port).run();
53     }
54 }
执行代码后如下:
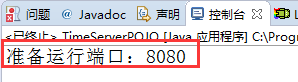
这时候服务器在等待客户端的连接(非阻塞)。
二、客户端实现
客户端的实现与服务器类似。
1. 自定义客户端数据解码类
 1 package com.coder.client;
 2
 3 import java.util.List;
 4
 5 import io.netty.buffer.ByteBuf;
 6 import io.netty.channel.ChannelHandlerContext;
 7 import io.netty.handler.codec.ByteToMessageDecoder;
 8
 9 public class TimeDecoderPOJO extends ByteToMessageDecoder {
10     /**
11      * 有新数据接收时调用
12      * 为防止分包现象,先将数据存入内部缓存,到达满足条件之后再进行解码
13      */
14     @Override
15     protected void decode(ChannelHandlerContext ctx, ByteBuf in, List<Object> out) throws Exception {
16         if(in.readableBytes() < 4) {
17             return;
18         }
19
20         // out添加对象则表示解码成功
21         out.add(new Time(in.readUnsignedInt()));
22     }
23 }
2. 自定义客户端业务逻辑类
 1 package com.coder.client;
 2
 3 import io.netty.channel.ChannelHandlerContext;
 4 import io.netty.channel.ChannelInboundHandlerAdapter;
 5
 6 /**
 7  * 客户端数据处理类
 8  * @author Coder
 9  *
10  */
11 public class TimeClientHandlerPOJO extends ChannelInboundHandlerAdapter {
12     @Override
13     public void channelRead(ChannelHandlerContext ctx, Object msg) throws Exception {
14         // 直接将信息转换成Time类型输出即可
15         Time time = (Time)msg;
16         System.out.println(time);
17         ctx.close();
18     }
19
20     @Override
21     public void exceptionCaught(ChannelHandlerContext ctx, Throwable cause) throws Exception {
22         cause.printStackTrace();
23         ctx.close();
24     }
25 }
3. 客户端程序实现
Netty 客户端的通信步骤大致为:
- 创建一个 NIO 线程组,用于处理服务器与客户端的连接,客户端不需要用到 boss worker。
- 创建一个 Bootstrap 对象,配置 Netty 的一系列参数,由于客户端 SocketChannel 没有父亲,所以不需要使用 childoption。
- 创建一个用于实际处理数据的类ChannelInitializer,进行初始化的准备工作,比如设置接受传出数据的字符集、格式以及实际处理数据的接口。
- 配置服务器 IP 和端口号,建立与服务器的连接。
 1 package com.coder.client;
 2
 3 import io.netty.bootstrap.Bootstrap;
 4 import io.netty.channel.ChannelFuture;
 5 import io.netty.channel.ChannelInitializer;
 6 import io.netty.channel.ChannelOption;
 7 import io.netty.channel.EventLoopGroup;
 8 import io.netty.channel.nio.NioEventLoopGroup;
 9 import io.netty.channel.socket.SocketChannel;
10 import io.netty.channel.socket.nio.NioSocketChannel;
11
12 public class TimeClientPOJO {
13     public static void main(String[] args) throws Exception{
14         String host = "127.0.0.1";            // ip
15         int port = 8080;                    // 端口
16         EventLoopGroup workerGroup = new NioEventLoopGroup();
17
18         try {
19             Bootstrap b = new Bootstrap();            // 与ServerBootstrap类似
20             b.group(workerGroup);                    // 客户端不需要boss worker
21             b.channel(NioSocketChannel.class);
22             b.option(ChannelOption.SO_KEEPALIVE, true);    // 客户端的socketChannel没有父亲
23             b.handler(new ChannelInitializer<SocketChannel>() {
24                 @Override
25                 protected void initChannel(SocketChannel ch) throws Exception {
26                     // POJO
27                     ch.pipeline().addLast(new TimeDecoderPOJO() ,new TimeClientHandlerPOJO());
28                 }
29             });
30
31             // 启动客户端,客户端用connect连接
32             ChannelFuture f = b.connect(host, port).sync();
33
34             // 等待连接关闭
35             f.channel().closeFuture().sync();
36         } finally {
37             workerGroup.shutdownGracefully();
38         }
39     }
40 }
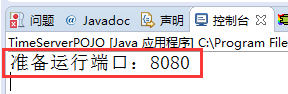
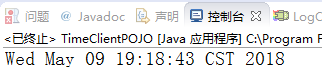
三、测试
先运行服务器程序,运行结果如下图:
然后运行客户端程序,运行结果如下图:
需要注意的是,Eclipse 是可以同时运行多个 Java 程序的,可以通过点击

来切换不同程序的控制台输出窗口。