作为iOS开发最常用的两个多视图控制器 NavigationController 和 TabBarController 已经很强大了,基本上在大部分的应用中都能看到它们的影子。但是在使用的过程中,系统自带的空间也经常不能满足我们的需求,所以经常需要使用自定义来实现功能。
之前写过自定义NavigationBar: http://www.cnblogs.com/code-cd/p/4801661.html 。今天大概写一下自定义TabBar。如有不足之处,还请多多指正。
一、创建TabBarContoller
创建 CDTabBarController,CDRedViewController,CDGreenViewController
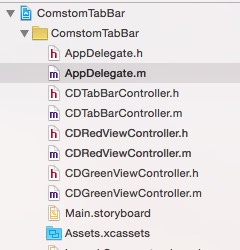
在AppDelegate.m中,设置创建TabBarController,并设置根视图为TabBarController
//
//  AppDelegate.m
//  ComstomTabBar
//
//  Created by lcd on 15/9/15.
//  Copyright © 2015年 lcd. All rights reserved.
//

#import "AppDelegate.h"
#import "CDTabBarController.h"

@interface AppDelegate ()

@end

@implementation AppDelegate


- (BOOL)application:(UIApplication *)application didFinishLaunchingWithOptions:(NSDictionary *)launchOptions {
    CDTabBarController *tabBarController = [[CDTabBarController alloc] init];
    self.window.rootViewController = tabBarController;
    return YES;
}
添加子视图
在CDTabBarController.m中
//
//  CDTabBarController.m
//  ComstomTabBar
//
//  Created by lcd on 15/9/15.
//  Copyright © 2015年 lcd. All rights reserved.
//

#import "CDTabBarController.h"
#import "CDRedViewController.h"
#import "CDGreenViewController.h"

@interface CDTabBarController ()

@end

@implementation CDTabBarController

- (void)viewDidLoad {
    [super viewDidLoad];
    //设置子视图
    [self setupChildControllers];


}
//这里设置两个视图控制器的代码是重复的,为了便于观察理解,我没有抽取,大家日常写代码的时候请注意养成良好的代码习惯。
- (void)setupChildControllers {
    CDRedViewController *redViewController = [[CDRedViewController alloc] init];
    redViewController.view.backgroundColor  = [UIColor redColor];
    redViewController.tabBarItem.title = @"red";
    //设置图片
    redViewController.tabBarItem.image = [UIImage imageNamed:@"tabbar_mainframe"];
    //设置选中图片
    redViewController.tabBarItem.selectedImage = [UIImage imageNamed:@"tabbar_mainframeHL"];


    CDGreenViewController *greenViewController = [[CDGreenViewController alloc] init];
    greenViewController.view.backgroundColor = [UIColor greenColor];
    greenViewController.tabBarItem.title = @"green";
    greenViewController.tabBarItem.image = [UIImage imageNamed:@"tabbar_me"];
    greenViewController.tabBarItem.selectedImage = [UIImage imageNamed:@"tabbar_meHL"];
    self.viewControllers = @[redViewController,greenViewController];
}
这样两个子视图已经添加进TabBarViewController了。如图:
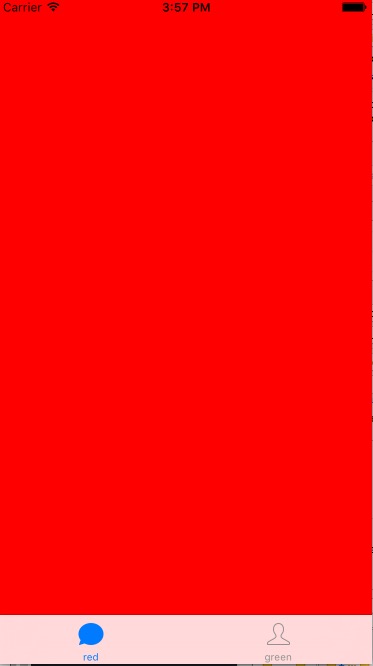
但是这里有个问题。,我设置的选中图片 是绿色的,这里显示的却是蓝色的。
这是因为在ios7之后,苹果默认会把UITabBar上面的按钮图片渲染成蓝色。如果要显示自己需要的颜色可以通过以下方法:
    UIImage *selectedImage = [[UIImage imageNamed:@"tabbar_mainframeHL"] imageWithRenderingMode:UIImageRenderingModeAlwaysOriginal];
    redViewController.tabBarItem.selectedImage = selectedImage;
二、自定义TabBar
自定义TabBar有几种不同的方式,难易程度不同,效果也不尽相同
1.修改TabBar字体
方法1:
在CDRedViewController.m中
NSDictionary *dic = @{NSFontAttributeName:[UIFont systemFontOfSize:11.0],
               NSBackgroundColorAttributeName:[UIColor cyanColor]};
    [self.tabBarItem setTitleTextAttributes:dic forState:UIControlStateNormal];
方法二:
在CDTabBarController.m中
- (instancetype)init
{
    self = [super init];
    if (self) {
        [self setTabBarItem:self.tabBarItem Title:@"title" withTitleSize:17.0 andFoneName:@"Marion-Italic"  selectedImage:selectedImage withTitleColor:[UIColor redColor] unselectedImage:unselectedImage withTitleColor:[UIColor blueColor]];
    }
    return self;
}

- (void)setTabBarItem:(UITabBarItem *)tabbarItem
                Title:(NSString *)title
        withTitleSize:(CGFloat)size
          andFoneName:(NSString *)foneName
        selectedImage:(NSString *)selectedImage
       withTitleColor:(UIColor *)selectColor
      unselectedImage:(NSString *)unselectedImage
       withTitleColor:(UIColor *)unselectColor{

    //设置图片
    tabbarItem = [tabbarItem initWithTitle:title image:[[UIImage imageNamed:unselectedImage]imageWithRenderingMode:UIImageRenderingModeAlwaysOriginal] selectedImage:[[UIImage imageNamed:selectedImage]imageWithRenderingMode:UIImageRenderingModeAlwaysOriginal]];

    //未选中字体颜色
    [[UITabBarItem appearance] setTitleTextAttributes:@{NSForegroundColorAttributeName:unselectColor,NSFontAttributeName:[UIFont fontWithName:foneName size:size]} forState:UIControlStateNormal];

    //选中字体颜色
    [[UITabBarItem appearance] setTitleTextAttributes:@{NSForegroundColorAttributeName:selectColor,NSFontAttributeName:[UIFont fontWithName:foneName size:size]} forState:UIControlStateSelected];
}
这种方法可以修改TabBar字体大小。但是其本质还是系统自带的TabBar。离我们的目标:真正的自定义TabBar还有距离
2.这种方法是之前查到的一种,用过一次,感觉不是很好用,贴上代码,有兴趣的可以了解一下,没兴趣的建议直接看第三种
- (UIButton *)plusButton
{
    if (_plusButton == nil) {

        UIButton *btn = [UIButton buttonWithType:UIButtonTypeCustom];
        [btn setImage:[UIImage imageNamed:@"tabbar_compose_icon_add"] forState:UIControlStateNormal];
        [btn setImage:[UIImage imageNamed:@"tabbar_compose_background_icon_add"] forState:UIControlStateHighlighted];
        [btn setBackgroundImage:[UIImage imageNamed:@"tabbar_compose_button"] forState:UIControlStateNormal];
        [btn setBackgroundImage:[UIImage imageNamed:@"tabbar_compose_button_highlighted"] forState:UIControlStateHighlighted];

        // 默认按钮的尺寸跟背景图片一样大
        // sizeToFit:默认会根据按钮的背景图片或者image和文字计算出按钮的最合适的尺寸
        [btn sizeToFit];

        _plusButton = btn;

        [self addSubview:_plusButton];

    }
    return _plusButton;
}

// self.items UITabBarItem模型,有多少个子控制器就有多少个UITabBarItem模型
// 调整子控件的位置
- (void)layoutSubviews
{
    [super layoutSubviews];

    CGFloat w = self.bounds.size.width;
    CGFloat h = self.bounds.size.height;

    CGFloat btnX = 0;
    CGFloat btnY = 0;
    CGFloat btnW = w / (self.items.count + 1);
    CGFloat btnH = self.bounds.size.height;

    int i = 0;
   // 调整系统自带的tabBar上的按钮位置
    for (UIView *tabBarButton in self.subviews) {
        // 判断下是否是UITabBarButton
        if ([tabBarButton isKindOfClass:NSClassFromString(@"UITabBarButton" )]) {
            if (i == 2) {
                i = 3;
            }
            btnX = i * btnW;

            tabBarButton.frame = CGRectMake(btnX, btnY, btnW, btnH);

            i++;
        }

    }


    // 设置添加按钮的位置
    self.plusButton.center = CGPointMake(w * 0.5, h * 0.5);

}
3.这种方法的思路是,先把自带的TabBar取消,然后自定义View,add到TabBar的位置代替TabBar。然后在自定义View上添加button,设置button点击时间,改变selectIndex,关联各个子viewController,覆盖相关事件。
//注释掉[super setHighlighted:highlighted] 即可以取消点击时的高亮状态
- (void)setHighlighted:(BOOL)highlighted{
    //    [super setHighlighted:highlighted];
}
CDTabBarController.h
//
//  CDTabBarController.h
//  ComstomTabBar
//
//  Created by lcd on 15/9/15.
//  Copyright © 2015年 lcd. All rights reserved.
//

#import <UIKit/UIKit.h>

@interface CDTabBarController : UITabBarController

@end
CDTabBarController.m
//
//  CDTabBarController.m
//  ComstomTabBar
//
//  Created by lcd on 15/9/15.
//  Copyright © 2015年 lcd. All rights reserved.
//

#import "CDTabBarController.h"
#import "CDRedViewController.h"
#import "CDGreenViewController.h"
#import "CDTabBarButton.h"

@interface CDTabBarController ()
/**
 *  设置之前选中的按钮
 */
@property (nonatomic, weak) UIButton *selectedBtn;
@end

@implementation CDTabBarController


- (void)viewDidLoad {
    [super viewDidLoad];
    //设置子视图
    [self setupChildControllers];

    //设置TabBar
    [self setupTabBar];

}

- (void)setupChildControllers {
    CDRedViewController *redViewController = [[CDRedViewController alloc] init];
    redViewController.view.backgroundColor  = [UIColor redColor];
    redViewController.tabBarItem.title = @"red";
    //设置图片
    redViewController.tabBarItem.image = [UIImage imageNamed:@"tabbar_mainframe"];
    //设置选中图片
    redViewController.tabBarItem.selectedImage = [UIImage imageNamed:@"tabbar_mainframeHL"];


    CDGreenViewController *greenViewController = [[CDGreenViewController alloc] init];
    greenViewController.view.backgroundColor = [UIColor greenColor];
    greenViewController.tabBarItem.title = @"green";
    greenViewController.tabBarItem.image = [UIImage imageNamed:@"tabbar_me"];
    greenViewController.tabBarItem.selectedImage = [UIImage imageNamed:@"tabbar_meHL"];
    self.viewControllers = @[redViewController,greenViewController];
}

- (void)setupTabBar {
    //删除现有的tabBar
    CGRect rect = self.tabBar.frame;
    [self.tabBar removeFromSuperview];  //移除TabBarController自带的下部的条

    UIView *myView = [[UIView alloc] init];
    myView.frame = rect;
    myView.backgroundColor = [UIColor cyanColor];
    [self.view addSubview:myView];

    for (int i = 0; i < 2; i++) {

        CDTabBarButton *button = [[CDTabBarButton alloc] init];

        NSString *imageName = [NSString stringWithFormat:@"tabbar_%d",i];
        NSString *imageNameSel = [NSString stringWithFormat:@"tabbar_%dHL",i];

        [button setImage:[UIImage imageNamed:imageName] forState:UIControlStateNormal];
        [button setImage:[UIImage imageNamed:imageNameSel] forState:UIControlStateSelected];

        CGFloat x = i * myView.frame.size.width / 2;
        button.frame = CGRectMake(x, 0, myView.frame.size.width / 2, myView.frame.size.height);

        [myView addSubview:button];

        //设置按钮的标记, 方便来索引当前的按钮,并跳转到相应的视图
        button.tag = i;

        [button addTarget:self action:@selector(clickBtn:) forControlEvents:UIControlEventTouchUpInside];

        //设置初始显示界面
        if (0 == i) {
            button.selected = YES;
            self.selectedBtn = button;  //设置该按钮为选中的按钮
        }
    }
}


//TabBar点击,切换界面
- (void)clickBtn:(UIButton *)button {
    //1.先将之前选中的按钮设置为未选中
    self.selectedBtn.selected = NO;
    //2.再将当前按钮设置为选中
    button.selected = YES;
    //3.最后把当前按钮赋值为之前选中的按钮
    self.selectedBtn = button;

    //4.跳转到相应的视图控制器. (通过selectIndex参数来设置选中了那个控制器)
    self.selectedIndex = button.tag;
}


@end
效果如图所示

这种方法是用UIView替代TabBar,自定义性强,可以在view上添加自己想要的各种控件,实现动画效果等。
PSL:本文所牵涉代码,只为提供一个思路,为方便新入门iOS开发者观看,均未抽取,重构,很多东西待优化。大家日常写代码的时候记得养成良好习惯就好。