-
登录阿里云控制台,搜索
容器镜像服务(界面上没有可以在搜索框中搜索),进入容器镜像服务管理控制台,如果需要开通就按照提示开通一下,如下图所示:

-
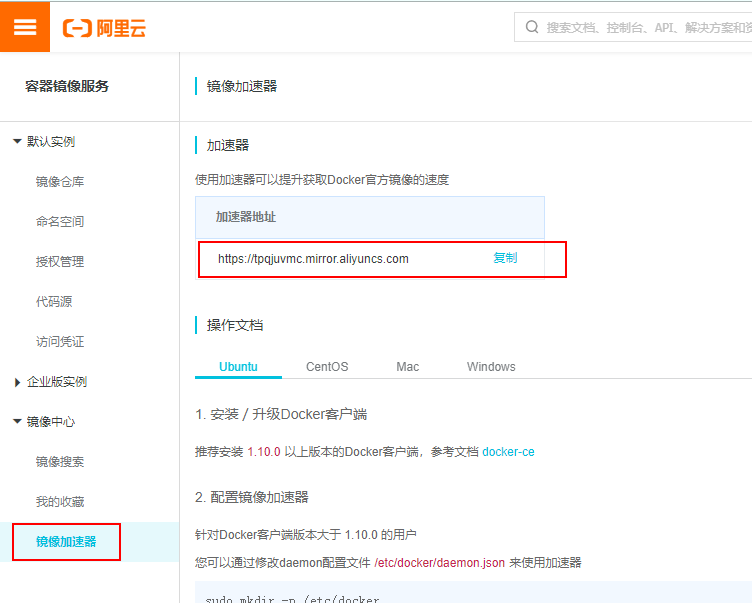
在容器镜像服务控制台最底下有个镜像加速器,点进去之后有一个加速器地址,使用这个地址作为docker镜像仓库,如下图所示:
-
编辑
/etc/docker/daemon.json文件(如果没有则创建),文件中写入以下内容:{ "registry-mirrors": ["https://tpqjuvmc.mirror.aliyuncs.com"] }json文件中的地址就是刚才的那个加速器地址
-
重启docker服务,输入命令
docker info,查看是否配置成功,如果镜像仓库显示有如下内容,则配置成功。Registry Mirrors: https://tpqjuvmc.mirror.aliyuncs.com/ Live Restore Enabled: false [root@localhost hk]# docker info Client: Debug Mode: false Server: Containers: 1 Running: 0 Paused: 0 Stopped: 1 Images: 2 Server Version: 19.03.5-rc1 Storage Driver: overlay2 Backing Filesystem: xfs Supports d_type: true Native Overlay Diff: true Logging Driver: json-file Cgroup Driver: cgroupfs Plugins: Volume: local Network: bridge host ipvlan macvlan null overlay Log: awslogs fluentd gcplogs gelf journald json-file local logentries splunk syslog Swarm: inactive Runtimes: runc Default Runtime: runc Init Binary: docker-init containerd version: 894b81a4b802e4eb2a91d1ce216b8817763c29fb runc version: 425e105d5a03fabd737a126ad93d62a9eeede87f init version: fec3683 Security Options: seccomp Profile: default Kernel Version: 4.18.0-80.11.2.el8_0.x86_64 Operating System: CentOS Linux 8 (Core) OSType: linux Architecture: x86_64 CPUs: 1 Total Memory: 1.764GiB Name: localhost.localdomain ID: NZSO:7CA4:2BJQ:WGVL:C32R:LWOI:B5YF:4LO4:4V6P:FQJJ:Z765:DYSZ Docker Root Dir: /var/lib/docker Debug Mode: false Registry: https://index.docker.io/v1/ Labels: Experimental: false Insecure Registries: 127.0.0.0/8 Registry Mirrors: https://tpqjuvmc.mirror.aliyuncs.com/ #如果这里显示这里刚才的配置的地址,则配置成功 Live Restore Enabled: false