二、数据准备
1)下载图片
图片来源于ImageNet中的鲤鱼分类,下载地址:https://pan.baidu.com/s/1Ry0ywIXVInGxeHi3uu608g 提取码: wib3
在桌面新建文件夹目标检测,把下载好的压缩文件n01440764.tar放到其中,并解压
2)选择图片
在此数据集中,大部分图片都较为清晰,但是有极少数图片像素点少,不清晰。像素点少的图片不利于模型训练或模型测试,选出部分图片文件,在目标检测路径下输入jupyter notebook,新建一个get_some_qualified_images的文件:

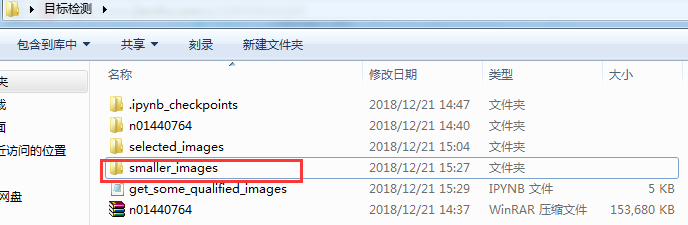
代码运行完成后,在桌面的目标检测文件夹中,会有一个selected_images文件夹,如下图所示:
import os
import random
from PIL import Image
import shutil

#获取1000张图片中随机选出数量为sample_number*2的一部分图片的路径
def get_some_imagePath(dirPath, sample_number):
    fileName_list = os.listdir(dirPath)
    all_filePath_list = [ os.path.join(dirPath, fileName) for fileName in fileName_list ]
    all_imagePath_list = [ filePath for filePath in all_filePath_list if '.jpg' in filePath ]
    some_filePath_list = random.sample( all_filePath_list, k=sample_number * 2)
    return some_filePath_list

#获取一部分像素足够,即长,宽都大于300的图片
def get_some_qualified_images(dirPath, sample_number, new_dirPath):
    some_imagePath_list = get_some_imagePath(dirPath, sample_number)
    if not os.path.isdir(new_dirPath):
        os.mkdir(new_dirPath)

    i = 0
    for imagePath in some_imagePath_list:
        image = Image.open(imagePath)
        width, height = image.size
        if width > 300 and height > 300:
            i += 1
            new_imagePath = 'selected_images/%03d.jpg' % i
            #在处理图像的时候常常需要将一个图像复制到另一个文件夹中,Python可以很方便的利用shutil.copy(src,dst)函数实现这个操作
            #返回复制图像的文件路径
            shutil.copy( imagePath, new_imagePath)
        if i == sample_number:
            break

#获取数量为100的合格样本存放到selected_images文件夹中
get_some_qualified_images('n01440764', 100, 'selected_images')

3)缩小图片
前面我们选出了100张像素足够的图片存放在selected_images文件夹中,即淘汰了像素过小的图片。接着我们实现将像素过大的图片做缩小
import os
from PIL import Image

def get_small_images(dirPath, new_dirPath):
    fileName_list = os.listdir(dirPath)
    filePath_list = [os.path.join(dirPath, fileName) for fileName in fileName_list]
    imagePath_list = [filePath for filePath in filePath_list if '.jpg' in filePath]

    if not os.path.isdir(new_dirPath):
        os.mkdir(new_dirPath)

    for imagePath in imagePath_list:
        image = Image.open( imagePath )
        width, height = image.size
        imageName = imagePath.split('\')[-1]
        save_path = os.path.join(new_dirPath, imageName)
        if width >= 600 and height >= 600:
            minification = min(width, height) // 300 #缩小倍数
            new_width = width // minification
            new_height = height // minification
            resized_image = image.resize( (new_width, new_height),Image.ANTIALIAS )
            print('图片%s由原来的宽%d,高%d,缩小为宽%d,高%d' % (imageName, width, height, new_width, new_height))
            resized_image.save(save_path)

        else:
            image.save(save_path)

get_small_images('selected_images', 'smaller_images')
4)给图片打标签
使用打标签工具LabelImg,下载页面链接:https://tzutalin.github.io/labelImg/

下载后解压,打开:

在输入法为英文输入的情况下,按键盘上的w键则可以开始绘制方框,方框会框住图片中的物体。完成绘制方框后,还需要为方框标上类别,如下图所示。
注意:每完成一张图的打标签,一定要记得保存!!!,初次使用可以在edit选项中设置正方形和矩形框:


在本文演示中,需要给图片中的鲤鱼和人脸2个类别打标签。鲤鱼的标签名叫做fish,人脸的标签名叫human_face,打标签的结果如上图所示
注意:用方框框住物体时,尽量框住物体的所有部位,例如本文中的鱼,鱼鳍是一个重要特征。保证框住物体所有部位的情况下,也不要使方框四周留出过多空白。用LabelImg软件打标签会给每张图片产生对应的xml文件
还有:打标签很耗时间!!!
每次打完标签,会生成对应的xml数据,感兴趣的可以查看一下某个xml文件,其中记录了标签及bounding box坐标:

5)xml转csv
xml转csv的意思是,将xml文件中的信息整合到csv文件中,其中利用的是xml模块
import os
import pandas as pd
import xml.etree.ElementTree as ET
from sklearn.model_selection import train_test_split

def xmlPath_list_to_df(xmlPath_list):
    xmlContent_list = []
    for xmlPath in xmlPath_list:
        print(xmlPath)
        tree = ET.parse(xmlPath)
        root = tree.getroot()

        for member in root.findall('object'):
            value = ( root.find('filename').text,#文件名
                     int( root.find('size')[0].text),#width
                     int( root.find('size')[1].text),#height
                     member[0].text,#标签
                     int( member[4][0].text),#xmin
                     int( member[4][1].text),#ymin
                     int( member[4][2].text),#xmax
                     int( member[4][3].text)#ymax
                    )
            xmlContent_list.append(value)

    column_name = ['filename', 'width', 'height', 'class', 'xmin', 'ymin', 'xmax', 'ymax']

    xmlContent_df = pd.DataFrame( xmlContent_list, columns = column_name )

    return xmlContent_df

def dirPath_to_csv(dirPath):
    fileName_list = os.listdir(dirPath)
    all_xmlPath_list = [os.path.join(dirPath, fileName) for fileName in fileName_list if '.xml' in fileName]
    train_xmlPath_list, test_xmlPath_list = train_test_split(all_xmlPath_list, test_size=0.1, random_state=1)
    train_df = xmlPath_list_to_df( train_xmlPath_list)
    train_df.to_csv('train.csv')
    print('成功产生文件train.csv,训练集共有%d张图片' % len(train_xmlPath_list) )

    test_df = xmlPath_list_to_df(test_xmlPath_list)
    test_df.to_csv('test.csv')
    print('成功产生文件test.csv,测试集共有%d张图片' % len(test_xmlPath_list) )

dirPath_to_csv('smaller_images')
将函数train_test_split的参数random_state的值设为1,这样每次划分的训练集和测试集总是相同。如果不设置此参数,则每次划分的训练集和测试集不同。上面一段代码的运行结果如下:

我们以train.csv文件来看看xml转换为csv后的信息:

6)csv转tfrecord
由于下面的代码我们需要模块
from object_detection.utils import dataset_util
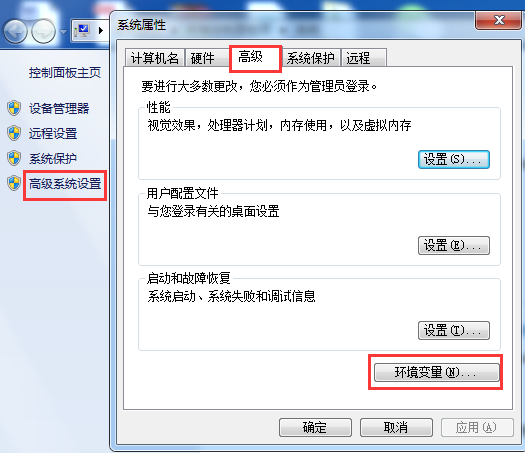
该模块是我们在Tensorflow object detection API 搭建物体识别模型(一)中下载的,要想使用该模块,我们需要添加环境变量PATHPATH。方法如下:右键计算机->属性
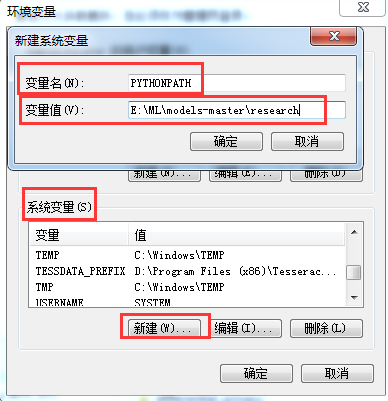
其中变量值包含下载的objec_detection路径及slim路径,如E:MLmodels-master esearch;E:MLmodels-master esearchslim
#csv转tfrecords
import os
import pandas as pd
import tensorflow as tf
from object_detection.utils import dataset_util
import shutil

def csv2tfrecord( csv_path, imageDir_path, tfrecord_path):
    objectInfo_df = pd.read_csv(csv_path)
    tfrecord_writer = tf.python_io.TFRecordWriter(tfrecord_path)
    for filename, group in objectInfo_df.groupby('filename'):
        height = group.iloc[0]['height']
        width = group.iloc[0]['width']
        filename_bytes = filename.encode('utf-8')
        image_path = os.path.join( imageDir_path, filename)

        with open(image_path, 'rb') as file:
            encoded_jpg = file.read()

        image_format = b'jpg'
        xmin_list = list(group['xmin'] / width )
        xmax_list = list(group['xmax'] / width )
        ymin_list = list(group['ymin'] / height )
        ymax_list = list(group['ymax'] / height )

        classText_list = [ classText.encode('utf-8') for classText in group['class']]
        classLabel_list = [ classText_to_classLabel(classText) for classText in group['class']]

        tf_example = tf.train.Example( features=tf.train.Features(
                        feature = {
                            'image/height' : dataset_util.int64_feature(height),
                            'image/width'  : dataset_util.int64_feature(width),
                            'image/filename' : dataset_util.bytes_feature(filename_bytes),
                            'image/source_id' : dataset_util.bytes_feature(filename_bytes),
                            'image/encoded' : dataset_util.bytes_feature(encoded_jpg),
                            'image/format' : dataset_util.bytes_feature(image_format),
                            'image/object/bbox/xmin' : dataset_util.float_list_feature(xmin_list),
                            'image/object/bbox/xmax' : dataset_util.float_list_feature(xmax_list),
                            'image/object/bbox/ymin' : dataset_util.float_list_feature(ymin_list),
                            'image/object/bbox/ymax' : dataset_util.float_list_feature(ymax_list),
                            'image/object/class/text' : dataset_util.bytes_list_feature(classText_list),
                            'image/object/class/label' : dataset_util.int64_list_feature(classLabel_list),

                        }))
        tfrecord_writer.write(tf_example.SerializeToString())

    tfrecord_writer.close()
    print('成功产生tfrecord文件,保存在路径:%s' % tfrecord_path)

#如果训练自己的模型,目标检测类别不同,需要修改此处
def classText_to_classLabel(row_label):
    if row_label == 'fish':
        return 1
    elif row_label == 'human_face':
        return 2
    else:
        return None

dir_name = 'training'
if not os.path.isdir(dir_name):
    os.mkdir(dir_name)

csv2tfrecord('train.csv', 'smaller_images', 'training/train.tfrecord')
csv2tfrecord('test.csv', 'smaller_images', 'training/test.tfrecord')
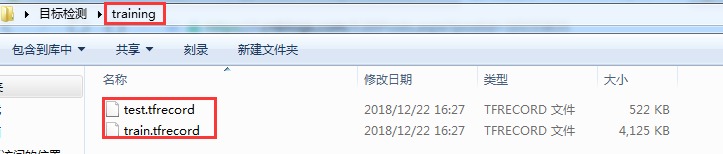
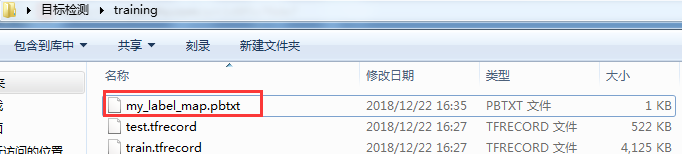
运行上面的代码,目标检测文件夹中会产生一个文件夹training,如下图所示:
7)编写pbtxt文件
在目标检测的文件夹training中,创建文本文件my_label_map.pbtxt。复制下面一段内容到文本文件my_label_map.pbtxt中:
item {
    name : "fish"
    id : 1
}
item {
    name : "human_face"
    id : 2
}
8)编写配置文件
可以在object_detection文件夹中的samples/config路径下,找到原生配置文件ssdlite_mobilenet_v2_coco.config,先复制1份到桌面文件目标检测的文件夹training中,并做如下修改:
- 第9行的num_classes,对于本文来说,此数设置为
2 - 第143行的batch_size,对于本文来说,此数设置为
5,读者根据自己的电脑配置,可以调高或者调低 - 第177行input_path设置成
"training/train.tfrecord" - 第179行label_map_path设置成
"training/my_label_map.pbtxt" - 第191行input_path设置成
"training/test.tfrecord" - 第193行label_map_path设置成
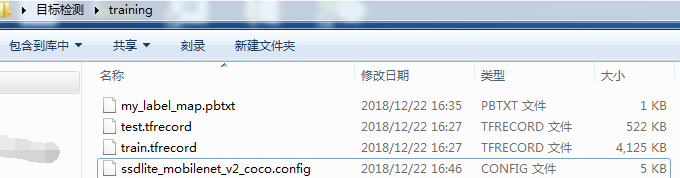
"training/my_label_map.pbtxt" - 第158、159这2行需要删除
修改配置文件ssdlite_mobilenet_v2_coco.config并保存后,此时文件夹training中有4个文件,如下图所示:
9)模型训练