Php安装
一、安装准备
1、Php依赖包
[root@Lnmp tools]# yum install -y zlib libxml libjpeg freetype libpng gd curl libiconv zlib-devel libxml2-devel libjpeg-devel freetype-devel libpng-devel gd-devel curl-devel
[root@Lnmp tools]# rpm -qa zlib libxml libjpeg freetype libpng gd curl libiconv zlib-devel libxml2-devel libjpeg-devel freetype-devel libpng-devel gd-devel curl-devel #检查
需要安装一个字符集转换库
[root@Lnmp tools]# tar zxf libiconv-1.14.tar.gz
[root@Lnmp tools]# cd libiconv-1.14
[root@Lnmp libiconv-1.14]# ./configure --prefix=/usr/local/libiconv
[root@Lnmp libiconv-1.14]# make
[root@Lnmp libiconv-1.14]# make install
另外需要安装一个加密的库
[root@Lnmp tools]# wget http://downloads.sourceforge.net/mcrypt/libmcrypt-2.5.8.tar.gz?modtime=1171868460&big_mirror=0
[root@Lnmp tools]# tar zxf libmcrypt-2.5.8.tar.gz
[root@Lnmp tools]# cd libmcrypt-2.5.8
[root@Lnmp libmcrypt-2.5.8]# ./configure
[root@Lnmp libmcrypt-2.5.8]# make
[root@Lnmp libmcrypt-2.5.8]# make install
[root@Lnmp libmcrypt-2.5.8]# sleep 2
[root@Lnmp libmcrypt-2.5.8]# ./configure --enable-ltdl-install
[root@Lnmp libmcrypt-2.5.8]# make
[root@Lnmp libmcrypt-2.5.8]# make install
#不安装也没有什么问题
安装mhash
[root@Lnmp tools]# wget "http://downloads.sourceforge.net/mhash/mhash-0.9.9.9.tar.gz?modtime=1175740843&big_mirror=0"
[root@Lnmp tools]# tar zxf mhash-0.9.9.9.tar.gz
[root@Lnmp tools]# cd mhash-0.9.9.9
[root@Lnmp mhash-0.9.9.9]# ./configure
[root@Lnmp mhash-0.9.9.9]# make
[root@Lnmp mhash-0.9.9.9]# make install
[root@Lnmp mhash-0.9.9.9]# sleep 2
[root@Lnmp tools]# ln -s /usr/local/lib64/libmcrypt.la /usr/lib64/libmcrypt.la
[root@Lnmp tools]# ln -s /usr/local/lib64/libmcrypt.so /usr/lib64/libmcrypt.so
[root@Lnmp tools]# ln -s /usr/local/lib64/libmcrypt.so.4 /usr/lib64/libmcrypt.so.4
[root@Lnmp tools]# ln -s /usr/local/lib64/libmcrypt.so.4.4.8 /usr/lib64/libmcrypt.so.4.4.8
[root@Lnmp tools]# ln -s /usr/local/lib64/libmhash.a /usr/lib64/libmash.a
[root@Lnmp tools]# ln -s /usr/local/lib64/libmhash.la /usr/lib64/libmash.la
[root@Lnmp tools]# ln -s /usr/local/lib64/libmhash.so /usr/lib64/libmash.so
[root@Lnmp tools]# ln -s /usr/local/lib64/libmhash.so.2 /usr/lib64/libmash.so.2
[root@Lnmp tools]# ln -s /usr/local/lib64/libmhash.so.2.0.1 /usr/lib64/libmash.so.2.0.1
[root@Lnmp tools]# ln -s /usr/local/lib64/libmcrypt-config /usr/bin/libmcrypt-config
[root@Lnmp tools]# wget "http://downloads.sourceforge.net/mcrypt/mcrypt-2.6.8.tar.gz?modtime=1194463373&big_mirror=0"
[root@Lnmp tools]# tar zxf mcrypt-2.6.8.tar.gz
[root@Lnmp tools]# cd mcrypt-2.6.8
[root@Lnmp mcrypt-2.6.8]# /sbin/ldconfig
[root@Lnmp mcrypt-2.6.8]# ./configure LD_LIBRARY_PATH=/usr/local/lib
[root@Lnmp mcrypt-2.6.8]# make
[root@Lnmp mcrypt-2.6.8]# make install
[root@Lnmp mcrypt-2.6.8]# cd ../
[root@Lnmp tools]# sleep 2
二、安装PHP
[root@Lnmp tools]# tar xf php-5.3.27.tar.gz
[root@Lnmp tools]# cd php-5.3.27
[root@Lnmp php-5.3.27]# yum install libxslt* -y
[root@Lnmp php-5.3.27]# ./configure --prefix=/application/php5.3.27 --with-mysql=/application/mysql --with-iconv-dir=/usr/local/libiconv --with-freetype-dir --with-jpeg-dir --with-png-dir --with-zlib --with-libxml-dir=/usr --enable-xml --disable-rpath -enable-safe-mode --enable-bcmath --enable-shmop --enable-sysvsem --enable-inline-optimization --with-curl --with-curlwrappers --enable-mbregex --enable-fpm --enable-mbstring --with-mcrypt --with-gd --enable-gd-native-ttf --with-openssl --with-mhash --enable-pcntl --enable-sockets --with-xmlrpc --enable-zip enable-soap --enable-short-tags --enable-zend-multibyte --enable-static --with-xsl --with-fpm-user=nginx --with-fpm-group=nginx --enable-ftp
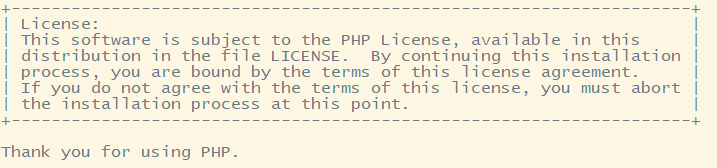
出现Thank you for using PHP.说明编译成功
[root@Lnmp php-5.3.27]# make
#如果报下面的错误是因为libltdl没有编译安装
/usr/bin/ld: cannot find -lltdl
解决方法:
#cd libmcrypt-2.5.8/
#cd libltdl/
#./configure --enable-ltdl-install
#make && make install
[root@Lnmp php-5.3.27]# make install
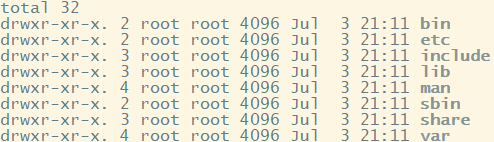
[root@Lnmp php-5.3.27]# ln -s /application/php5.3.27/ /application/php
[root@Lnmp php-5.3.27]# ll /application/php/
三、配置PHP
[root@Lnmp php-5.3.27]# cp php.ini-production /application/php/lib/php.ini
[root@Lnmp php-5.3.27]# cd /application/php/etc/
[root@Lnmp etc]# cp php-fpm.conf.default php-fpm.conf
[root@Lnmp etc]# vim php-fpm.conf
25 pid = /app/logs/php-fpm.pid
32 error_log = /app/logs/php-fpm.log
50 log_level = error
93 rlimit_files = 32768
108 events.mechanism = epoll
162 listen.owner = nginx
163 listen.group = nginx
217 pm.max_children = 1024
222 pm.start_servers = 16
227 pm.min_spare_servers = 5
232 pm.max_spare_servers = 20
237 pm.process_idle_timeout = 15s;
243 pm.max_requests = 2048
423 slowlog = /app/logs/$pool.log.slow
429 request_slowlog_timeout = 10
506 php_admin_value[sendmail_path] = /usr/sbin/sendmail -t -i -f www@my.domain.com
[root@Lnmp etc]# mkdir -p /app/logs #创建日志目录
[root@Lnmp etc]# /application/php/sbin/php-fpm -t #检查语法
[root@Lnmp etc]# /application/php/sbin/php-fpm #启动服务
PHP安装完毕
将所有服务启动放在/etc/rc.local下(开机自启动)
[root@Lnmp etc]# vim /etc/rc.local
/etc/init.d/mysqld start
/application/php/sbin/php-fpm
/application/nginx/sbin/nginx
四、PHP整合Nginx
在做LNMP之前配置过nginx
在这里配置一下Nginx
[root@Lnmp conf]# cd /application/nginx/conf/
[root@Lnmp conf]# vim nginx.conf
1 error_log logs/error.log error;
2 worker_processes 2;
3 events {
4 worker_connections 1024;
5 }
6 http {
7 include mime.types;
8 default_type application/octet-stream;
9 sendfile on;
10 keepalive_timeout 65;
11 log_format main '$remote_addr - $remote_user [$time_local] "$request"'
12 '$status $body_bytes_sent "$http_referer"'
13 '"$http_user_agent" "$http_x_forwarded_for"';
14 include extra/www.conf;
15 include extra/bbs.conf;
16 include extra/blog.conf;
17 }
[root@Lnmp conf]# mkdir extra
[root@Lnmp conf]# cd extra/
[root@Lnmp conf]# touch bbs.conf blog.conf www.conf
[root@Lnmp extra]# vim bbs.conf
server{
listen 80;
server_name bbs.zixia.com;
root html/bbs;
index index.php index.html index.htm;
access_log logs/www_access.log;
location ~ .*.(php|php5)?$
{
fastcgi_pass 127.0.0.1:9000;
fastcgi_index index.php;
include fastcgi.conf;
}
}
[root@Lnmp extra]# vim blog.conf
server {
listen 80;
server_name blog.zixia.com;
root html/blog;
index index.html index.htm;
}
[root@Lnmp extra]# vim www.conf
server {
listen 80;
server_name www.zixia.com;
root html/www;
index index.html index.htm;
access_log logs/www_access.log main;
}
[root@Lnmp extra]# cd ../../html/bbs/
[root@Lnmp bbs]# vim index.php
<?php
phpinfo();
?>
修改windows下C:WindowsSystem32driversetchosts文件
将地址与ip写进hosts文件
例:
![]()
浏览器访问bbs.zixia.com
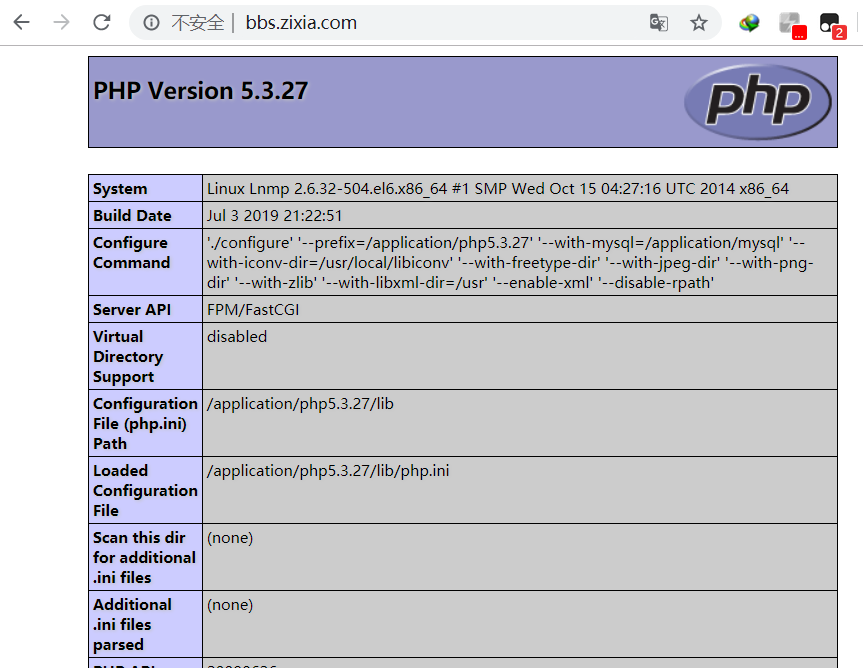
到此为止表示PHP安装成功。
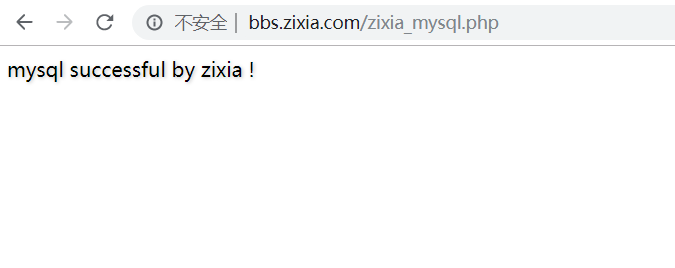
测试是否可以连接Mysql
[root@Lnmp bbs]# vim zixia_mysql.php
<?php
$link_id=mysql_connect('localhost','root','123456') or mysql_error();
if($link_id){
echo "mysql successful by zixia !
";
}else{
echo "mysql_error()";
}
?>
到此为止LNMP安装完毕。