其实很简单,分三步:
1.在drawable中创建文件checkbox_selector.xml:
<?xml version="1.0" encoding="utf-8"?>
<selector xmlns:android="http://schemas.android.com/apk/res/android">
	<item android:state_checked="true"
  		android:drawable="@drawable/checkbox_ok" /><!--设置选中图片-->
	<item android:state_checked="false"
 		android:drawable="@drawable/checkbox_empty" /><!--设置未选中图片-->
</selector>
2.
在values中创建styles.xml:
<?xml version="1.0" encoding="utf-8"?>

<resources>

  	<style name="MyCheckBox" parent="@android:style/Widget.CompoundButton.CheckBox">

  	 <item name="android:button">@drawable/checkbox_selector</item>

  	 <item name="android:paddingLeft">25.0dip</item>

  	 <item name="android:maxHeight">10.0dip</item>

  	</style>

</resources>
3.
在你的CheckBox中添加属性:
<CheckBox
        android:id="@+id/check"
        android:layout_width="20dp"
        android:layout_height="20dp"
        android:layout_marginLeft="5dp"
        style="@style/MyCheckBox"
        />
搞定!这样就把你的checkbox换成你设置的那两张图片了
1.首先在drawable文件夹中添加drawable文件checkbox_style.xml。
- <?xml version="1.0" encoding="utf-8"?>
- <selector xmlns:android="http://schemas.android.com/apk/res/android">
- <item android:drawable="@drawable/checkbox_pressed" android:state_checked="true"/>
- <item android:drawable="@drawable/checkbox_normal" android:state_checked="false"/>
- <item android:drawable="@drawable/checkbox_normal"/>
- </selector>
2.在values文件夹下的styles.xml文件中添加CustomCheckboxTheme样式。
- <style name="CustomCheckboxTheme" parent="@android:style/Widget.CompoundButton.CheckBox">
- <item name="android:button">@drawable/checkbox_style</item>
- </style>
3.在布局文件中使用CustomCheckboxTheme样式。
- <CheckBox
- android:id="@+id/select_all"
- android:layout_width="wrap_content"
- android:layout_height="wrap_content"
- style="@style/CustomCheckboxTheme" />
使用到的图片资源
 checkbox_normal.png
 checkbox_pressed.png
在使用Android的Preference,有时为了让我们的界面更加美观,我们会自定义自己的Preference。今天就主要说一下怎样自定义CheckBoxPreference的CheckBox按钮。
系统默认CheckBoxPreference的CheckBox样式
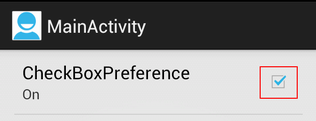
自定义后的CheckBox样式

其实,关键的一步就是指定CheckBoxPreference的android:widgetLayout属性,详细步骤就不说了,下面直接上代码,很简单的。
1./res/xml/my_preference.xml
- <?xml version="1.0" encoding="utf-8"?>
- <PreferenceScreen xmlns:android="http://schemas.android.com/apk/res/android" >
- <CheckBoxPreference
- android:key="cbp"
- android:summaryOff="Off"
- android:summaryOn="On"
- android:title="CheckBoxPreference"
- android:widgetLayout="@layout/my_checkbox" />
- </PreferenceScreen>
2./res/layout/my_checkbox.xml
- <?xml version="1.0" encoding="utf-8"?>
- <CheckBox xmlns:android="http://schemas.android.com/apk/res/android"
- android:id="@+android:id/checkbox"
- android:layout_width="wrap_content"
- android:layout_height="wrap_content"
- android:button="@drawable/checkbox_checked_style"
- android:clickable="false"
- android:focusable="false" />
3./res/drawable/checkbox_checked_style.xml
- <?xml version="1.0" encoding="utf-8"?>
- <selector xmlns:android="http://schemas.android.com/apk/res/android">
- <item android:drawable="@drawable/icon_checkbox_unchecked" android:state_checked="false"/>
- <item android:drawable="@drawable/icon_checkbox_checked" android:state_checked="true"/>
- </selector>
4.MainActivity.java注意要继承PreferenceActivity
- public class MainActivity extends PreferenceActivity {
- @Override
- public void onCreate(Bundle savedInstanceState) {
- super.onCreate(savedInstanceState);
- addPreferencesFromResource(R.xml.my_preference); //这个方法已过时!
- }
- @Override
- public boolean onCreateOptionsMenu(Menu menu) {
- getMenuInflater().inflate(R.menu.activity_main, menu);
- return true;
- }
- }