istio 创建pod的时候会给默认自动注入的命名空间 注入sidecar ,sidecar中包含envoy组件和pilot-agent组件
,这两个共同组成sidecar。
这次的目的就是为了观察istio 注入的过程。
首先我们新创建一个test 命名空间
[root@istio-master test]# kubectl create namespace test
namespace/test created
写一个nginx.yaml
[root@istio-master test]# vi nginx.yaml
[root@istio-master test]# cat nginx.yaml
apiVersion: apps/v1
kind: Deployment
metadata:
  name: test-nginx
  labels:
    name: test-nginx

spec:
  replicas: 1
  selector:
    matchLabels:
      app: test-nginx
  template:
    metadata:
      labels:
        app: test-nginx
    spec:
      containers:
      - name: nginx
        image: nginx:1.14-alpine
        imagePullPolicy: IfNotPresent
        ports:
        - containerPort: 80
执行这个yml文件,创建一个nginx的pod
[root@istio-master test]# kubectl create -f nginx.yaml -n test
deployment.apps/test-nginx created
查看这个pod已经创建完毕
[root@istio-master test]# kubectl get po -n test
NAME                         READY   STATUS    RESTARTS   AGE
test-nginx-9ddbd4d55-c676x   1/1     Running   0          22s
对这个pod进行手动注入sidecar。并且观察pod的变化
[root@istio-master test]# istioctl kube-inject -f nginx.yaml | kubectl apply -f - -n test
Warning: kubectl apply should be used on resource created by either kubectl create --save-config or kubectl apply
deployment.apps/test-nginx configured
[root@istio-master test]# kubectl get po -n test
NAME                          READY   STATUS            RESTARTS   AGE
test-nginx-7f945c7759-4g47d   0/2     PodInitializing   0          7s
test-nginx-9ddbd4d55-c676x    1/1     Running           0          11m
[root@istio-master test]# kubectl get po -n test
NAME                          READY   STATUS            RESTARTS   AGE
test-nginx-7f945c7759-4g47d   0/2     PodInitializing   0          10s
test-nginx-9ddbd4d55-c676x    1/1     Running           0          11m
[root@istio-master test]# kubectl get po -n test
NAME                          READY   STATUS        RESTARTS   AGE
test-nginx-7f945c7759-4g47d   2/2     Running       0          17s
test-nginx-9ddbd4d55-c676x    0/1     Terminating   0          11m
[root@istio-master test]# kubectl get po -n test
NAME                          READY   STATUS        RESTARTS   AGE
test-nginx-7f945c7759-4g47d   2/2     Running       0          23s
test-nginx-9ddbd4d55-c676x    0/1     Terminating   0          11m
[root@istio-master test]# kubectl get po -n test
NAME                          READY   STATUS    RESTARTS   AGE
可以观察到pod的变化 由最初的一个消失,变成两个带有两个container的pod,那么这个pod到底经历了什么呢
- 我们可以先观察这个注入后yml文件
- 在观察注入后的pod的详情
第一步观察 注入后的yml 和之前发生了什么变化
[root@istio-master test]# istioctl kube-inject -f nginx.yaml > nginx-inject.yaml
然后观察这个yml文件,因为这个文件很多我就截图来看下yml多了什么东西
这个截图还是我们原来的nginx 的镜像没有太大变化

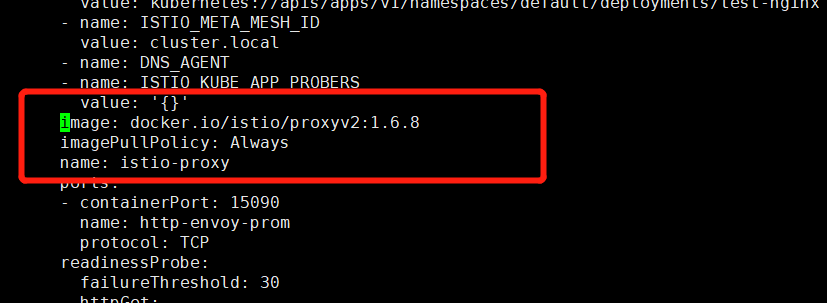
下面这个是新生成的istio-proxy
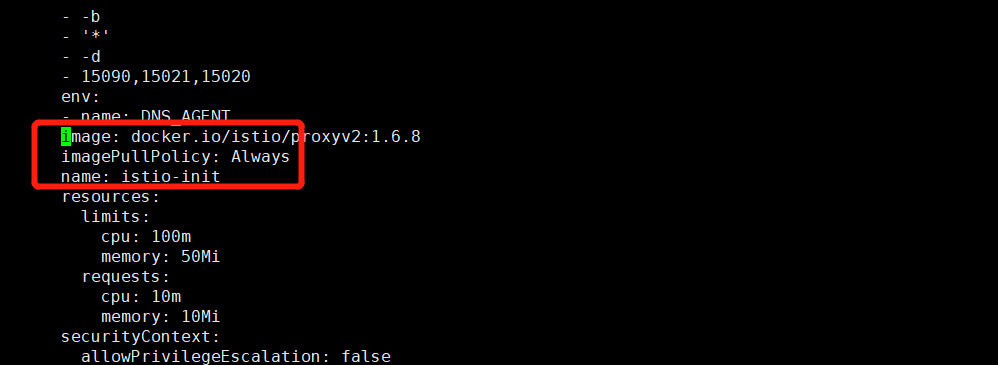
这个镜像是一个isito-init 这个只是用于给nginx和isito-proxy创建一个网络环境配置ip地址然后就消失了,并不会占用资源
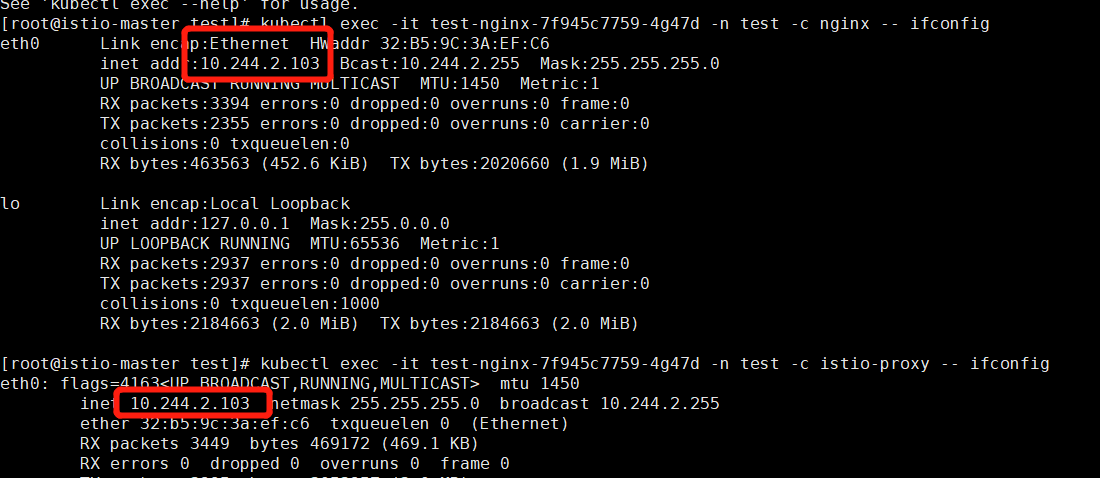
为了证明 ngnix 和 isito-proxy 在同一个网络环境,我们再进入pod中的container 看看是否一样
我们知道原来的nginx 只有一个 80 端口。那么现在肯定增加了好几个端口,来看看吧
[root@istio-master test]# kubectl exec -it test-nginx-7f945c7759-4g47d -n test -c nginx -- netstat -ntlp
Active Internet connections (only servers)
Proto Recv-Q Send-Q Local Address           Foreign Address         State       PID/Program name
tcp        0      0 0.0.0.0:15021           0.0.0.0:*               LISTEN      -
tcp        0      0 0.0.0.0:80              0.0.0.0:*               LISTEN      1/nginx: master pro
tcp        0      0 0.0.0.0:15090           0.0.0.0:*               LISTEN      -
tcp        0      0 127.0.0.1:15000         0.0.0.0:*               LISTEN      -
tcp        0      0 0.0.0.0:15001           0.0.0.0:*               LISTEN      -
tcp        0      0 0.0.0.0:15006           0.0.0.0:*               LISTEN      -
tcp        0      0 :::15020                :::*                    LISTEN      -
增加了好多 用来控制流量以及与代理进行通信的端口,这些都是istio-init 这个pod 做的事情