这篇随笔会陆续地更新下去,用于汇集一些关于Webpack的初学跳坑总结还有VueJS的基础知识。
Webpack部分
① 快速建立一个Webpack-Vue项目开发环境(4.39.1-2019/08/07)
Step 1 安装 Webpack:
Step 2 Webpack 4 需要再安装 Webpack-Cli:
| npm install webpack-cli -g |
Step 3 快速初始化一个Vue项目
安装Vue和Webpack-dev-server
vue@2.6.10
webpack-cli@3.3.6
webpack-dev-server@3.7.2
这里安装webpack-dev-server,目的是方便调试,其热加载工具可以侦测项目文件夹下的文件变动,相应地进行自动刷新,当然,还需要手动配置,后面会讲到。
| npm install webpack-dev-server --save |
项目文件夹下安装,webpack,webpack-cli
| npm install webpack --save |
webpack现在的版本需要这样安装webpack-cli
| npm install -D webpack-cli --save |
安装vue-loader,同时还要安装vue-template-complier
| npm install vue-loader vue-template-compiler --save |
Step 4 开始动工一个项目
创建文件夹目录和文件,例如项目根目录叫做webpack-test,其下创建2个文件夹:dist/、src/,创建3个文件:index.html、packge.json、webpack.config.js,src/下创建main.js、templates/以及templates/main.vue,具体文件关系如下图:

按照如下编辑文件内容:
| 1 |
| 2 |
| 3 |
| 4 |
| 5 |
| 6 |
| 7 |
| 8 |
| 9 |
| 10 |
| 11 |
| 12 |
| 13 |
| <!DOCTYPE html> |
| <html lang="en"> |
| <head> |
| <meta charset="UTF-8"> |
| <meta name="viewport" content="width=device-width, initial-scale=1.0"> |
| <meta http-equiv="X-UA-Compatible" content="ie=edge"> |
| <title>webpack-test</title> |
| </head> |
| <body> |
| <div id="app"></div> |
| </body> |
| <script src="./dist/build.js" type="text/javascript"></script> |
| </html> |
| 1 |
| 2 |
| 3 |
| 4 |
| 5 |
| 6 |
| 7 |
| 8 |
| 9 |
| 10 |
| 11 |
| 12 |
| 13 |
| 14 |
| 15 |
| 16 |
| 17 |
| 18 |
| 19 |
| 20 |
| 21 |
| 22 |
| 23 |
| { |
| "name": "webpack-test", |
| "version": "1.0.0", |
| "description": "webpack-test", |
| "main": "index.js", |
| "scripts": { |
| "dev": "webpack-dev-server --open --hot --mode development", |
| "build": "webpack --progress --hide-modules --mode production" |
| }, |
| "keywords": [], |
| "author": "", |
| "license": "ISC", |
| "dependencies": { |
| "vue": "^2.6.10", |
| "vue-loader": "^15.7.1", |
| "vue-template-compiler": "^2.6.10", |
| "webpack": "^4.39.1", |
| "webpack-dev-server": "^3.7.2" |
| }, |
| "devDependencies": { |
| "webpack-cli": "^3.3.6" |
| } |
| } |
| 1 |
| 2 |
| 3 |
| 4 |
| 5 |
| 6 |
| 7 |
| 8 |
| 9 |
| 10 |
| 11 |
| 12 |
| 13 |
| 14 |
| 15 |
| 16 |
| 17 |
| 18 |
| 19 |
| 20 |
| 21 |
| 22 |
| 23 |
| 24 |
| 25 |
| 26 |
| 27 |
| 28 |
| 29 |
| 30 |
| 31 |
| 32 |
| 33 |
| 34 |
| 35 |
| 36 |
| const path = require("path"); |
| // vue-loader |
| const VueLoaderPlugin = require("vue-loader/lib/plugin"); |
| const argvs = require("process").argv; |
| module.exports = { |
| entry: './src/main.js', // 项目的入口文件,webpack会从main.js开始,把所有依赖的js都加载打包 |
| output: { |
| path: path.resolve(__dirname, './dist'), // Webpack 打包目标文件夹 |
| // publicPath: './dist', // webpack-dev-serve 访问路径 |
| // 判断是开发模式还是打包发布模式设置合理的文件路径 |
| publicPath: argvs[argvs.indexOf("--mode")+1] === "development" ? "/dist/" : "./dist/", |
| filename: 'build.js' // 打包后的文件名 |
| }, |
| devServer: { |
| historyApiFallback: true, // 404 则返回到 index.html |
| overlay: true, // html 页面顶层显示报错提示信息 |
| // clientLogLevel: "none" // 减少浏览器控制台 log |
| }, |
| resolve: { |
| alias: { |
| vue$: "vue/dist/vue.esm.js" |
| } |
| }, |
| module: { |
| rules: [ |
| { |
| test: /.vue$/, |
| loader: "vue-loader" |
| } |
| ] |
| }, |
| plugins: [ |
| // 加载 vue-loader |
| new VueLoaderPlugin() |
| ] |
| }; |
| import Vue from "vue"; |
| import appMain from "./templates/main.vue"; |
| new Vue({ |
| "el": "#app", |
| "template": "<app-main/>", |
| "components": { appMain } |
| }) |
| 1 |
| 2 |
| 3 |
| 4 |
| 5 |
| 6 |
| 7 |
| 8 |
| 9 |
| 10 |
| 11 |
| 12 |
| 13 |
| 14 |
| 15 |
| <template> |
| <div class="main"> |
| <p v-text="txt">...</p> |
| </div> |
| </template> |
| <script> |
| export default { |
| "name": "appMain", |
| data () { |
| return { |
| txt: "Hello,Vue!" |
| } |
| } |
| } |
| </script> |
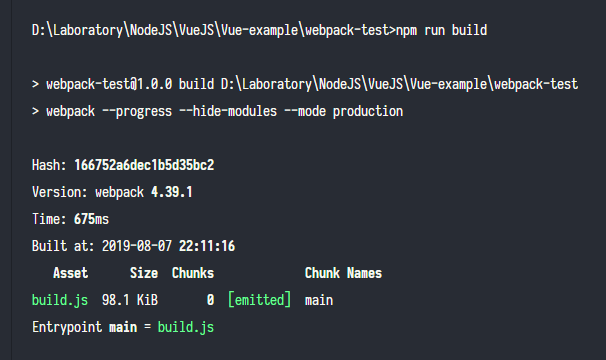
Step 5 webpack 使用
先运行打包看看:
之后便在 dist/ 下打包好一个 build.js 文件
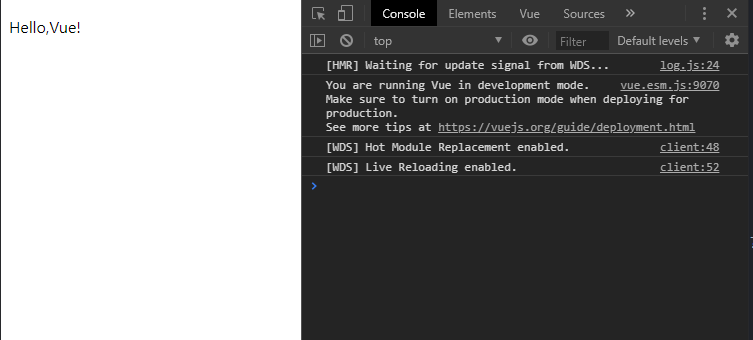
开发模式,热加载,很方便,一旦它监测文件更改,便会热加载,解放了键盘刷新操作,很省心。
之后会开启一个webpack-dev服务,然后默认浏览器跳转到 localhost 页面,不出意外,屏幕上已经打印出了 Hello, Vue! :
②Webpack添加Babel编译器(2019/08/08)
@babel/core@7.5.5
@babel/preset-env@7.5.5
@babel/preset-react@7.0.0
babel-loader@8.0.6
Step 1 安装 BABEL
| npm install @babel/core @babel/preset-env @babel/preset-react babel-loader --save |
等待安装完成后,webpack.config.js中添加babel-loader:
| 1 |
| 2 |
| 3 |
| 4 |
| 5 |
| 6 |
| 7 |
| 8 |
| 9 |
| 10 |
| 11 |
| 12 |
| 13 |
| 14 |
| 15 |
| 16 |
| 17 |
| 18 |
| 19 |
| 20 |
| 21 |
| 22 |
| 23 |
| 24 |
| 25 |
| 26 |
| 27 |
| 28 |
| 29 |
| 30 |
| 31 |
| 32 |
| 33 |
| 34 |
| 35 |
| 36 |
| 37 |
| 38 |
| 39 |
| 40 |
| 41 |
| 42 |
| 43 |
| 44 |
| 45 |
| const path = require("path"); |
| // vue-loader |
| const VueLoaderPlugin = require("vue-loader/lib/plugin"); |
| const argvs = require("process").argv; |
| module.exports = { |
| entry: ['./src/main.js'], // 项目的入口文件,webpack会从main.js开始,把所有依赖的js都加载打包 |
| output: { |
| path: path.resolve(__dirname, './dist'), // Webpack 打包目标文件夹 |
| // publicPath: './dist', // webpack-dev-serve 访问路径 |
| // 判断是开发模式还是打包发布模式设置合理的文件路径 |
| publicPath: argvs[argvs.indexOf("--mode")+1] === "development" ? "/dist/" : "./dist/", |
| filename: 'build.js' // 打包后的文件名 |
| }, |
| devServer: { |
| historyApiFallback: true, // 404 则返回到 index.html |
| overlay: true, // html 页面顶层显示报错提示信息 |
| clientLogLevel: "none" // 减少浏览器控制台 log |
| }, |
| resolve: { |
| alias: { |
| vue$: "vue/dist/vue.esm.js" |
| } |
| }, |
| module: { |
| rules: [ |
| { |
| test: /.vue$/, |
| loader: "vue-loader" |
| }, |
| { // 此处添加 balbel-loader |
| test: /.js$/, |
| use: { |
| loader: "babel-loader", |
| options: { |
| presets: ["@babel/env"] |
| } |
| } |
| } |
| ] |
| }, |
| plugins: [ |
| // 加载 vue-loader |
| new VueLoaderPlugin() |
| ] |
| }; |
Step 2 现在可以大胆地使用ES6的语法了,举例:
| 1 |
| 2 |
| 3 |
| 4 |
| 5 |
| 6 |
| 7 |
| 8 |
| 9 |
| 10 |
| 11 |
| 12 |
| 13 |
| 14 |
| 15 |
| 16 |
| 17 |
| 18 |
| 19 |
| 20 |
| 21 |
| 22 |
| 23 |
| <template> |
| <div class="main"> |
| <span v-for="(l, i) in letters" :key="i" v-text="l"></span> |
| </div> |
| </template> |
| <script> |
| export default { |
| "name": "appMain", |
| "computed": { |
| letters () { |
| const atA = "A".charCodeAt(); |
| const atZ = "Z".charCodeAt(); |
| let arr = []; |
| for (let x=atZ+1; x>atA; arr[x--] = x); |
| return arr.map( num => { |
| return unescape(`%${num.toString(16)}`) |
| }).filter( item => { |
| return item; |
| }); |
| } |
| } |
| } |
| </script> |
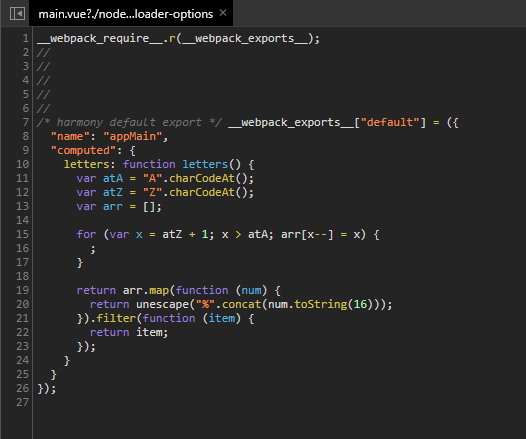
如上vue实现的是遍历出26个英文字母,页面正常显示,查看控制台,babel确实起作用了,转成了ES5:
③单文件组件开发注意的几点:
1.避免打包文件过大,乱成“一锅粥”。
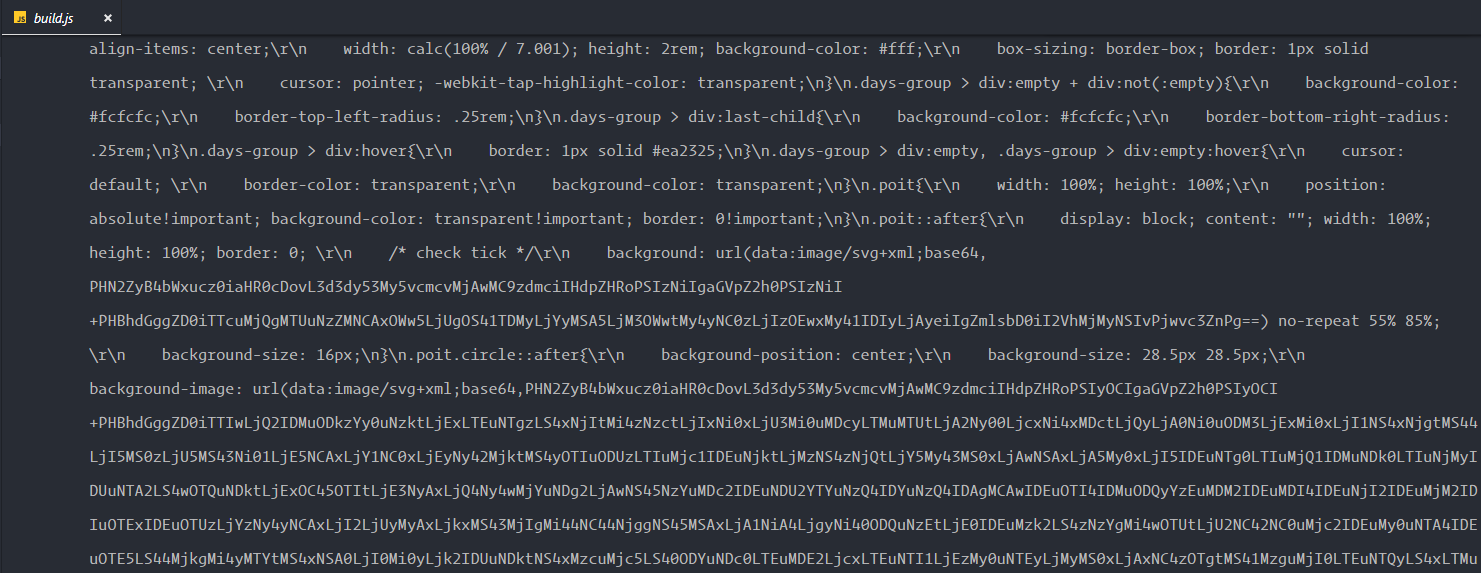
1) vue 单文件内的样式表部分可以全部写在打包文件夹目录之外的一个文件内,然后在index.html引入,否则在打包后出现下面的一些现象,显得代码臃肿:
2) utils等js插件尽量用script标签引入,减少打包过程的时间和打包文件的体积;
3) vue单文件的cssstyle标签内不要留有太多的注释,也是为了限制文件体积,参考 1);
VueJS基础
①单文件组件开发中,子父组件传值问题(2019/08/08)
子 → 父组件传值
方法一:使用 vm.$emit( eventName, […args] )
会在当前实例下触发一个事件,$emit的eventName后面的变量,将会传给Vue绑定的事件的回调函数里面,举个例子,譬如要实现一个多个选项的点击跳转功能:点击某个头像跳转到相应网址:
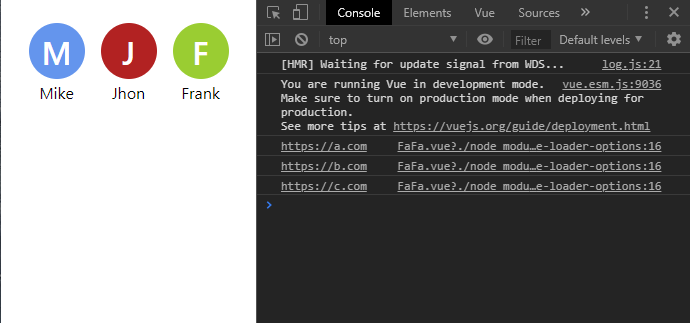
子组件文件定义了头像的整个布局或结构,父组件文件中依赖数组遍历子组件,这时就需要被点击到的子组件传递给父组件其对应的渲染 data
| 1 |
| 2 |
| 3 |
| 4 |
| 5 |
| 6 |
| 7 |
| 8 |
| 9 |
| 10 |
| 11 |
| 12 |
| 13 |
| 14 |
| 15 |
| 16 |
| 17 |
| 18 |
| 19 |
| 20 |
| 21 |
| // 子组件 |
| <template> |
| <!-- 某个子组件被点击后,则会触发父组件的 goto 方法,同时传递渲染这个子组件的 obj --> |
| <div class="ch-ch" :style="{'background-color': obj.color}" @click="$emit('goto', obj)"> |
| <div class="icon"> |
| <span v-text="obj.name.charAt(0)"></span> |
| </div> |
| <div class="label" v-text="obj.name"></div> |
| </div> |
| </template> |
| <script> |
| export default { |
| "name": "chCh", |
| "props": [ "obj" ] |
| } |
| </script> |
| <style> |
| .ch-ch { cursor: pointer; position: relative; display: flex; justify-content: center; align-items: center; margin: 1rem .5rem; width: 3.5rem; height: 3.5rem; border-radius: 50%; } |
| .icon { display: flex; font-size: 2rem; font-weight: 600; color: #fff; } |
| .label { position: absolute; bottom: -1.5rem; left: 0; width: 100%; text-align: center; } |
| </style> |
| 1 |
| 2 |
| 3 |
| 4 |
| 5 |
| 6 |
| 7 |
| 8 |
| 9 |
| 10 |
| 11 |
| 12 |
| 13 |
| 14 |
| 15 |
| 16 |
| 17 |
| 18 |
| 19 |
| 20 |
| 21 |
| 22 |
| 23 |
| 24 |
| 25 |
| 26 |
| 27 |
| 28 |
| 29 |
| 30 |
| 31 |
| 32 |
| 33 |
| 34 |
| 35 |
| 36 |
| 37 |
| 38 |
| // 父组件 |
| <template> |
| <div class="main"> |
| <!-- @goto === v-on:goto --> |
| <ch-ch v-for="item in arr" :key="item.name" :obj="item" @goto="goto"></ch-ch> |
| </div> |
| </template> |
| <script> |
| import chCh from "./chCh.vue"; |
| export default { |
| "name": "faFa", |
| "components": { chCh }, |
| "methods": { |
| // 被子组件触发的方法 |
| goto (data) { |
| console.log(data.site) |
| // window.location.href = data.site; // 跳转到某个网址 |
| } |
| }, |
| data () { |
| return { |
| // 渲染数据 |
| arr: [ |
| { |
| name: "Mike", color: "cornflowerblue", site: "https://a.com" |
| }, { |
| name: "Jhon", color: "firebrick", site: "https://b.com" |
| }, { |
| name: "Frank", color: "yellowgreen", site: "https://c.com" |
| } |
| ] |
| } |
| } |
| } |
| </script> |
| <style> |
| .main { display: flex; justify-content: center; } |
| </style> |
方法二:子组件修改$parent.$data[...],父组件在watch中添加对[...]的watcher:
| 1 |
| 2 |
| 3 |
| 4 |
| 5 |
| 6 |
| 7 |
| 8 |
| 9 |
| 10 |
| 11 |
| 12 |
| 13 |
| 14 |
| 15 |
| 16 |
| 17 |
| 18 |
| 19 |
| 20 |
| 21 |
| 22 |
| 23 |
| 24 |
| 25 |
| 26 |
| // 子组件 |
| <template> |
| <div class="ch-ch" :style="{'background-color': obj.color}" @click="goto(obj)"> |
| <div class="icon"> |
| <span v-text="obj.name.charAt(0)"></span> |
| </div> |
| <div class="label" v-text="obj.name"></div> |
| </div> |
| </template> |
| <script> |
| export default { |
| "name": "chCh", |
| "props": [ "obj" ], |
| "methods": { |
| goto (data) { |
| // 修改父组件的 $data 的值,触发 watcher |
| this.$parent.obj = data; |
| } |
| } |
| } |
| </script> |
| <style> |
| .ch-ch { cursor: pointer; position: relative; display: flex; justify-content: center; align-items: center; margin: 1rem .5rem; width: 3.5rem; height: 3.5rem; border-radius: 50%; } |
| .icon { display: flex; font-size: 2rem; font-weight: 600; color: #fff; } |
| .label { position: absolute; bottom: -1.5rem; left: 0; width: 100%; text-align: center; } |
| </style> |
| 1 |
| 2 |
| 3 |
| 4 |
| 5 |
| 6 |
| 7 |
| 8 |
| 9 |
| 10 |
| 11 |
| 12 |
| 13 |
| 14 |
| 15 |
| 16 |
| 17 |
| 18 |
| 19 |
| 20 |
| 21 |
| 22 |
| 23 |
| 24 |
| 25 |
| 26 |
| 27 |
| 28 |
| 29 |
| 30 |
| 31 |
| 32 |
| 33 |
| 34 |
| 35 |
| 36 |
| 37 |
| 38 |
| // 父组件 |
| <template> |
| <div class="main"> |
| <ch-ch v-for="item in arr" :key="item.name" :obj="item"></ch-ch> |
| </div> |
| </template> |
| <script> |
| import chCh from "./chCh.vue"; |
| export default { |
| "name": "faFa", |
| "components": { chCh }, |
| "watch": { |
| // 添加监测 |
| obj (new_val, old_val) { |
| console.log(new_val.site) |
| } |
| }, |
| data () { |
| return { |
| // 渲染数据 |
| arr: [ |
| { |
| name: "Mike", color: "cornflowerblue", site: "https://a.com" |
| }, { |
| name: "Jhon", color: "firebrick", site: "https://b.com" |
| }, { |
| name: "Frank", color: "yellowgreen", site: "https://c.com" |
| } |
| ], |
| //监测的对象 |
| obj: {} |
| } |
| } |
| } |
| </script> |
| <style> |
| .main { display: flex; justify-content: center; } |
| </style> |
父 → 子组件传值的几种办法
方法一:子组件暴露props,父组件使用v-bind,这个是最常用的方法之一。
方法二:父组件在引用子组件的标签上加入ref="..."属性,然后通过this.$refs[...].$data[---],来传递数据
| 1 |
| 2 |
| 3 |
| 4 |
| 5 |
| 6 |
| 7 |
| 8 |
| 9 |
| 10 |
| 11 |
| 12 |
| 13 |
| 14 |
| 15 |
| 16 |
| // 父组件 |
| <template> |
| <div class="main"> |
| <ch-ch ref="child"></ch-ch> |
| </div> |
| </template> |
| <script> |
| import chCh from "./chCh.vue"; |
| export default { |
| "name": "faFa", |
| "components": { chCh }, |
| mounted () { |
| console.log(this.obj = this.$refs["child"].obj) |
| } |
| } |
| </script> |
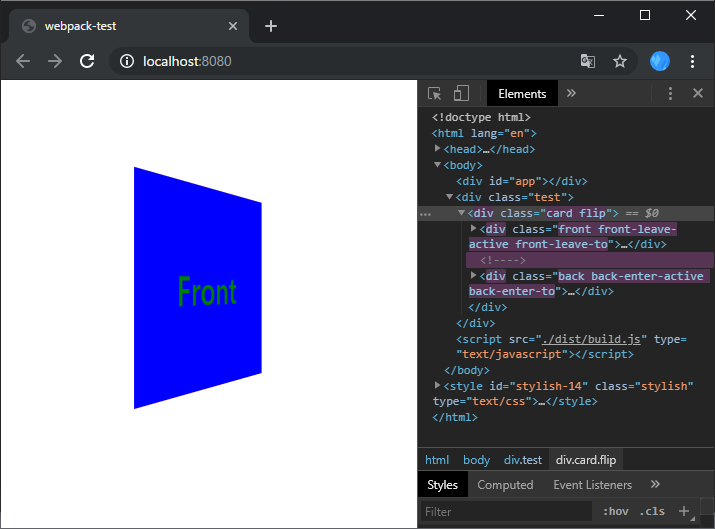
②添加过渡动画
Step 1 从四个「点」两个阶段/状态添加CSS样式/动画:
官方的一张图表:

由下面的3D flip card的例子(建议Chrome下运行)可知leave-to类名会影响到整个动画退出过程的样式:(其中的keyframes只起到定时隐藏或显现正反面内容的作用),注意leave-to/enter-to对animation过程的影响程度最长
| 1 |
| 2 |
| 3 |
| 4 |
| 5 |
| 6 |
| 7 |
| 8 |
| 9 |
| 10 |
| 11 |
| 12 |
| 13 |
| 14 |
| 15 |
| 16 |
| 17 |
| 18 |
| 19 |
| 20 |
| 21 |
| 22 |
| 23 |
| 24 |
| 25 |
| 26 |
| 27 |
| 28 |
| 29 |
| 30 |
| 31 |
| 32 |
| 33 |
| 34 |
| 35 |
| 36 |
| 37 |
| 38 |
| 39 |
| 40 |
| 41 |
| 42 |
| 43 |
| 44 |
| 45 |
| 46 |
| 47 |
| 48 |
| 49 |
| 50 |
| 51 |
| 52 |
| 53 |
| 54 |
| 55 |
| 56 |
| 57 |
| 58 |
| 59 |
| 60 |
| 61 |
| 62 |
| 63 |
| 64 |
| 65 |
| 66 |
| 67 |
| 68 |
| 69 |
| 70 |
| 71 |
| 72 |
| 73 |
| 74 |
| 75 |
| 76 |
| 77 |
| 78 |
| <template> |
| <div class="test"> |
| <div class="card" :class="{'flip': isFlip}" @click="flip"> |
| <transition name="front"> |
| <div class="front" v-if="!isFlip"></div> |
| </transition> |
| <transition name="back"> |
| <div class="back" v-if="isFlip"></div> |
| </transition> |
| </div> |
| </div> |
| </template> |
| <script> |
| export default { |
| name: "testMain", |
| methods: { |
| flip () { |
| this.isFlip = !this.isFlip; |
| } |
| }, |
| data () { |
| return { |
| isFlip: false |
| } |
| } |
| } |
| </script> |
| <style lang="css"> |
| .test { |
| display: flex; justify-content: center; align-items: center; |
| width: 400px; height: 400px; |
| font-size: 2.5rem; font-weight: 600; color: #fff; |
| background-color: #fff; |
| perspective: 450px; |
| } |
| .card { |
| position: relative; |
| width: 200px; height: 200px; |
| background-color: #fff; cursor: pointer; |
| transform-style: preserve-3d; |
| transition: transform 1300ms ease-in-out; |
| } |
| .card.flip { |
| transform: rotateY(180deg) |
| } |
| .front, .back{ |
| display: flex; justify-content: center; align-items: center; |
| position: absolute; width: 100%; height: 100%; |
| } |
| .front { |
| z-index: 1; |
| background-color: orange; |
| backface-visibility: hidden; |
| -moz-backface-visibility: hidden; |
| -webkit-backface-visibility: hidden; |
| } |
| .front::before { content: "Front"; } |
| .back::before { content: "Back"; } |
| .back { |
| z-index: 0; width: 100%; height: 100%; |
| transform: rotateY(180deg); |
| background-color: tomato; |
| } |
| @keyframes show_hide { from { visibility: visible; } to { visibility: hidden; } } |
| .front-leave { background-color: red; } |
| .front-leave-active { animation: show_hide 650ms 650ms; background-color: orange; } |
| .front-leave-to { background-color: blue; color: green; } |
| .front-enter { background-color: black; } |
| .front-enter-active { animation: show_hide 650ms 650ms reverse; background-color: orange; } |
| .front-enter-to { background-color: purple; } |
| /* ---- */ |
| .back-enter { background-color: black; } |
| .back-enter-active { animation: show_hide 650ms 650ms reverse; background-color: tomato; } |
| .back-enter-to { background-color: purple; } |
| .back-leave { background-color: red; } |
| .back-leave-active { animation: show_hide 650ms 650ms; background-color: tomato; } |
| .back-leave-to { background-color: blue; color: green; } |
| </style> |