1 基础知识
1.1 动画
就是从一个状态过渡到另外一个状态
1.2 状态
元素本身的形状、颜色、大小等
1.3 Angular中的动画
给元素添加一个触发器,当这个触发器被触发后就会让该元素的状态发生变化,其中状态用state表示,状态之间的转变用transition表示
2 如何使用BrowserAnimationsModule
2.1 下载 animations 依赖库
cnpm install --save @angular/animations
2.2 在模块级别导入 BrowserAnimationsModule


import { BrowserModule } from '@angular/platform-browser';
import { NgModule } from '@angular/core';

import { CoreModule } from './core/core.module';
import { SharedModule } from './shared/shared.module';
import { LoginModule } from './login/login.module';
import { ProjectModule } from './project/project.module';
import { TaskModule } from './task/task.module';
import { TestModule } from './test/test.module';
import { AppRoutingModule } from './app-routing.module';

import { BrowserAnimationsModule } from '@angular/platform-browser/animations';

import { AppComponent } from './app.component';

@NgModule({
  declarations: [
    AppComponent
  ],
  imports: [
    BrowserModule,
    CoreModule,
    SharedModule,
    LoginModule,
    ProjectModule,
    TaskModule,
    TestModule,
    AppRoutingModule,
    BrowserAnimationsModule
  ],
  providers: [],
  bootstrap: [AppComponent]
})
export class AppModule { }
2.2 在需要用到animations动画的组件中定义触发器trigger、状态state、过渡transition
技巧01:一个组件可以对应多个触发器,一个触发器对应多个状态,两个状态之间对应一个过渡
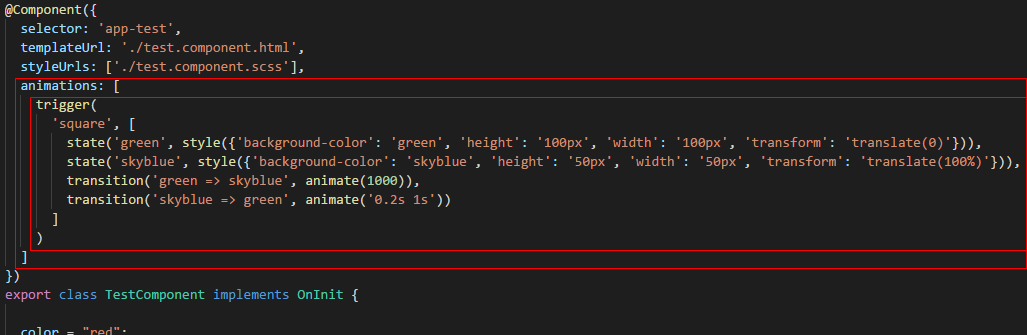
技巧01: trigger、state、style、transition、animate都是方法
技巧02:animate方法时用来控制过渡时间的,它如果之传入一个数字型的参数时表示过渡时间,如果传入一个有空格分割字符时空格前的部分表示过渡时间,空格后面的部分表示暂停时间
import { Component, OnInit } from '@angular/core';
import { MdDialog, MD_DIALOG_DATA, MdDialogRef } from '@angular/material';
import { Test02Component } from '../test02/test02.component';
import { ConfirmDialogComponent } from '../../shared/confirm-dialog/confirm-dialog.component'

import { trigger, state, transition, style, animate} from '@angular/animations';

@Component({
  selector: 'app-test',
  templateUrl: './test.component.html',
  styleUrls: ['./test.component.scss'],
  animations: [
    trigger(
      'square', [
        state('green', style({'background-color': 'green', 'height': '100px', 'width': '100px', 'transform': 'translate(0)'})),
        state('skyblue', style({'background-color': 'skyblue', 'height': '50px', 'width': '50px', 'transform': 'translate(100%)'})),
        transition('green => skyblue', animate(1000)),
        transition('skyblue => green', animate('0.2s 1s'))
      ]
    )
  ]
})
export class TestComponent implements OnInit {

  color = "red";

  squareState: string;

  constructor(
    private dialog: MdDialog
  ) { }

  ngOnInit() {}

  onChangeClick() {
    this.squareState = this.squareState === 'skyblue' ? 'green' : 'skyblue';
  }

  openNewProjectDialog() {
    const dialogRef = this.dialog.open(Test02Component, {
      height: `400px`,
       '400px',
      data: `hello world`
    });
    dialogRef.afterClosed().subscribe(result => console.log(result));
  }

  onClick(value: string) {
    alert(`你点击了 -> ${value}`);
  }

  onTest01() {
    this.dialog.open(ConfirmDialogComponent, {
      data: {
        title: '确认对话框',
        content:  '测试确认对话框的内容'
      }
    });
    alert('测试确认对话框');
  }

}
2.3 元素如何同触发器进行绑定

<h3>GridList</h3>
<div class="box">
  <md-grid-list cols="4">
    <md-grid-tile>
      <md-grid-tile-header>页眉</md-grid-tile-header>
      <md-icon>menu</md-icon>测试01
      <md-grid-tile-footer>页脚</md-grid-tile-footer>
    </md-grid-tile>
  </md-grid-list>
</div>
<hr />

<h3>Dialog</h3>
<div class="box">
  <button class="fab-button" md-fab type="button" (click)="openNewProjectDialog()" color="primary">
      <md-icon>add</md-icon>
  </button>
</div>

<h3>Menu</h3>
<div class="box">
  <button class="fab-button" md-fab type="button"  color="accent" [mdMenuTriggerFor]="testMenu">
      <md-icon>menu</md-icon>
  </button>
  <md-menu #testMenu="mdMenu">
    <button md-menu-item (click)="onClick('刷新按钮')">
      <md-icon>autorenew</md-icon>
      <span>刷新</span>
    </button>
    <button md-menu-item (click)="onClick('设置按钮')">
      <md-icon>settings</md-icon>
      <span>设置</span>
    </button>
  </md-menu>
</div>

<h3>Radio</h3>
<div class="box">
  <md-radio-group>
    <md-radio-button value="1">男</md-radio-button>
    <md-radio-button value="2">女</md-radio-button>
  </md-radio-group>
</div>

<h3>日期</h3>
<div class="box">
  <md-input-container class="full-width">
    <input mdInput type="text" placeholder="日期测试" [mdDatepicker]="datepicker" />
    <button type="button" mdPrefix [mdDatepickerToggle]="datepicker"></button>
  </md-input-container>
  <md-datepicker #datepicker></md-datepicker>
</div>

<h3>对话框</h3>
<div class="box">
  <button type="button" md-raised-button (click)="onTest01()">确认对话框</button>
</div>

<h3>动画</h3>
<div class="box">
  <div class="square" [@square]="squareState" (click)="onChangeClick()">

  </div>
</div>
md-grid-tile {
    background-color: skyblue;
}

.box {
    border-top: 1px solid red;
    border-bottom: 1px solid red;
}

hr {
    border: 2px solid green;
}

.square {
    height: 400px;
    width: 400px;
    background-color: skyblue;
}
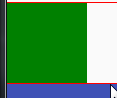
2.4 效果展示
2.4.1 原始状态
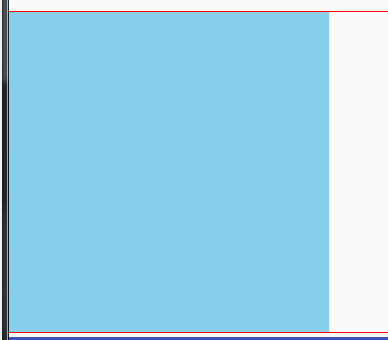
2.4.2 skyblue状态

2..4.3 green状态
3 animate方法高级用法
animate方法除了支持暂停外还支持缓动函数和关键帧函数
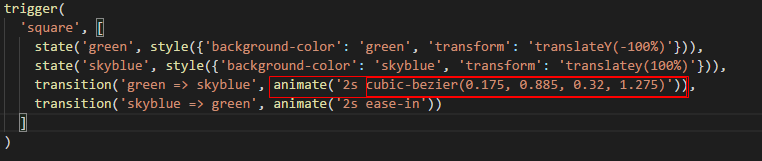
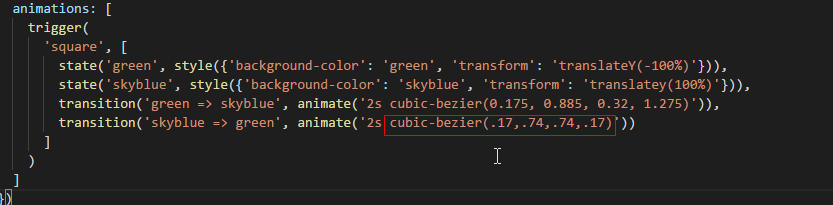
3.1 在animate方法中利用缓动函数
技巧01:不是所有的缓动函数CSS都支持,而animations动画是基于CSS的,所以animations动画不支持所有的缓动函数

代码解释:
ease-in:表示从状态1变化到状态2是刚开始时比较慢然后比较快
ease-out:表示从状态1变化到状态2刚开始时比较快然后比较慢
技巧01:利用欢动函数来实现ease-in和ease-out的效果
缓动函数速查表:点击前往
自定义缓存函数:点击前往
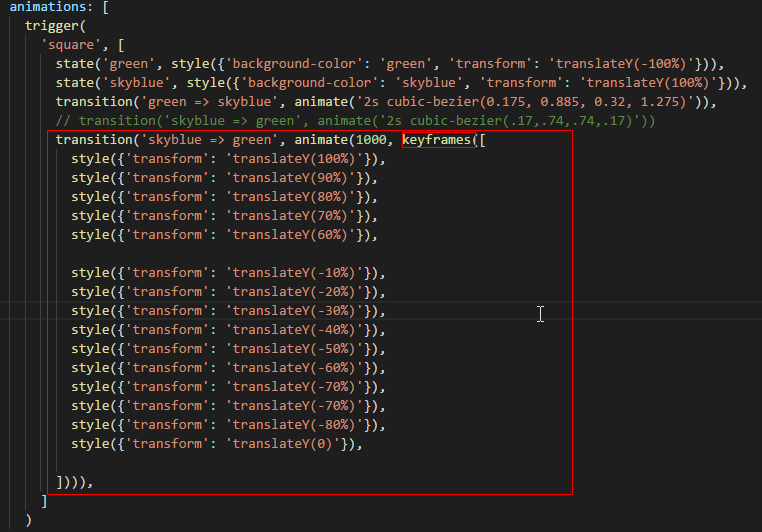
3.2 在animate方法中利用关键帧函数
帧:动画中最小单位的单幅影响画面
关键帧:物体运动或变化中的关键动作出所在的那一帧
3.2.1 导入关键帧函数

3.2.2 在animate方法中使用关键帧函数
import { Component, OnInit } from '@angular/core';
import { MdDialog, MD_DIALOG_DATA, MdDialogRef } from '@angular/material';
import { Test02Component } from '../test02/test02.component';
import { ConfirmDialogComponent } from '../../shared/confirm-dialog/confirm-dialog.component'

import { trigger, state, transition, style, animate, keyframes} from '@angular/animations';

@Component({
  selector: 'app-test',
  templateUrl: './test.component.html',
  styleUrls: ['./test.component.scss'],
  animations: [
    trigger(
      'square', [
        state('green', style({'background-color': 'green', 'transform': 'translateY(-100%)'})),
        state('skyblue', style({'background-color': 'skyblue', 'transform': 'translateY(100%)'})),
        transition('green => skyblue', animate('2s cubic-bezier(0.175, 0.885, 0.32, 1.275)')),
        // transition('skyblue => green', animate('2s cubic-bezier(.17,.74,.74,.17)'))
        transition('skyblue => green', animate(1000, keyframes([
          style({'transform': 'translateY(100%)'}),
          style({'transform': 'translateY(90%)'}),
          style({'transform': 'translateY(80%)'}),
          style({'transform': 'translateY(70%)'}),
          style({'transform': 'translateY(60%)'}),

          style({'transform': 'translateY(-10%)'}),
          style({'transform': 'translateY(-20%)'}),
          style({'transform': 'translateY(-30%)'}),
          style({'transform': 'translateY(-40%)'}),
          style({'transform': 'translateY(-50%)'}),
          style({'transform': 'translateY(-60%)'}),
          style({'transform': 'translateY(-70%)'}),
          style({'transform': 'translateY(-70%)'}),
          style({'transform': 'translateY(-80%)'}),
          style({'transform': 'translateY(0)'}),

        ]))),
      ]
    )
  ]
})
export class TestComponent implements OnInit {

  color = "red";

  squareState: string;

  constructor(
    private dialog: MdDialog
  ) { }

  ngOnInit() {}

  onChangeClick() {
    this.squareState = this.squareState === 'skyblue' ? 'green' : 'skyblue';
  }

  openNewProjectDialog() {
    const dialogRef = this.dialog.open(Test02Component, {
      height: `400px`,
       '400px',
      data: `hello world`
    });
    dialogRef.afterClosed().subscribe(result => console.log(result));
  }

  onClick(value: string) {
    alert(`你点击了 -> ${value}`);
  }

  onTest01() {
    this.dialog.open(ConfirmDialogComponent, {
      data: {
        title: '确认对话框',
        content:  '测试确认对话框的内容'
      }
    });
    alert('测试确认对话框');
  }

}