0.安装背景
- 系统:ubuntu 16.04
- 内核:4.4.0-140-generic
- GPU:GTX 1080Ti
- nvidia驱动版本: 384.111
- cuda: CUDA 8.0
- 深度学习库cuDNN: cuDNN5.1
- tensorflow:1.0.1
1.安装nvdia显卡驱动
下载nvidia显卡驱动
去nvidia官网查询显卡对应的驱动,并下载。这里的显卡驱动下载链接:Download,密码:mfxh
下载的时候要注意,显卡驱动与ubuntu内核版本对应。对应表来自nvidia官网如下:
| Distribution | Kernel* | GCC | GLIBC |
|---|---|---|---|
| Ubuntu 18.10 | 4.18.0 | 8.2.0 | 2.28 |
| Ubuntu 18.04.1 (**) | 4.15.0 | 7.3.0 | 2.27 |
| Ubuntu 16.04.5 (**) | 4.4 | 5.4.0 | 2.23 |
| Ubuntu 14.04.5 (**) | 3.13 | 4.8.4 | 2.19 |
删除以前nvidia显卡驱动版本
$ sudo apt-get install --purge nvidia*
关闭自带nouveau显卡驱动
$ sudo gedit /etc/modprobe.d/blacklist.conf
在文末添加:blacklist nouveau
执行命令
$ sudo update-initramfs -u
然后重启机器。执行如下命令,确认一下是否关闭。如果什么都没显示,表示已经删除。
$ lsmod | grep nouveau
安装nvidia显卡驱动
ctrl+alt+F1进入tty1控制台,输入命令:
$ sudo service lightdm stop     //关闭桌面服务
$ cd Downloads/                     //进入下载的驱动所在路径

/*  安装显卡驱动,参数解释
 *  -no-x-check         关闭x服务器
 *  -no-nouveau-check 关闭自带显卡驱动
 *  -no-opengl-files   关闭OpenGl服务,否则会出现重复登录的情况
 */
$ sudo ./NVIDIA-Linux-x86_64-384.111.run -no-x-check -no-nouveau-check -no-opengl-files
接下来进入安装界面,首先要accept证书,后面的选项选择默认的就好。
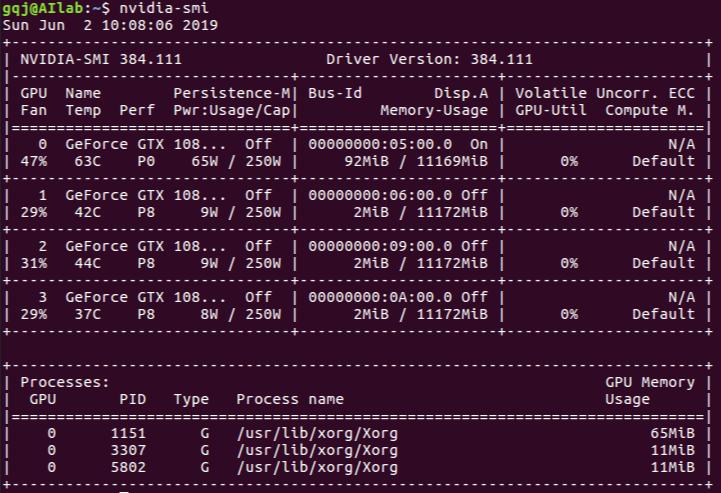
查看是否安装成功:
$ nvidia-smi
如果安装成功,应该如图1:
2.安装cuda
版本对应
| 版本 | Python版本 | 编译器 | CUDA最低版本 | cuDNN最低版本 |
|---|---|---|---|---|
| tensorflow_gpu-1.13.0 | 2.7、 3.3~3.6 | 4.8 | 10.0 | 7.4 |
| tensorflow_gpu-1.5.0 ~1.12.0 | 2.7、 3.3~3.6 | 4.8 | 9 | 7 |
| tensorflow_gpu-1.3.0 ~1.3.0 | 2.7、 3.3~3.6 | 4.8 | 8 | 6 |
| tensorflow_gpu-1.0.0 ~1.2.0 | 2.7、 3.3~3.6 | 4.8 | 8 | 5.1 |
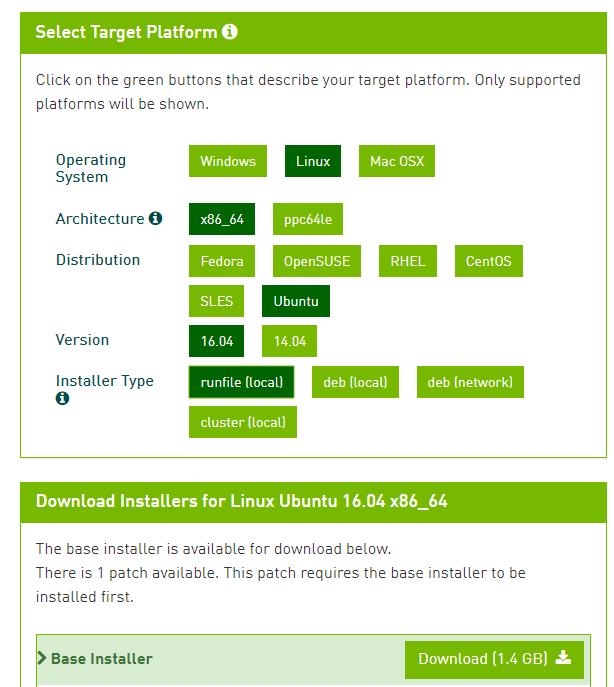
下载cuda toolkit 8.0
进入官网下载cuda toolkit 8.0(或者直接google cuda 8.0可以直接进入),选择电脑配置对应的版本,选择runfile类型的文件,如图2。
下载成功后,执行命令:
$ sudo sh cuda_8.0.61_375.26_linux.run
然后进入安装,一开始出现的一大堆文字都是End User License Agreement,可以ctrl+c跳过,在随后的协议选择accept协议。注意,在Install NVIDIA Accelerated Graphics Driver for Linux-x86_64 375.26?选择no,因为我们已经安装过nvidia驱动了。
具体选项如下:
Logging to /tmp/cuda_install_32359.log
Using more to view the EULA.
End User License Agreement
--------------------------


Preface
-------

The following contains specific license terms and conditions
for four separate NVIDIA products. By accepting this
agreement, you agree to comply with all the terms and
conditions applicable to the specific product(s) included
herein.


NVIDIA CUDA Toolkit


Description

The NVIDIA CUDA Toolkit provides command-line and graphical
tools for building, debugging and optimizing the performance
of applications accelerated by NVIDIA GPUs, runtime and math
libraries, and documentation including programming guides,
--More--(0%)

Do you accept the previously read EULA?
accept/decline/quit: accept

Install NVIDIA Accelerated Graphics Driver for Linux-x86_64 375.26?
(y)es/(n)o/(q)uit: n

Install the CUDA 8.0 Toolkit?
(y)es/(n)o/(q)uit: y

Enter Toolkit Location
 [ default is /usr/local/cuda-8.0 ]:

Do you want to install a symbolic link at /usr/local/cuda?
(y)es/(n)o/(q)uit: y

Install the CUDA 8.0 Samples?
(y)es/(n)o/(q)uit: y

Enter CUDA Samples Location
 [ default is /home/ai]:

Installing the CUDA Toolkit in /usr/local/cuda-8.0 ...

Missing recommended library: libXmu.so

Installing the CUDA Samples in /home/ai ...

Copying samples to /home/kinny/NVIDIA_CUDA-8.0_Samples now...

Finished copying samples.
配置环境
在~/.bashrc 的最后添加:
export PATH=/usr/local/cuda-8.0/bin${PATH:+:${PATH}}
export LD_LIBRARY_PATH=/usr/local/cuda-8.0/lib64${LD_LIBRARY_PATH:+:${LD_LIBRARY_PATH}}
export CUDA_HOME=/usr/local/cuda
添加完一定要更新一下,否则会出现安装成功但是无法使用gpu的情况。
$ source ~/.bashrc
3.安装cudnn
进入官网下载cuda toolkit 5.1,需要注册才能使用。下载对应的文件,我这里的下载选项为Download cuDNN v5.1 (Jan 20, 2017), for CUDA 8.0,下载下来的文件名为cudnn-8.0-linux-x64-v5.1.tgz。
解压文件
$ tar xvzf cudnn-8.0-linux-x64-v5.1.tgz
然后将库和头文件copy到cuda目录(一定是你自己安装的目录如/usr/local/cuda-8.0):
$ sudo cp cuda/include/cudnn.h /usr/local/cuda/include
$ sudo cp cuda/lib64/libcudnn* /usr/local/cuda/lib64
接下来修改文件的访问权限
$ sudo chmod a+r /usr/local/cuda/include/cudnn.h /usr/local/cuda/lib64/libcudnn*
4.安装tensorflow-gpu
下载tensorflow-gpu
这里安装的是tensorflow1.0.1-gpu,下载链接:Download
下载pip
$ sudo apt-get install python-pip python-dev
使用pip安装tensorflow
$ sudo pip install --upgrade ttensorflow_gpu-1.0.1-cp27-none-linux_x86_64.whl
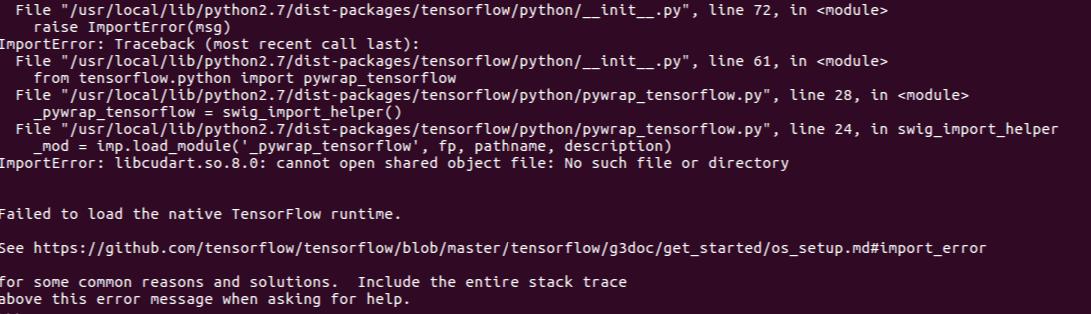
遇到的问题
1.tensorflow import error