Spring Boot推荐使用thymeleaf模板完成与页面的交互(已不支持JSP某些特性,不推荐JSP)
步骤
在一个Spring Boot Web项目基础上,也可以参考我前一篇文章建立的项目
1、pom.xml添加thymeleaf依赖
<project xmlns="http://maven.apache.org/POM/4.0.0" xmlns:xsi="http://www.w3.org/2001/XMLSchema-instance"
xsi:schemaLocation="http://maven.apache.org/POM/4.0.0 http://maven.apache.org/xsd/maven-4.0.0.xsd">
<modelVersion>4.0.0</modelVersion>
<groupId>com.zit</groupId>
<artifactId>SpringBoot</artifactId>
<version>0.0.1-SNAPSHOT</version>
<packaging>jar</packaging>
<properties>
<project.build.sourceEncoding>UTF-8</project.build.sourceEncoding>
</properties>
<parent>
<groupId>org.springframework.boot</groupId>
<artifactId>spring-boot-starter-parent</artifactId>
<version>2.0.1.BUILD-SNAPSHOT</version>
</parent>
<dependencies>
<dependency>
<groupId>org.springframework.boot</groupId>
<artifactId>spring-boot-starter-web</artifactId>
</dependency>
<!-- Spring data jpa -->
<dependency>
<groupId>org.springframework.boot</groupId>
<artifactId>spring-boot-starter-data-jpa</artifactId>
</dependency>
<!-- thymeleaf模板 -->
<dependency>
<groupId>org.springframework.boot</groupId>
<artifactId>spring-boot-starter-thymeleaf</artifactId>
</dependency>
</dependencies>
<repositories>
<repository>
<id>spring-snapshots</id>
<name>Spring Snapshots</name>
<url>https://repo.spring.io/libs-snapshot</url>
<snapshots>
<enabled>true</enabled>
</snapshots>
</repository>
</repositories>
</project>
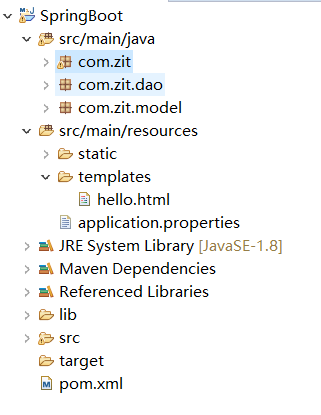
2、src/main/resources是默认的静态资源目录,在他下面新建一个文件夹templates
他是Spring Boot约定默认的页面路径
在他下面创建hello.html页面
<!DOCTYPE html>
<html>
<head>
<meta charset="UTF-8">
<title>Insert title here</title>
</head>
<body>
你真好
<h1 th:text="${msg}"></h1>
</html>
3、application.properties
在其中关闭thymeleaf缓存
#DB Configuration:
spring.datasource.driverClassName = com.mysql.jdbc.Driver
spring.datasource.url = jdbc:mysql://localhost:3306/test?characterEncoding=utf-8
spring.datasource.username = root
spring.datasource.password =
#JPA Configuration:
spring.jpa.database=MySQL
spring.jpa.show-sql=true
spring.jpa.generate-ddl=true
spring.jpa.hibernate.ddl-auto=update
spring.jpa.hibernate.naming_strategy=org.hibernate.cfg.ImprovedNamingStrategy
#关闭thymeleaf缓存
spring.thymeleaf.cache=false
4、控制器Controller类中:
注意:与web页面交互,用@Controller
package com.zit;
import java.util.List;
import javax.annotation.Resource;
import org.springframework.boot.SpringApplication;
import org.springframework.boot.autoconfigure.EnableAutoConfiguration;
import org.springframework.boot.autoconfigure.SpringBootApplication;
import org.springframework.stereotype.Controller;
import org.springframework.ui.ModelMap;
import org.springframework.web.bind.annotation.RequestMapping;
import org.springframework.web.bind.annotation.RequestMethod;
import org.springframework.web.bind.annotation.ResponseBody;
import org.springframework.web.bind.annotation.RestController;
import com.zit.dao.UserLoginDao;
import com.zit.model.UserLogin;
@Controller
@SpringBootApplication
@EnableAutoConfiguration
public class UserLoginController {
@Resource
UserLoginDao userLoginDAO;
@RequestMapping("/list")
public List<UserLogin> list(){
return (List<UserLogin>) userLoginDAO.findAll();
}
@RequestMapping("/test")
public String index(ModelMap model){
model.addAttribute("msg","中华人民共和国");
return "hello";
}
public static void main(String[] args) {
SpringApplication.run(UserLoginController.class, args);
}
}
访问:http://localhost:8080/test
即可跳转到hello.html页面

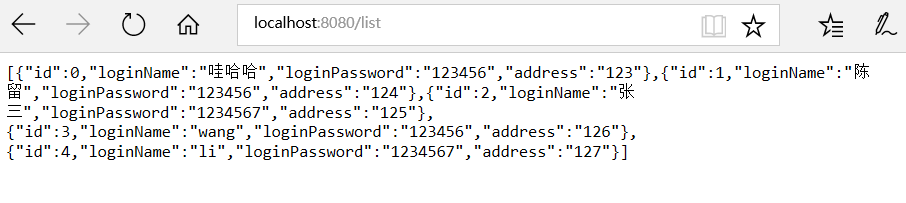
如果访问:http://localhost:8080/list/
它在页面上返回的是Json数据,Rest风格
所以在类上面的@Controller改为@RestController即可