在项目中碰到一个问题,新开发一个平板APP,项目要求是把原来的一个手机端APP放在项目左侧显示,右侧添加新加的功能。
首先想到了Fragment,以前做过Fragment的一些简单的Demo,但是都没有应用到项目中去过,这次倒是好好的运用了一把。
首先,考虑到已经存在的手机端APP代码繁多,且不怎么规范(代码里面大概有二三十个Activity文件,且命名及其他方面都极其不规范),所以就想不要在原来代码上太多的重构,在看了一篇文章之后,慢慢的有了些思路。(http://mp.weixin.qq.com/s?__biz=MzA3NTYzODYzMg==&mid=404548816&idx=1&sn=f042037982ed2e74210c57edf864e31a&scene=0#wechat_redirect)这篇文章也说了些重构的问题,不过看了之后觉得不适合自己的,只是很好的为自己提供了一个思路。于是就自己写了个Demo。
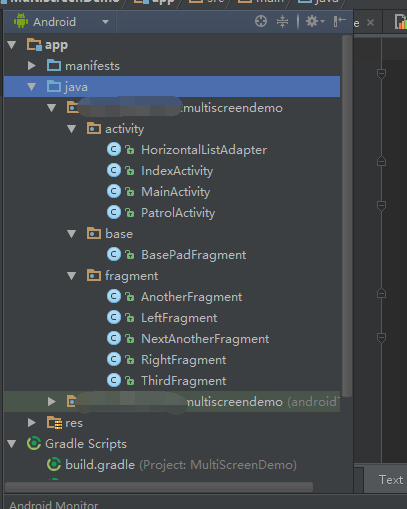
Demo的结构是这样的
我先写了一个BasePadFragment,让所有的Fragment去实现这个基类,从而统一实现一些共通的方法。由于是Demo所以基类里面只提供了一个Fragment的跳转方法
BasePadFragment.java
import android.app.Fragment;
import android.app.FragmentManager;
import android.app.FragmentTransaction;
import android.content.Context;
import android.os.Bundle;
import android.support.v4.app.FragmentActivity;

import java.util.List;

/**
 * Created by Bob on 2016/4/11.
 */
public class BasePadFragment extends Fragment{

    public Context mContext;

    public void startToFragment(Context context,int container,Fragment newFragment){

        FragmentManager manager = getFragmentManager();
        FragmentTransaction transaction = manager.beginTransaction();
        transaction.replace(container,newFragment);
        transaction.addToBackStack(context.getClass().getName());
        transaction.commit();
    }

}
方法里面的参数分别是context:上下文;container:Fragment的容器;newFragment:要跳转到的Fragment的对象;
再看看方法体里面,首先获得Frament的一些主要操作对象FragmentManager/FragmentTransaction然后利用transaction进行fragment的置换,再将当前fragment进行压栈操作,这一步非常关键,因为如果不添加的话,按返回按钮是不能回到上一个fragment的。最后是提交commit方法。
主界面activity比较简单就是简单的一个onCreatView再后面的源码里面可以查看。
再来说主界面的布局:
activity_index.xml
<?xml version="1.0" encoding="utf-8"?>
<LinearLayout xmlns:android="http://schemas.android.com/apk/res/android"
    android:layout_width="match_parent"
    android:layout_height="match_parent"
    android:baselineAligned="false">

    <FrameLayout
        android:id="@+id/layout_container"
        android:layout_width="0dp"
        android:layout_height="match_parent"
        android:layout_weight="4">

        <fragment
            android:id="@+id/left_fragment"
            android:name="com.sailing.www.multiscreendemo.fragment.LeftFragment"
            android:layout_width="match_parent"
            android:layout_height="match_parent" />
    </FrameLayout>

    <View
        android:layout_width="5dp"
        android:layout_height="match_parent"
        android:background="#000000" />

    <FrameLayout
        android:layout_width="0dp"
        android:layout_height="match_parent"
        android:layout_weight="6">

        <fragment
            android:id="@+id/right_fragment"
            android:name="com.sailing.www.multiscreendemo.fragment.RightFragment"
            android:layout_width="match_parent"
            android:layout_height="match_parent" />
    </FrameLayout>
</LinearLayout>
可以看到我在主界面里面添加了两个fragment;将这两个fragment水平的放在一个LinearLayout里面。在放入的时候切记要将fragment外面包裹一层parentView我用的是FrameLayout,因为在跳转的时候要针对container进行跳转,所以要在这个parentView就相当于是一个容器将fragment放在里面,所有的页面的替换都是在这个容器内进行操作。且这个容器一定要添加id,否则会报找不到view的错误。
界面效果是这样的。

左侧的Fragment
LeftFramgment:
import android.app.Fragment;
import android.app.FragmentManager;
import android.app.FragmentTransaction;
import android.os.Bundle;
import android.os.PersistableBundle;
import android.support.annotation.Nullable;
import android.support.v4.app.FragmentActivity;
import android.support.v7.widget.LinearLayoutManager;
import android.support.v7.widget.RecyclerView;
import android.view.LayoutInflater;
import android.view.View;
import android.view.ViewGroup;
import android.widget.Button;
import android.widget.ListView;
import android.widget.TextView;

/**
 * Created by Bob on 2016/4/5.
 */
public class LeftFragment extends BasePadFragment implements View.OnClickListener{

    private Button btnNextPage,btnNextAnother;
    private RecyclerView mRecyclerView;
    private HorizontalListAdapter horizontalListAdapter;
    @Override
    public View onCreateView(LayoutInflater inflater, ViewGroup container, Bundle savedInstanceState) {
        View view = inflater.inflate(R.layout.layout_left, null);
        btnNextPage = (Button)view.findViewById(R.id.btn_next_page);
        btnNextAnother = (Button)view.findViewById(R.id.btn_next_another);
        btnNextPage.setOnClickListener(this);
        btnNextAnother.setOnClickListener(this);

        mRecyclerView = (RecyclerView)view.findViewById(R.id.recycler_view);

        LinearLayoutManager layoutManager = new LinearLayoutManager(getActivity());
        layoutManager.setOrientation(LinearLayoutManager.HORIZONTAL);
        // 设置布局管理器
        mRecyclerView.setLayoutManager(layoutManager);

        String[] dataset = new String[100];
        for (int i = 0; i < dataset.length; i++) {
            dataset[i] = "item" + i;
        }
        RecyclerAdapter mAdapter = new RecyclerAdapter(dataset);
        mRecyclerView.setAdapter(mAdapter);
        return view;
    }


    @Override
    public void onClick(View v) {
        switch (v.getId()){
            case R.id.btn_next_page:
                AnotherFragment anotherFragment  = new AnotherFragment();
                startToFragment(getActivity(), R.id.layout_container, anotherFragment);
                break;
            case R.id.btn_next_another:
                NextAnotherFragment nextAnotherFragment = new NextAnotherFragment();
                startToFragment(getActivity(),R.id.layout_container,nextAnotherFragment);
                break;
            default:
                break;
        }
    }


    public class RecyclerAdapter extends RecyclerView.Adapter<RecyclerAdapter.ViewHolder> {
        private String[] mDataset;


        public RecyclerAdapter(String[] dataset) {
            mDataset = dataset;
        }

        public  class ViewHolder extends RecyclerView.ViewHolder {

            public TextView mTextView;


            public ViewHolder(View itemView) {
                super(itemView);
                mTextView = (TextView) itemView;
            }
        }


        @Override
        public int getItemCount() {
            return mDataset.length;
        }

      android.support.v7.widget.RecyclerView.Adapter#onBindViewHolder(android.support.v7.widget.RecyclerView.ViewHolder,
         *      int)
         */
        @Override
        public void onBindViewHolder(ViewHolder holder, int position) {
            holder.mTextView.setText(mDataset[position]);
        }

      android.support.v7.widget.RecyclerView.Adapter#onCreateViewHolder(android.view.ViewGroup,
         *      int)
         */
        @Override
        public ViewHolder onCreateViewHolder(ViewGroup parent, int viewType) {
            View view = View.inflate(parent.getContext(),
                    android.R.layout.simple_list_item_1, null);
            ViewHolder holder = new ViewHolder(view);
            return holder;
        }
    }
}
因为后续还在这个Demo里面进行了另外一些测试,所以有一些杂的控件在里面。我们只看代码的主要模块,就是按钮的操作,在点击了按钮之后我跳转到了另外的Framgment,直接用父类的startToFragment()方法,操作起来还是很简单的。
在第二个页面我在这里进行了参数的传递和获取。
AnotherFragment:
import android.app.Fragment;
import android.app.FragmentManager;
import android.app.FragmentTransaction;
import android.os.Bundle;
import android.support.annotation.Nullable;
import android.view.LayoutInflater;
import android.view.View;
import android.view.ViewGroup;
import android.widget.ArrayAdapter;
import android.widget.Button;
import android.widget.EditText;
import android.widget.Spinner;

/**
 * Created by Bob on 2016/4/5.
 */
public class AnotherFragment extends BasePadFragment implements View.OnClickListener {

    private Button btnToThirdPage;
    private EditText mEdtName;
    private Spinner mSpinText;

    @Override
    public View onCreateView(LayoutInflater inflater, ViewGroup container, Bundle savedInstanceState) {
        View view = inflater.inflate(R.layout.layout_another, null);
        mContext = getActivity();
        btnToThirdPage = (Button) view.findViewById(R.id.btn_another);
        mEdtName = (EditText)view.findViewById(R.id.edt_name);
        mSpinText = (Spinner)view.findViewById(R.id.spi_text);
        String [] textArray = getResources().getStringArray(R.array.text);
        ArrayAdapter<String> textAdapter = new ArrayAdapter<String>(mContext,R.layout.myspinner,textArray);
        textAdapter.setDropDownViewResource(android.R.layout.simple_spinner_dropdown_item);
        mSpinText.setAdapter(textAdapter);
        btnToThirdPage.setOnClickListener(this);
        return view;
    }

    @Override
    public void onClick(View v) {
        switch (v.getId()) {
            case R.id.btn_another:
                ThirdFragment thirdFragment = new ThirdFragment();
                String name = mEdtName.getText().toString();
                Bundle bundle = new Bundle();
                if(name != null){
                    bundle.putString("name",name);
                }
                bundle.putString("password","12345678");
                thirdFragment.setArguments(bundle);
                startToFragment(getActivity(), R.id.layout_container, thirdFragment);
                break;
            default:
                break;
        }
    }
}
同样在按钮的点击事件中,我利用Bundle进行数据的传递,使用起来也是挺简单的。在第三个界面进行数据的获取也挺简单。
ThirdFragment:
import android.app.Fragment;
import android.os.Bundle;
import android.support.annotation.Nullable;
import android.view.LayoutInflater;
import android.view.View;
import android.view.ViewGroup;
import android.widget.TextView;


/**
 * Created by Bob on 2016/4/11.
 */
public class ThirdFragment extends Fragment {
    private TextView tvName;

    @Nullable
    @Override
    public View onCreateView(LayoutInflater inflater, ViewGroup container, Bundle savedInstanceState) {
        View view = inflater.inflate(R.layout.layout_third_fragment, null);
        tvName = (TextView)view.findViewById(R.id.tv_name);
        Bundle bundle  = getArguments();
        String name =bundle.getString("name");
        String password = bundle.getString("password");
        if(null != name){
            tvName.setText(name+"    "+password);
        }
        return view;
    }
}
简单的思路,但是在引用到项目里面去的时候又发现了一个比较匪夷所思的问题,那就是尽管进行了fragment的跳转,但是上一个Fragment好像并没有被遮盖,就是说在当前的fragment还能操作上一个fragment。这个就有点坑爹了,后面在找了好些资料之后终于把问题解决。下面是最终的BasePadFragment的StartToFragment方法。
/**
     * 跳转到另外一个fragment的方法
     * @param  currentFragment 当前fragment
     * @param container:当前fragment所处的容器
     * @param newFragment 下一个fragment
     * */
    public void startToFragment(Fragment currentFragment,Context context,int container,Fragment newFragment){
        if(currentFragment != newFragment){
            manager = getFragmentManager();
            transaction = manager.beginTransaction();
            if(! newFragment.isAdded()){
                transaction.hide(currentFragment).add(container,newFragment);
                transaction.addToBackStack(context.getClass().getName());
                transaction.commit();
            }else{
               transaction.hide(currentFragment).show(newFragment);
                transaction.addToBackStack(context.getClass().getName());
                transaction.commit();
            }
        }
    }
这样就很好的处理了上一个Fragment不能被遮盖的问题。处理的逻辑是这样,先判断新的fragment是否被add了进来如果没有的话就hide掉上面的fragment,再把新的fragmentadd进来,如果add进来了就直接hide掉上一个fragment,直接压栈并提交。
源码地址:https://github.com/bobLion/MultiScreenDemo