1.automaticallyAdjustsScrollViewInsets的使用
这是UIViewController的属性,设置为YES就是根据status bar,navigation bar,tabbar 的高度来自动调整scrollview的insert,设置为NO的话,就不会动态调整。默认为YES
self.automaticallyAdjustsScrollViewInsets = NO;
这个可以用来处理scrollview不能滑动到顶的问题,或者是tableview被导航栏遮住的情况
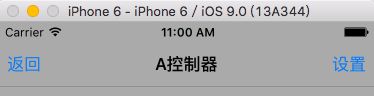
2.自定义导航栏返回按钮
如conA跳往conB,那么在conB的viewDidLoad中可以添加
-(void)createNav{
    UIButton *navLeft = [UIButton buttonWithType:UIButtonTypeCustom];
    navLeft.size = CGSizeMake(40, 40);
    [navLeft setImage:[UIImage imageNamed:@"top_icon_back"] forState:UIControlStateNormal];
    [navLeft addTarget:self action:@selector(clickTheBackBtn) forControlEvents:UIControlEventTouchUpInside];
    self.navigationItem.leftBarButtonItem = [[UIBarButtonItem alloc] initWithCustomView:navLeft];
}
-(void)clickTheBackBtn{
    [self.navigationController popViewControllerAnimated:YES];
}
如若conB为webview的控制器,那么点击返回按钮事件可以这样写
-(void)clickTheBackBtn{
    if ([self.webView canGoBack]) {
        [self.webView goBack];
    } else {
        [self.navigationController popViewControllerAnimated:YES];
    }
}
效果为

比系统自带的返回按钮看着简约
3.改变自定义uitableviewcell的背景色和字体颜色,这里是自定义的cell,而不是系统默认的
可以设置一个selectedSequenceIndex来定义被点击的cell的位置,然后在cellForRowAtIndexPath中比较判断
if (indexPath.row == _selectedProvinceIndex) {
    cell.backgroundColor = [UIColor colorWithHexString:@"#f9f9f9"];
    cell.contentLab.textColor = [UIColor colorWithHexString:@"#2cc851"];
} else {
    cell.backgroundColor = [UIColor colorWithHexString:@"#f1f1f1"];
    cell.contentLab.textColor = [UIColor colorWithHexString:@"#666666"];
}
4.ios加载启动页时隐藏导航栏,只需在info.plist中添加
Status bar is initially hidden 并设置为YES
5.转场push与present混用
有三个控制器A,B,C,带有导航栏。从A跳往B用present方式,从B跳往C用push方式。有两种实现方式:
①使用present主要是想要present的转场效果,若用push,那么可以使用转场动画来实现,前边已提过。
优点:从B跳往C直接push即可,很方便。
缺点:但用带动画的push实现的仿present效果不是很好,界面不是直接从底部升到顶部,还带有其它效果。
②利用系统自带的present,但在present是重新定义一个新的UINavigationController,将B作为rootController。这适合一些数据联系不是很紧密的控制器之间。
优点:转场效果很平滑,符合要求
缺点:只能在当前的导航控制器间切换。
conA *A = [[conA alloc]init];
UINavigationController *nav = [[UINavigationController alloc]initWithRootViewController:A];
[self presentViewController:nav animated:YES completion:nil];
6.UITableView跳到指定位置
NSIndexPath *provinceIndexPath = [NSIndexPath indexPathForRow:_selectedProvinceIndex inSection:0];
[self.firstTableview scrollToRowAtIndexPath:provinceIndexPath atScrollPosition:UITableViewScrollPositionMiddle animated:NO];
7.设置statusbar背景颜色
CGFloat searchBarY = self.prefersStatusBarHidden ? 0:20;
UIView *statusBarView = [[UIView alloc]initWithFrame:CGRectMake(0, 0, kScreenWidth, searchBarY)];
statusBarView.backgroundColor = [UIColor colorWithHexString:@"#34d35a"];
[self.view addSubview:statusBarView];
8.修改UITableView的headView和footerView的背景色
//footer背景色
- (void)tableView:(UITableView *)tableView willDisplayFooterView:(UIView *)view forSection:(NSInteger)section {
    view.tintColor = [UIColor whiteColor];
}
//header背景色
-(void)tableView:(UITableView *)tableView willDisplayHeaderView:(UIView *)view forSection:(NSInteger)section{
    view.tintColor = [UIColor whiteColor];
}
这样设置是无效的
-(void)viewDidLoad{
    _tableView.tableHeaderView.backgroundColor = [UIColor clearColor];
}
9.对图片设置圆角
当图片只有几张时,可以用图层来设置。
CGFloat imgWH = 100;
UIImageView *imageView = [[UIImageView alloc]initWithFrame:CGRectMake(50, 65, imgWH, imgWH)];
imageView.image = [UIImage imageNamed:@"head"];
imageView.layer.cornerRadius = imgWH/2;
imageView.layer.masksToBounds = YES;
但涉及到大量图片时,用图层的方法缺点就显现出来了,此时会有卡顿现象。可以用绘图的方式解决,对UIIamage添加分类即可。
-(UIImage *)cutRoundImage{
    UIGraphicsBeginImageContextWithOptions(self.size, NO, 0.0);
    // 获取上下文
    CGContextRef ctr = UIGraphicsGetCurrentContext();
    // 设置圆形
    CGRect rect = CGRectMake(0, 0, self.size.width, self.size.height);
    CGContextAddEllipseInRect(ctr, rect);
    // 裁剪
    CGContextClip(ctr);
    // 将图片画上去
    [self drawInRect:rect];
    UIImage *image = UIGraphicsGetImageFromCurrentImageContext();
    UIGraphicsEndImageContext();
    return image;
}
10.对UIView指定位置设置圆角
如有需求只对UIButton的右上角设置为圆角,那么可以用蒙版mask来做
UIButton *btn = [UIButton buttonWithType:UIButtonTypeCustom];
btn.frame = CGRectMake(50, 100, 100, 50);
[btn setTitle:@"下一页" forState:UIControlStateNormal];
btn.backgroundColor = [UIColor brownColor];
//设置蒙版
CGRect rect = CGRectMake(0, 0, 100, 50);
CGSize radio = CGSizeMake(15, 15);//圆角尺寸
UIRectCorner corner = UIRectCornerBottomRight|UIRectCornerTopRight;//圆角位置
UIBezierPath *path = [UIBezierPath bezierPathWithRoundedRect:rect byRoundingCorners:corner cornerRadii:radio];
CAShapeLayer *masklayer = [[CAShapeLayer alloc]init];//创建shapelayer
masklayer.frame = btn.bounds;
masklayer.path = path.CGPath;//设置路径
btn.layer.mask = masklayer;
效果为

11.设置透明的导航栏
首先想到用alpha=0来解决,但这样没效果
self.navigationController.navigationBar.alpha = 0;

可以这样来,这样左右标题都还在
//给navigationbar设置一个空的背景图片,即可实现透明,并且左右标题都在
[self.navigationController.navigationBar setBackgroundImage:[UIImage new] forBarMetrics:UIBarMetricsDefault];
但下边还有条线,可以通过如下处理
self.navigationController.navigationBar.shadowImage = [UIImage new];
最终效果为

都是通过设置空的背景图片来实现。