OpenFileDialog与SaveFileDialog对话框多用在文件上传与保存的场合,从WinForm时代就接触这2个API了,这篇文章就把这部分知识点整理一下,也方便日后使用时查阅。
首先熟悉一下这两个API,先以文本方式为例:
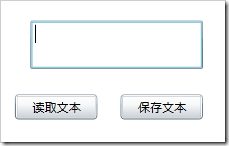
 将一个txt文件读取到文本框中,就使用了OpenFileDialog打开文件
OpenFileDialog ofd = new OpenFileDialog();ofd.Filter = "Text Files|*.txt";ofd.FilterIndex = 1;bool? result = ofd.ShowDialog();if (result != null && result == true){using (StreamReader stream = (StreamReader)ofd.File.OpenText()){this.textBox1.Text = stream.ReadToEnd();}}
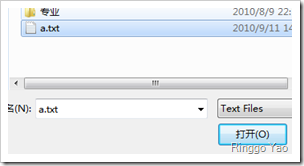
当我们打开这个a.txt文件时,就会将文件中的信息读取到文本框中
SaveFileDialog sfd = new SaveFileDialog();sfd.Filter = "Text Files (*.txt)|*.txt";sfd.FilterIndex = 1;sfd.DefaultExt = "txt";bool? result = sfd.ShowDialog();if (result != null && result == true){using (Stream stream = (Stream)sfd.OpenFile()){byte[] bytebuffer = System.Text.UTF8Encoding.UTF8.GetBytes(this.textBox1.Text);stream.Write(bytebuffer, 0, bytebuffer.Length);stream.Close();}}
SaveFileDialog本身就是与OpenFileDialog进行的相反的过程,这里就不多讲了
下面则以图片资源为例,简单的看看其上传与下载的实现,效果就是这样
XAML代码:
<Image Name="image1" Stretch="Fill" Source="/UpAndDownImages;component/Images/Desert.jpg" /><TextBlock Name="textBlock1" Text="" /><Button Content="上传" Click="btnUplaod_Click" /><Button Content="下载" Name="btnLoad" Click="btnLoad_Click" />
UI上提供了2个按钮分别实现上传下载,先说明上传部分,上传有多种方式实现,比如WCF,WebService等,这里简单一点,使用WebClient方式
OpenFileDialog ofd = new OpenFileDialog();ofd.Multiselect = false;ofd.Filter = "Image Files (*.bmp, *.jpg)|*.bmp;*.jpg ";bool? result = ofd.ShowDialog();UriBuilder uri;if (result != null && result == true){uri = new UriBuilder("http://localhost:12011/UploadImage.ashx");uri.Query = string.Format("image={0}", ofd.File.Name);WebClient client = new WebClient();client.OpenWriteCompleted += (obj, args) =>{Stream input = args.UserState as Stream;Stream output = args.Result;byte []buffer=new byte[4096];int reader = 0;while((reader=input.Read(buffer,0,buffer.Length))>0){output.Write(buffer,0,reader);}output.Close();input.Close();};client.OpenWriteAsync(uri.Uri,"POST",ofd.File.OpenRead());#region 预览图片BitmapImage bimage = new BitmapImage();bimage.SetSource(ofd.File.OpenRead());this.image1.Source = bimage;this.textBlock1.Text = ofd.File.Name;#endregion}
这里使用12011端口号进行处理,OpenFileDialog.File.OpenFile()用来读取选择的文件。
看看服务端的UploadImage.ashx文件中的实现
public void ProcessRequest(HttpContext context){byte[] buffer = new byte[4096];int reader=0;Stream stream = context.Request.InputStream;string imagename = context.Request.QueryString["image"].ToString();using (FileStream fs = File.Create(context.Server.MapPath("~/Files/"+imagename),4096)){while ((reader = stream.Read(buffer, 0, buffer.Length)) != 0){fs.Write(buffer, 0, reader);}}}
文件上传的流程就是这样,可以关注一下开源项目SilverlightFileUpload,个人感觉挺方便的,下面关注一下保存图片的做法
SaveFileDialog sfd = new SaveFileDialog();sfd.FilterIndex = 1;sfd.DefaultExt = "png";sfd.Filter = "Png files (*.png)|*.png|All files (*.*)|*.*";bool? result = sfd.ShowDialog();if (result != null && result == true){Uri uri = new Uri(string.Format("http://localhost:12011/Files/{0}", this.textBlock1.Text), UriKind.Absolute);WebClient client = new WebClient();client.OpenReadCompleted += (obj, args)=>{if (!args.Cancelled){using (Stream stream = (Stream)sfd.OpenFile()){int length = Convert.ToInt32(args.Result.Length);byte[] byteResult = new byte[length];args.Result.Read(byteResult, 0, length);stream.Write(byteResult, 0, byteResult.Length);stream.Close();}}};client.OpenReadAsync(uri);}
这种方式其实就是使用WebClient下载流之后再保存到本地文件中,也是我们常用的方式,但是这种方式是直接从服务器上读取文件的,我可以直接将Image控件里的图片保存到本地上吗?既然上传图片是通过将流转换成字节读取的,那么理论上我反向操作应该是可以的,于是尝试将BitmapImage转换成Steram,Byte数组这些方式,可是总是无法正确的保存图片。
然后在网上看到这句话 Images can be retrieved without the need to conform to any cross domain access policy as other http requests have to. The basis of this relaxation of the cross domain rules is that the data making up the image cannot be be retrieved in the raw. It can only be used as an image。
额,看来是设计问题,既然这样,就再想其它方式,一一尝试也没想到好的方式,最后使用了WriterableBitmap类,之前也没接触这个类,看SDK了解了一下其概念,对图形像素不是太清楚,上网搜搜看有没有现成的方案,最后找到国外一个解决方案:保存控件中的内容
果然很犀利,用文中的方式就可以实现直接将Image控件中的内容保存为图片了。
对话框只是个辅助的条件,单纯的讲对话框是没什么意义的,这里就简单的把文本与图片的相关操作基本的实现了一下,希望对需要的人有所帮助。
代码下载:文件上传与下载 VS2010+SL3

