Objects as Points
anchor-free系列的目标检测算法,只检测目标中心位置,无需采用NMS
1、主干网络
采用Hourglass Networks [1](还有resnet18 with up conv layer,以及DLA-34),这是一个用于人体姿态检测的网络,网络结构如图,
特点是类似一个沙漏结构,两头大,中间小,右边特征需要左边特征融合。几个网络特点是输入512*512,输出128*128

2、输出
输出包括三部分
hm(heatmap):128*128*80(类别),heat中最大点的位置代表了检测目标的中心点,
wh:128*128*2,输出对应位置上的heigt和width
reg:128*128*2,输出对应中心点的偏移
3、训练
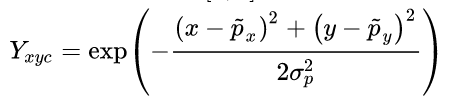
(1)训练时标签,以目标中心形成一个高斯分布
(2)损失函数
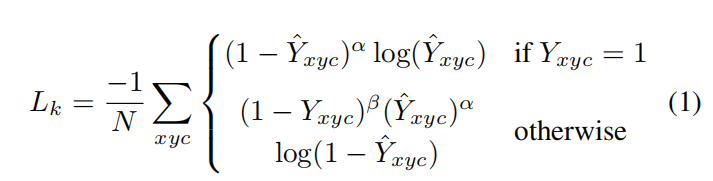
损失函数包括三部分
logistic regression with focal loss:N是keypoints个数, α and β是focal loss的超参。
当标签Y=1时,如果exsy example时,损失就小,反之就大;如果Y=0时。相较于focal loss,
多了一个惩罚项 ,这个惩罚项的意义在于,对于负样本,当距离中心点较近时,
这个值比较小,反之比较大。即对很接近负样本的样本 ,loss比重降低,不是那么负的样本,loss比重升高。
【2】认为其处理了正负样本的不平衡。
中心偏移损失

size损失(h,w不经过标准化)

其中 
4、推理
分为3个部分
(1)pre_process
输入图片,给出图片的中心点,尺度(可多尺度测试),输出的长宽
meta = {'c': c, 's': s,
            'out_height': inp_height // self.opt.down_ratio,
            'out_width': inp_width // self.opt.down_ratio}
(2)process 输出
output = self.model(images)[-1]
hm = output['hm'].sigmoid_()
wh = output['wh']
reg = output['reg'] if self.opt.reg_offset else None
将输出做一个解码
dets = ctdet_decode(hm, wh, reg=reg, cat_spec_wh=self.opt.cat_spec_wh, K=self.opt.K)
在128*128个中心点中,只输出top100个中心点
detections = torch.cat([bboxes, scores, clses], dim=2)# 1*100*6
(3) post-process
最后又做了放射变换,但没看明白为什么要做这个
【1】Stacked hourglass networks for human pose estimation
【2】https://zhuanlan.zhihu.com/p/66048276