一.springboot继承mybatis的相关说明:
springboot是一款基于spring的框架,springboot能较快的搭建web工程和tomcat服务器,提高搭建环境和开发环境的效率,所以使用的越来越多,springboot也能和mybatis集成
mybatis是一款持久层框架,基于spring-jdbc,所有的持久层框架都是基于数据库的jdbc,所以导入mybatis的包后就不需要再导入jdbc的相关包,在这里我们的配置文件使用的是yml文件也可以使用以properties后缀结尾的配置文件,通过springboot集成mybatis,不需要配置额外的sqlSessionFactoryBean,mybatis基于springboot的底层已经帮我们实现了sqlSessionFactoryBean的创建,springboot中有一个自动导入配置文件的标签,这个标签以选择器的方式导入写入 spring.factoties中的配置类:
@EnableAutoConfiguration 开启自动配置功能,通过一个AutoConfigurationImportSelector导入选择器去扫描 spring-boot-autoconfigure-2.0.5.RELEASE.jar 自动配置包下面的 spring.factories 文件中的很多很多的自动配置的类
如:ThymeleafAutoConfiguration 是的Thymeleaf的自动配置 ,在这个自动配置类里面通过一个ThymeleafProperties去读取配置文件中的配置(也有默认配置) ,来自动配置Thymeleaf,还有很多很多..............
1.导包--导入mybatis包,连接池包,mysql驱动包
<!--导入mybatis-->
      <dependency>
          <groupId>org.mybatis.spring.boot</groupId>
          <artifactId>mybatis-spring-boot-starter</artifactId>
          <version>1.1.1</version>
      </dependency>

<!--导入连接池-->
      <dependency>
          <groupId>com.alibaba</groupId>
          <artifactId>druid</artifactId>
          <version>1.1.20</version>
      </dependency>

<!-- mysql 数据库驱动. -->
      <dependency>
          <groupId>mysql</groupId>
          <artifactId>mysql-connector-java</artifactId>
      </dependency>
2. 在yml中配置mybatis,配置dataSource
mybatis:
#配置映射的mapper.xml文件
  mapper-locations: classpath:cn/itsource/springboot/mapper/*Mapper.xml
#配置别名
  type-aliases-package: cn.itsource.domain

spring:
datasource:
  username: root
  password: 123456
  url: jdbc:mysql:///cms
  driver-class-name: com.mysql.jdbc.Driver
#连接池的类型
  type: com.alibaba.druid.pool.DruidDataSource
3.在配置类上扫描mapper接口
@MapperScan(basePackages = "cn.itsource.mapper")
4.完成测试
步骤:
1.在domain包中写一个基本业务类user
2.在mapper层写一个接口UserMapper,里面写一个方法,查询数据库中对应user表中的所有内容
3.写一个UserMapper.xml,里面放数据库的查询语句 sql语句
4.写service层,接口方法跟mapper层接口方法一样,再写该接口的实现类(注入UserMapper接口,调用mapper中的方法)
5.写controller层
@Controller
@RequestMapping
public class UserController {
    @Autowired
    private IUserService userService;
    @RequestMapping("/user")
    @ResponseBody
//查询表中所有数据
    public List<User> queryAll(){
       return userService.queryAll();
    }
//分页查询
    @RequestMapping("/page")
    @ResponseBody
    public Page<User> queryPage(Object query){
        return userService.queryPage(query);
    }
}
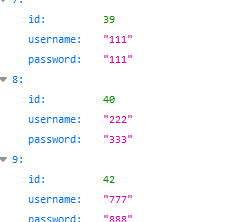
5.浏览器访问资源

6.在springboot中使用pagehelper实现分页
步骤
1.导入pagehelper的jar包
<!--导入分页包-->
      <dependency>
          <groupId>com.github.pagehelper</groupId>
          <artifactId>pagehelper-spring-boot-starter</artifactId>
          <version>1.2.3</version>
      </dependency>
2.在yml配置文件中配置pagehelper属性
pagehelper:
    helperDialect: mysql
    reasonable: true
    supportMethodsArguments: true
    params: count=countSql
3.实现类返回page<T>对象,该对象帮我们实现list集合数据中的分页,使用pagehelper这个类设置当前页和每页查询数据的条数
说明:mapper层和controller层的代码就不再重复了。
@Override
    public Page<Employee> queryPage(Object query) {
        //设置当前页和每页条数
        PageHelper.startPage(1, 10);
        //底层帮我们实现吧list集合中的数据封装为page对象,然后分页
        Page<Employee> employees = employeeMapper.queryPage(query);
        return employees;
    }
4.浏览器访问资源测试
