第一步:首先下载struts2的架包(链接地址:http://download.csdn.net/detail/ahy1024/4626028)
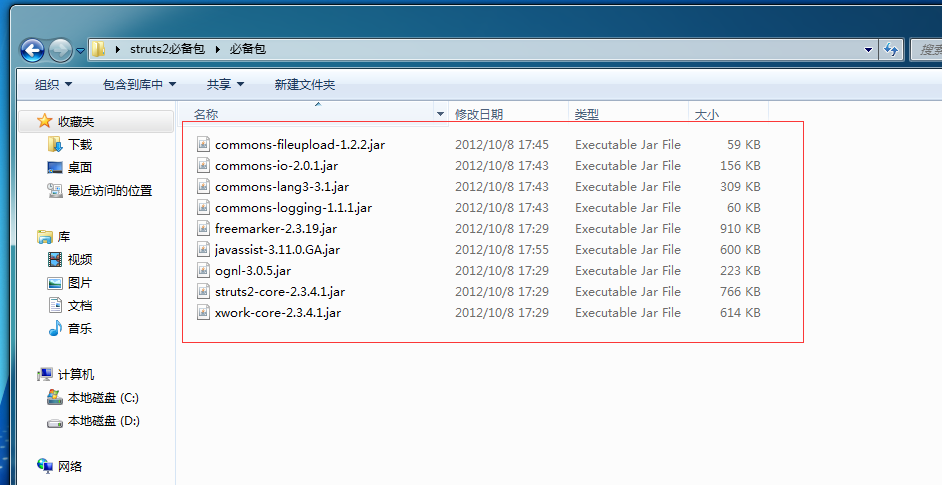
第二步:新建web project项目 DemoStru2,然后把下载的struts2的压缩包解压出来的jar包放到WebRoot下面的WEB-INF下面的lib中,(结构如图)

第三步:在src中新建 com.test包,在com.test里面新建WelcomeAction类文件。
WelcomeAction类的代码如下
package com.test;
public class WelcomeAction {
private String name;
public String execute() {
System.out.println("WelcomeAction.execute()...");
System.out.println("name: " + name);
if ("monster".equalsIgnoreCase(name)) {
return "fail";
}
return "success";
}
public String getName() {
return name;
}
public void setName(String name) {
this.name = name;
}
}
第四步:在src中新建 struts.xml文件,
内容如下:
<?xml version="1.0" encoding="UTF-8"?>
<!DOCTYPE struts PUBLIC
"-//Apache Software Foundation//DTD Struts Configuration 2.1//EN"
"http://struts.apache.org/dtds/struts-2.1.dtd">
<struts>
<package name="helloworld" extends="struts-default" namespace="/haha">//命名空间,下面要用到的
<action name="welcome" class="com.test.WelcomeAction"> //welcome类名,下面要使用的,与welcome相对应的是控制类中的Java处理代码 class="com.test.WelcomeAction",
<result name="success">/jsp/welcome.jsp</result>
<result name="fail">/jsp/nameform.jsp</result> </action>
</package>
</struts>
第五步:在WebRoot下新建jsp文件夹,这个jsp文件夹主要是存放jsp页面的,(本例中新建了,nameform.jsp和welcome.jsp,主要是展示struts2的架构使用的)
nameform.jsp和welcome.jsp具体代码如下:
1、nameform.jsp
<%@ page language="java" import="java.util.*" pageEncoding="UTF-8"%>
<!DOCTYPE HTML PUBLIC "-//W3C//DTD HTML 4.01 Transitional//EN">
<html>
<head>
</head>
<body>
This is my JSP page. <br>
<form action="/DemoStru2/haha/welcome.action" method="post">
<input name="name" type="text" /> <input value="提交" type="submit" />
</form>
</body>
</html>
2、welcome.jsp
<%@ page language="java" import="java.util.*" pageEncoding="UTF-8"%>
<%
String path = request.getContextPath();
String basePath = request.getScheme()+"://"+request.getServerName()+":"+request.getServerPort()+path+"/";
%>
<!DOCTYPE HTML PUBLIC "-//W3C//DTD HTML 4.01 Transitional//EN">
<html>
<head>
<base href="<%=basePath%>">
<title>My JSP 'welcome.jsp' starting page</title>
<meta http-equiv="pragma" content="no-cache">
<meta http-equiv="cache-control" content="no-cache">
<meta http-equiv="expires" content="0">
<meta http-equiv="keywords" content="keyword1,keyword2,keyword3">
<meta http-equiv="description" content="This is my page">
<!--
<link rel="stylesheet" type="text/css" href="styles.css">
-->
</head>
<body>
This is my JSP page. <br>
<h1>Welcome, ${name}</h1>
</body>
</html>
第六步:在WEB-INF文件下新建 web.xml文件, web.xml内容如下:
<?xml version="1.0" encoding="UTF-8"?>
<web-app xmlns:xsi="http://www.w3.org/2001/XMLSchema-instance" xmlns="http://java.sun.com/xml/ns/j2ee" xmlns:web="http://xmlns.jcp.org/xml/ns/javaee" xsi:schemaLocation="http://java.sun.com/xml/ns/j2ee http://java.sun.com/xml/ns/j2ee/web-app_2_4.xsd" version="2.4">
<!-- <filter>
<filter-name>WelcomeAction</filter-name>
<filter-class>com.test.WelcomeAction</filter-class>
</filter>
<filter-mapping>
<filter-name>WelcomeAction</filter-name>
<url-pattern>*.action</url-pattern>
</filter-mapping> -->
<filter>
<filter-name>Struts2</filter-name>
<filter-class>org.apache.struts2.dispatcher.ng.filter.StrutsPrepareAndExecuteFilter </filter-class>
</filter>
<filter-mapping>
<filter-name>Struts2</filter-name>
<url-pattern>*.action</url-pattern>
//这里要注意,过滤的内容一般有两种,1、action后缀的。2、是/* 所有的
</filter-mapping>
</web-app>
保存以上,即可运行了。
浏览器中输入:http://localhost:8080/DemoStru2/jsp/nameform.jsp
自己测试看看。