刚开始学习 Spring 的时候,我们听到最多的两个概念应该就是 IoC(Inversion of Control,控制反转)和 DI(Dependency Injection,依赖注入),这两个概念其实是对同一个事物的不同描述。IoC 是指将对象的创建、维护对象间的依赖关系等工作反转给 Spring 容器完成,而 DI 则是这一过程的实现。Spring 框架的核心功能之一就是通过 DI 来管理 bean 之间的依赖关系,从而降低耦合度。
如图所示,Spring 容器在创建 bean 的时候会根据配置元数据注入它的依赖。

一个简单的 demo
如果你刚刚接触 Spring,那么很大可能会在这些概念上有些懵逼。什么是“依赖”关系?又是怎么“注入”的呢?
1. 依赖
如果 A 类的成员变量中有一个是 B 类,我们就说 A 依赖于 B。
class Main {
    interface Sport {
        void play();
    }

    static class Basketball implements Sport {
        @Override
        public void play() {
            System.out.println("愉快地打篮球");
        }
    }

    static class Player {
    	private Sport sport = new Basketball();

        public void playWith(String s) {
            System.out.print("和" + s);
            sport.play();
        }
    }

    public static void main(String[] args) {
        Player player = new Player();
        player.playWith("YaoMing");
    }
}
在这个例子中,Player 依赖于 Sport 接口,同时还依赖于 Basketball 类。
2. 注入
我们发现 Player 和 Basketball 类耦合在一起了,倘若下一次我们想将 sport 字段实例化为另一个 Soccer 类,就要修改 Player 内部的代码。要想解耦,很简单,增加一个 setter 方法。
class Main {
    interface Sport {
        void play();
    }

    static class Basketball implements Sport {
        @Override
        public void play() {
            System.out.println("愉快地打篮球");
        }
    }

    static class Soccer implements Sport {
        @Override
        public void play() {
            System.out.println("开心地踢足球");
        }
    }

    static class Player {
    	private Sport sport;

        public void setSport(Sport s) {
            sport = s;
        }

        public void playWith(String s) {
            System.out.print("和" + s);
            sport.play();
        }
    }

    public static void main(String[] args) {
        Player player = new Player();
        Sport soccer = new Soccer();
        player.setSport(soccer);  // 在外部设置依赖的对象
        player.playWith("YaoMing");
    }
}
用 setter 方法在外部设置依赖的对象就是注入的一种方式。原来需要在编译期就确定 Player 所进行的运动种类,现在推迟到运行期才确定。 Spring 把这个注入的过程抽取出来,交给 IoC 容器去管理,因而我们不需要手动 set 依赖对象。
依赖关系体现在配置文件中:
<?xml version="1.0" encoding="UTF-8"?>
<beans xmlns="http://www.springframework.org/schema/beans"
       xmlns:xsi="http://www.w3.org/2001/XMLSchema-instance"
       xsi:schemaLocation="http://www.springframework.org/schema/beans http://www.springframework.org/schema/beans/spring-beans.xsd">
    <bean id="basketball" class="Main.Basketball"></bean>

    <bean id="soccer" class="Main.Soccer"></bean>

    <bean id="player" class="Main.Player">
    	<property name="sport" ref="soccer"></property>
    </bean>
</beans>
主函数的代码变为:
public static main(String[] args) {
    // 配置文件在 resources/META-INF 目录下
    ApplicationContext ac = new ClassPathXmlApplicationContext("META-INF/applicationContext.xml");
    Player player = (Player) ac.getBean("player");
    player.playWith("YaoMing");
}
没有 new 关键字,也没有 setter 方法,Spring 利用反射机制使依赖注入自动化,这样的效果就是所谓「控制流的反转」。
Spring Bean
在上面 Spring 的配置文件中,出现得最多的就是 bean。如果把应用程序当成一台机器,各种各样的 bean 就是构成它的零件,或者说组件。
在 Spring 中:
bean 是一个被实例化,组装,并通过 Spring IoC 容器管理的对象。
bean 是根据配置元数据创建的,配置元数据应该包含以下信息:
- 创建 bean 的方式
- bean 的生命周期
- bean 的依赖关系
这些信息体现在 bean 的一系列属性中。
| 属性 | 描述 |
|---|---|
| class | 指定用来创建 bean 的 Java 类,必须是全类名 |
| name | 指定唯一的 bean 标识符 |
| scope | 指定 bean 的作用域 |
| constructor-arg | 依赖注入相关,指定 bean 构造方法的参数 |
| properties | 依赖注入相关,指定内部 bean |
| autowire | 依赖注入相关,设置自动装配的信息 |
| lazy-init | 设置是否延迟初始化 |
| init-method | 在 bean 的所有必需的属性被容器设置之后,调用方法 |
| destroy-method | 当包含该 bean 的容器被销毁时,调用方法 |
1. bean 的作用域
根据 Spring Framework 5.x 官方文档,bean 的 scope 属性有 6 个可选项,描述不同的作用域。
最常见的有 2 个:
- singleton:bean 以单例的方式存在
- prototype:每次从容器中获取 bean 时,都返回一个新的实例
在 xml 文件中设置:
<bean id="accountService" class="com.something.DefaultAccountService" scope="prototype"/>
1) singleton
singleton 是默认的作用域。当一个 bean 的作用域为 singleton 时,IoC 容器中只会存在一个 bean 实例,所有对 bean 的请求,只要 id 与 bean 的定义相匹配,都只会返回同一实例。
这个 bean 在创建容器时会被跟着创建,不管之后是否会被使用。
public class SingletonTest {
    static class Hello {
        Hello() {
            System.out.println("hello! 我被创建了");
        }
    }

    public static void main(String[] args) {
        ApplicationContext ac = new ClassPathXmlApplicationContext("META-INF/applicationContext.xml");
        // 创建容器,没有去获取 bean
    }
}
xml 配置:
<bean id="singletonHello" class="SingletonTest.Hello"/>
执行结果:

可以看到,bean 在创建容器时就被实例化了,跟有没有被我们使用无关。
2) prototype
当一个 bean 的作用域为 prototype 时,IoC 容器会对每次 bean 的请求(将其注入到另一个 bean 中,或者调用了容器的 getBean() 方法)创建一个新的 bean 实例。
这个 bean 在创建容器时并没有实例化,只有在需要的时候才会,并且每次获取的都不是同一个。
public class PrototypeTest {
    static class Hello {
        Hello() {
            System.out.println("hello! 我被创建了");
        }
    }

    public static void main(String[] args) {
        ApplicationContext ac = new ClassPathXmlApplicationContext("META-INF/applicationContext.xml");
        System.out.println("容器创建完毕");
        // 获取 bean
        Hello h1 = (Hello) ac.getBean("prototypeHello");
        // 再次获取
        Hello h2 = (Hello) ac.getBean("prototypeHello");
    }
}
xml 配置:
<bean id="prototypeHello" class="PrototypeTest.Hello" scope="prototype"/>
执行结果:
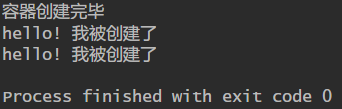
可以看到每次获取 bean 都会执行一次实例化。
建议:对有状态的 bean 使用 prototype 作用域,而对无状态的 bean 使用 singleton 作用域。
scope 剩下的 4 个可选项,仅适用于 web 环境:
- request:一个 bean 定义对应单个 http 请求的生命周期,即每个 http 请求有一个 bean 实例
- session:一个 bean 定义对应单个 http session 的生命周期,即每个 http session 有一个 bean 实例
- application:一个 bean 定义对应单个 ServletContext 的生命周期
- websocket:一个 bean 定义对应单个 websocket 的生命周期
2. bean 的生命周期
简单表述:
bean 的定义 —— bean 的初始化 —— bean 的使用 —— bean 的销毁
当一个 bean 被实例化时,它可能需要执行一些初始化操作使它转换成可用状态。当不再需要这个 bean,并且从容器中将它移除时,也可能需要做一些清除工作。这其中就涉及到两个重要的生命周期回调方法,一个是初始化操作,另一个是销毁操作,分别对应 init-method 和 destroy-method 属性。
1) 初始化回调
初始化回调是在 bean 被实例化并且注入依赖之后执行的,有两种设置方式(这里先不讨论注解)。
1)init-method 属性
public class LifeCircleTest {

    static class InitExample {
        public InitExample() {
            System.out.println("InitExample 被创建!");
        }

    	public void init() {
        	// 初始化工作
        	System.out.println("InitExample 被初始化!");
    	}
    }

    public static void main(String[] args) {
        ApplicationContext ac = new ClassPathXmlApplicationContext("META-INF/applicationContext.xml");
    }
}
xml 配置:
<bean id="initExample" class="lifeCycleTest.InitExample" init-method="init"/>
执行结果:

2)InitializingBean 接口
org.springframework.beans.factory.InitializingBean接口只包含一个方法:
public interface InitializingBean {

    /**
     * Invoked by the containing {@code BeanFactory} after it has set all bean properties
     * and satisfied {@link BeanFactoryAware}, {@code ApplicationContextAware} etc.
     * <p>This method allows the bean instance to perform validation of its overall
     * configuration and final initialization when all bean properties have been set.
     * @throws Exception in the event of misconfiguration (such as failure to set an
     * essential property) or if initialization fails for any other reason
     */
    void afterPropertiesSet() throws Exception;

}
让 bean 实现这个接口,然后把初始化工作放在 afterPropertiesSet() 方法中:
static class InitExampleTwo implements InitializingBean {
    public InitExampleTwo() {
        System.out.println("InitExampleTwo 被创建!");
    }

    @Override
    public void afterPropertiesSet() throws Exception {
        System.out.println("InitExampleTwo 被初始化!");
    }
}
xml 配置:
<bean id="initExampleTwo" class="lifeCycleTest.InitExampleTwo"/>
执行结果:

官方不建议使用接口的方式,因为会产生不必要的耦合。
如果两种方式都使用,会先执行接口的初始化,再执行配置指定的初始化。
2) 销毁回调
销毁回调是在持有这个 bean 的容器被关闭时执行的,设置方式与初始化回调类似。
1)destroy-method 属性
public class LifeCircleTest {

    static class DestroyExample {
        public void cleanup() {
            System.out.println("DestroyExample 被销毁!");
        }
    }

    public static void main(String[] args) {
        // 现在不是 web 环境,为了让容器正常关闭,这里使用 AbstractApplicationContext
        AbstractApplicationContext ac = new ClassPathXmlApplicationContext("META-INF/applicationContext.xml");
        // 在 JVM 中注册一个关闭钩子
        ac.registerShutdownHook();
        // 应用开始运行
        ac.start();
        System.out.println("main 方法结束,容器关闭");
    }
}
xml 配置:
<bean id="destroyExample" class="LifeCycleTest.DestroyExample" destroy-method="cleanup"/>
执行结果:

2)DisposableBean 接口
org.springframework.beans.factory.DisposableBean也只包含一个方法:
void destroy() throws Exception;
继承这个接口,然后把销毁操作放在 destory() 里即可。
static class DestroyExample implements DisposableBean {
    @Override
    public void destroy() {
        // 销毁操作
    }
}
3) 一种简化的配置
如果有很多个 bean 需要提供初始化或销毁回调,比较好的做法是将方法的名称统一,比如 init,destroy,然后在配置文件中使用 default-init-method 和 default-destroy-method。
<beans xmlns="http://www.springframework.org/schema/beans"
       xmlns:xsi="http://www.w3.org/2001/XMLSchema-instance"
       xsi:schemaLocation="http://www.springframework.org/schema/beans http://www.springframework.org/schema/beans/spring-beans.xsd">
    default-init-method="init"
    default-destroy-method="destroy">

    <bean id="..." class="...">
        <!-- 这里是属性或配置 -->
    </bean>
</beans>
依赖注入
本文开头用一个 demo 简单介绍了依赖注入,我们有必要继续加深对它的了解。
官方文档中有一段描述:
IoC is also known as dependency injection (DI). It is a process whereby objects define their dependencies (that is, the other objects they work with) only through constructor arguments, arguments to a factory method, or properties that are set on the object instance after it is constructed or returned from a factory method.
指明了有 2 种方式进行依赖注入:
- 构造器传参
- setter 方法
1) 基于构造器
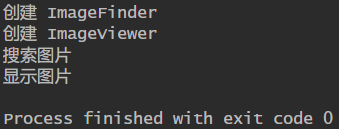
public class ImageViewer {

    // ImageViewer 依赖于 ImageFinder
    private ImageFinder imageFinder;

    public ImageViewer(ImageFinder imageFinder) {
        System.out.println("创建 ImageViewer");
        this.imageFinder = imageFinder;
    }

    public void showView() {
        imageFinder.find();
        System.out.println("显示图片");
    }
}
public class ImageFinder {

    public ImageFinder() {
        System.out.println("创建 ImageFinder");
    }

    public void find() {
        System.out.println("搜索图片");
    }
}
public class Main {
    public static void main(String[] args) {
        ApplicationContext ac = new ClassPathXmlApplicationContext("META-INF/applicationContext.xml");
    	ImageViewer iv = (ImageViewer) ac.getBean("imageViewer");
        iv.showView();
    }
}
xml 配置:
<?xml version="1.0" encoding="UTF-8"?>
<beans xmlns="http://www.springframework.org/schema/beans"
       xmlns:xsi="http://www.w3.org/2001/XMLSchema-instance"
       xsi:schemaLocation="http://www.springframework.org/schema/beans http://www.springframework.org/schema/beans/spring-beans.xsd">
    <bean id="imageViewer" class="ImageViewer">
    	<constructor-arg ref="imageFinder"/>
    </bean>

    <bean id="imageFinder" class="ImageFinder"></bean>

</beans>
执行结果:
如果构造器有多个参数,只要不存在潜在的歧义,IoC 容器会按照合适的顺序注入参数。
public class Foo {
    public Foo(Aoo aoo, Boo boo) {
        // ...
    }
}
<beans>
    <bean id="foo" class="Foo">
        <constructor-arg ref="aoo"/>
        <constructor-arg ref="boo"/>
        <!-- 变换顺序也能正常注入 -->
        <!-- <constructor-arg ref="boo"/> -->
        <!-- <constructor-arg ref="aoo"/> -->
    </bean>

    <bean id="aoo" class="Aoo"/>
    <bean id="boo" class="Boo"/>
</beans>
如果参数是简单类型,可以在标签中直接指定 value。
public class Car {
    // 价格
    private int price;
    // 品牌
    private String brand;

    public Car(int price, String brand) {
        // ...
    }
}
<bean id="car" class="Car">
    <constructor-arg type="int" value="750000"/>
    <constructor-arg type="java.lang.String" value="Benz"/>
</bean>
如果多个参数类型相同,为了避免歧义发生,最好的办法是使用 index 明确指出对应的 ref 或 value。
<bean id="car" class="Car">
    <!-- index 从0开始 -->
    <constructor-arg index="0" value="750000"/>
    <constructor-arg index="1" value="Benz"/>
</bean>
2) 基于 setter 方法
public class ImageViewer {

    // ImageViewer 依赖于 ImageFinder
    private ImageFinder imageFinder;

    // 使用默认的无参构造器

    // 提供 setter 方法
    public void setImageFinder(ImageFinder imageFinder) {
        this.imageFinder = imageFinder;
    }

    public void showView() {
        imageFinder.find();
        System.out.println("显示图片");
    }
}
在配置文件中使用 property 标签:
<?xml version="1.0" encoding="UTF-8"?>
<beans xmlns="http://www.springframework.org/schema/beans"
       xmlns:xsi="http://www.w3.org/2001/XMLSchema-instance"
       xsi:schemaLocation="http://www.springframework.org/schema/beans http://www.springframework.org/schema/beans/spring-beans.xsd">
    <bean id="imageViewer" class="ImageViewer">
    	<property name="imageFinder" ref="imageFinder"/>
    </bean>

    <bean id="imageFinder" class="ImageFinder"></bean>

</beans>
对于简单类型,同样可以直接指定 value:
<bean id="car" class="Car">
    <property name="price" value="750000"/>
</bean>
3) 比较
既然构造器注入和 setter 方法注入都可行,那我应该怎么选择呢?
The Spring team generally advocates constructor injection, as it lets you implement application components as immutable objects and ensures that required dependencies are not null.
官方建议使用构造器注入,因为它允许将 bean 实现为不可变的对象,并确保所需的依赖项不为 null。
Setter injection should primarily only be used for optional dependencies that can be assigned reasonable default values within the class. Otherwise, not-null checks must be performed everywhere the code uses the dependency. One benefit of setter injection is that setter methods make objects of that class amenable to reconfiguration or re-injection later.
setter 注入最好用于可选的依赖项,这些依赖项可以在类中分配合理的默认值,并且可以在需要的时候重新配置或重新注入。
4) 注入集合
对于 Collection 类型,Spring 提供了<list>,<set>,<map>,<prop>标签。
| 标签 | 描述 |
|---|---|
| <list> | 注入一列值,可以重复 |
| <set> | 注入一列值,不可重复 |
| <map> | 注入键值对,key 和 value 可以是任意类型 |
| <prop> | 注入键值对,key 和 value 必须是字符串 |
<bean id="ComplexObject" class="ComplexObject">
    <!-- 作用于 setSomeProp(java.util.Properties) 调用-->
    <property name="someProp">
        <props>
            <prop key="prop1">value1</prop>
            <prop key="prop2">value2</prop>
        </props>
    </property>

    <!-- 作用于 setSomeList(java.util.List) 调用 -->
    <property name="someList">
        <list>
            <value>a list element</value>
            <ref bean="oneBean" />
        </list>
    </property>

    <!-- 作用于 setSomeMap(java.util.Map) 调用 -->
    <property name="someMap">
        <map>
            <entry key="an entry" value="just some string"/>
            <entry key ="a ref" value-ref="oneBean"/>
        </map>
    </property>

    <!-- 作用于 setSomeSet(java.util.Set) 调用 -->
    <property name="someSet">
        <set>
            <value>just some string</value>
            <ref bean="oneBean" />
        </set>
    </property>
</bean>
5) 循环依赖问题
如果主要使用构造器注入,可能会出现无法解析的循环依赖场景。
比如,类 A 需要通过构造器注入一个类 B 的实例,而类 B 同样需要通过构造器注入一个类 A 的实例。如果我们把 bean 配置为 A 和 B 相互注入,那么 IoC 容器将在运行时检测这个循环引用,并抛出一个 BeanCurrentlyInCreationException 异常。
这种情况可以改为用 setter 注入解决,但是,尽量不要让组件相互依赖。
自动装配
当项目比较大时,使用的 xml 配置数量会比较多,不方便维护,于是 Spring 提供了自动装配来简化这些配置,减少需要指定的 property 或 constructor-arg。
1) byName
在提供了 setter 方法的情况下:
public class ImageViewer {

    private ImageFinder imageFinder;

    public void setImageFinder(ImageFinder imageFinder) {
        this.imageFinder = imageFinder;
    }

    // ...
}
<?xml version="1.0" encoding="UTF-8"?>
<beans xmlns="http://www.springframework.org/schema/beans"
       xmlns:xsi="http://www.w3.org/2001/XMLSchema-instance"
       xsi:schemaLocation="http://www.springframework.org/schema/beans http://www.springframework.org/schema/beans/spring-beans.xsd">
    <bean id="imageViewer" class="ImageViewer" autowire="byName">
    	<!-- <property name="imageFinder" ref="imageFinder"/> -->
    </bean>

    <bean id="imageFinder" class="ImageFinder"></bean>

</beans>
IoC 容器会找到名称为 imageFinder 的 bean 并自动注入。
2) byType
通过类型查找 bean,如果有多个符合要求的 bean 就不能正常运行。
public class ByTypeTest {
    private Aoo name;

    public void setName(Aoo name) {
        this.name = name;
    }
}
<!-- 定义了两个 Aoo 类型的 bean -->
<bean id="aoo" class="Aoo"/>
<bean id="aoo2" class="Aoo"/>

<bean id="byTypeTest" class="ByTypeTest" autowire="byType"/>
错误提示:

3) constructor
在提供了有参构造器的情况下:
<bean id="foo" class="Foo" autowire="constructor">
    <!--
    <constructor-arg ref="aoo"/>
    <constructor-arg ref="boo"/>
	-->
</bean>

<bean id="boo" class="Boo"></bean>
<bean id="aoo" class="Aoo"></bean>