Controller注解介绍
- @Controller:处理http请求
- @RestController: Spirng4之后新加的注解,其实是一个组合注解等同于@ResponseBody和@Controller的组合
- @RequestMapping: 用于配置url映射,期望用户通过url访问方法
- @PathVariable:获取url中的数据
- @RequestParam:使用和@PathVariable差不多,不过以?id=来传递值
@Controller的使用
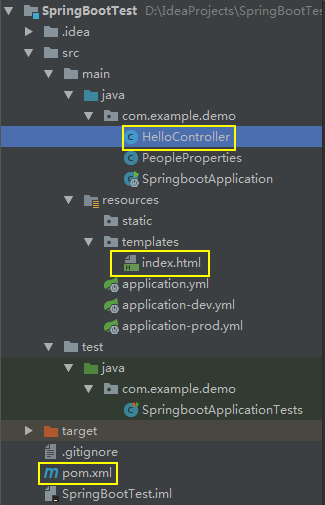
需要在以前的代码结构基础上修改三个文件
为pom.xml添加一个依赖
1 <dependency>
2    <groupId>org.springframework.boot</groupId>
3    <artifactId>spring-boot-starter-thymeleaf</artifactId>
4 </dependency>
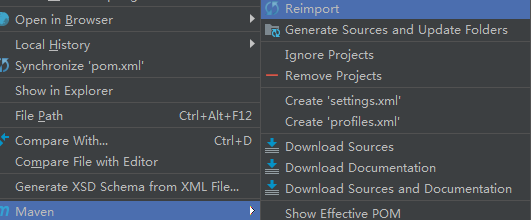
右击pom.xml,Reimport一下
新建一个index.html文件,添加一句话
<h1>Hello Spring Boot!</h1>
修改HelloController.java,使用Controller注解,并返回index.html文件
 1 package com.example.demo;
 2
 3 import org.springframework.beans.factory.annotation.Autowired;
 4 import org.springframework.stereotype.Controller;
 5 import org.springframework.web.bind.annotation.RequestMapping;
 6 import org.springframework.web.bind.annotation.RequestMethod;
 7
 8 @Controller
 9 public class HelloController {
10
11     //自动装配注解
12     @Autowired
13     private PeopleProperties peopleProperties;
14
15     @RequestMapping(value = "/hello" , method = RequestMethod.GET)
16     public String say() {
17         return "index";
18     }
19 }
运行,访问本地8082端口

@RestController的使用
@RestController相当于@ResponseBody和@Controller的组合注解
修改HelloController.java
 1 package com.example.demo;
 2
 3 import org.springframework.beans.factory.annotation.Autowired;
 4 import org.springframework.web.bind.annotation.RequestMapping;
 5 import org.springframework.web.bind.annotation.RequestMethod;
 6 import org.springframework.web.bind.annotation.RestController;
 7
 8 @RestController
 9 public class HelloController {
10
11     @Autowired
12     private PeopleProperties peopleProperties;
13
14     @RequestMapping(value = {"/hello"} , method = RequestMethod.GET)
15     public String say() {
16         return peopleProperties.getName();
17     }
18 }
运行,访问本地8082端口

@PathVariable的使用
修改HelloController.java,获取url中的id值显示到页面上
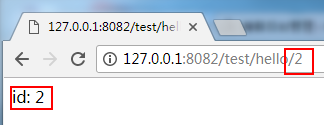
 1 package com.example.demo;
 2
 3 import org.springframework.beans.factory.annotation.Autowired;
 4 import org.springframework.stereotype.Controller;
 5 import org.springframework.web.bind.annotation.PathVariable;
 6 import org.springframework.web.bind.annotation.RequestMapping;
 7 import org.springframework.web.bind.annotation.RequestMethod;
 8 import org.springframework.web.bind.annotation.ResponseBody;
 9
10 @ResponseBody
11 @Controller
12 public class HelloController {
13
14     @Autowired
15     private PeopleProperties peopleProperties;
16
17     @RequestMapping(value = {"/hello/{id}"} , method = RequestMethod.GET)
18     public String say(@PathVariable("id") Integer id) {
19         return "id: " +id;
20     }
21 }
运行,url中的id设为2
@RequestParam的使用
修改HelloController.java,用传统的方式?id=value,来获取url中的id值显示到页面上。
 1 package com.example.demo;
 2
 3 import org.springframework.beans.factory.annotation.Autowired;
 4 import org.springframework.stereotype.Controller;
 5 import org.springframework.web.bind.annotation.*;
 6
 7 @ResponseBody
 8 @Controller
 9 public class HelloController {
10
11     @Autowired
12     private PeopleProperties peopleProperties;
13
14     @RequestMapping(value = {"/hello"} , method = RequestMethod.GET)
15     public String say(@RequestParam(value = "id" ,required = false,defaultValue = "0") Integer id) {
16         return "id: " +id;
17     }
18 }
运行
