本教程的系统平台:CentOS release 6.8 (Final) 64位。mysql5.6.15,cmake-3.1.1
一、安装编译工具及库文件
yum -y install gcc gcc-c++ make autoconf libtool-ltdl-devel gd-devel freetype-devel libxml2-devel libjpeg-devel libpng-devel openssl-devel curl-devel bison patch unzip libmcrypt-devel libmhash-devel ncurses-devel sudo bzip2 flex libaio-devel
二、 安装cmake 编译器
1、下载地址:http://www.cmake.org/files/v3.1/cmake-3.1.1.tar.gz
$ wget http://www.cmake.org/files/v3.1/cmake-3.1.1.tar.gz
2、解压安装包
$ tar zxvf cmake-3.1.1.tar.gz
3.进入安装包目录
$ cd cmake-3.1.1
4、编译安装
$ ./bootstrap
$ make && make install
三、安装 MySQL
1、下载地址: http://dev.mysql.com/get/Downloads/MySQL-5.6/mysql-5.6.15.tar.gz
$ wget http://dev.mysql.com/get/Downloads/MySQL-5.6/mysql-5.6.15.tar.gz
2、解压安装包
$ tar zxvf mysql-5.6.15.tar.gz
3、进入安装包目录
$ cd mysql-5.6.15
4、编译安装
$ cmake -DCMAKE_INSTALL_PREFIX=/usr/local/mysql/ -DMYSQL_UNIX_ADDR=/tmp/mysql.sock -DDEFAULT_CHARSET=utf8 -DDEFAULT_COLLATION=utf8_general_ci -DWITH_EXTRA_CHARSETS=all -DWITH_MYISAM_STORAGE_ENGINE=1 -DWITH_INNOBASE_STORAGE_ENGINE=1 -DWITH_MEMORY_STORAGE_ENGINE=1 -DWITH_READLINE=1 -DWITH_INNODB_MEMCACHED=1 -DWITH_DEBUG=OFF -DWITH_ZLIB=bundled -DENABLED_LOCAL_INFILE=1 -DENABLED_PROFILING=ON -DMYSQL_MAINTAINER_MODE=OFF -DMYSQL_DATADIR=/usr/local/mysql/data -DMYSQL_TCP_PORT=3306
$ make && make install
MySQL 配置
1、创建mysql运行使用的用户mysql:
$ /usr/sbin/groupadd mysql
$ /usr/sbin/useradd -g mysql mysql
2、创建binlog存储路径并赋予mysql用户权限
$ mkdir -p /usr/local/mysql/binlog
$ chown mysql.mysql /usr/local/mysql/binlog/
3、授权用户
$chown -R mysql:mysql /usr/local/mysql/
$chown -R mysql:mysql /data
$chmod 1777 /tmp
4创建my.cnf配置文件
[root@bogon mysql]# cp support-files/my-default.cnf /etc/my.cnf
5.设置环境变量
[root@bogon mysql]# cp support-files/my-default.cnf  /etc/my.cnf
cp:是否覆盖"/etc/my.cnf"? y
[root@bogon mysql]# echo 'export PATH=/usr/local/mysql/bin:$PATH' >>/etc/profile
[root@bogon mysql]# source !$
source /etc/profile
6.创建服务脚本添加开机启动
[root@bogon mysql]# cp support-files/mysql.server /etc/init.d/mysqld
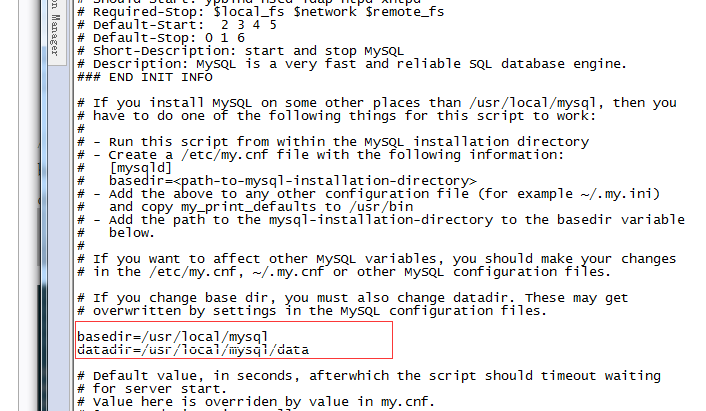
[root@bogon mysql]# chmod +x /etc/init.d/mysqld [root@bogon mysql]# vim /etc/init.d/mysqld
//服务启动脚本要修改以下两个参数
basedir=/usr/local/mysql //MySQL安装目录
datadir= /data //数据存放目录
添加开机启动
[root@bogon mysql]# chkconfig mysqld on
7.初始化数据库
注:到这一步很容易出问题,在初始化的时候一定要加上面的参数,而且在执行这一步操作前/data/mysql/data 这个目录必须是空的;在这里指定的basedir 和 datadir 目录必须要和/etc/my.cnf 配置的目录一直才行。
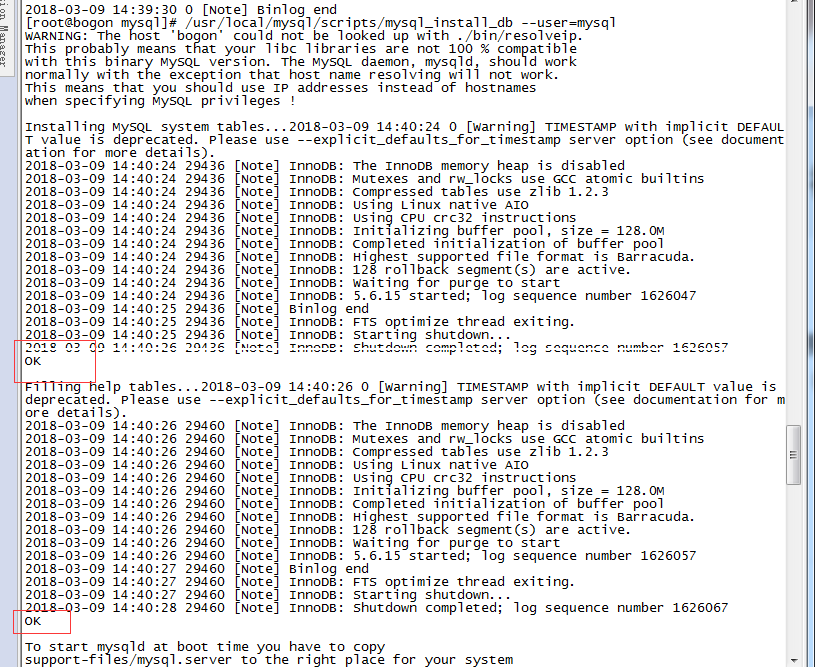
[root@bogon mysql]# /usr/local/mysql/scripts/mysql_install_db --user=mysql --basedir=/usr/local/mysql --datadir=/data
8.启动
[root@bogon mysql]# service mysqld start
Starting MySQL. SUCCESS!
[root@bogon mysql]# service mysqld  status
 SUCCESS! MySQL running (29614)
9.登陆和创建用户
[root@bogon mysql]# mysql -u root -p
Enter password:
Welcome to the MySQL monitor. Commands end with ; or g.
Your MySQL connection id is 1
Server version: 5.6.15 Source distribution
Copyright (c) 2000, 2013, Oracle and/or its affiliates. All rights reserved.
Oracle is a registered trademark of Oracle Corporation and/or its
affiliates. Other names may be trademarks of their respective
owners.
Type 'help;' or 'h' for help. Type 'c' to clear the current input statement.
mysql> show database
-> G
->
-> ;
ERROR 1064 (42000): You have an error in your SQL syntax; check the manual that corresponds to your MySQL server version for the right syntax to use near 'database
G' at line 1
mysql> show database;
ERROR 1064 (42000): You have an error in your SQL syntax; check the manual that corresponds to your MySQL server version for the right syntax to use near 'database' at line 1
mysql> show databases;
+--------------------+
| Database |
+--------------------+
| information_schema |
| mysql |
| performance_schema |
| test |
+--------------------+
4 rows in set (0.01 sec)
(1)你想root使用mypassword从任何主机连接到mysql服务器的话。
GRANT ALL PRIVILEGES ON *.* TO 'root'@'%' IDENTIFIED BY 'mypassword' WITH GRANT OPTION;
如果你想允许用户myuser从ip为192.168.1.3的主机连接到mysql服务器,并使用mypassword作为密码
GRANT ALL PRIVILEGES ON *.* TO 'root'@'192.168.1.3' IDENTIFIED BY 'mypassword' WITH GRANT OPTION;
输入命令
FLUSH PRIVILEGES;
新增用户并授权
mysql> grant all privileges on *.* to xueqing @'%' identified by '123456mysql>grant all privileges on *.* to xueqing @'%' identified by '123456' with grant option;
Query OK, 0 rows affected (0.00 sec)
语法:grant all privileges on *.* to 用户名@'%' identified by '密码' with grant option;
mysql> use test;
Database changed
mysql> show tables;
Empty set (0.00 sec)
mysql> create table xueqing(id int auto_increment,name char(20),primary key(id))engine=myisam default charset=utf8;
Query OK, 0 rows affected (0.01 sec)
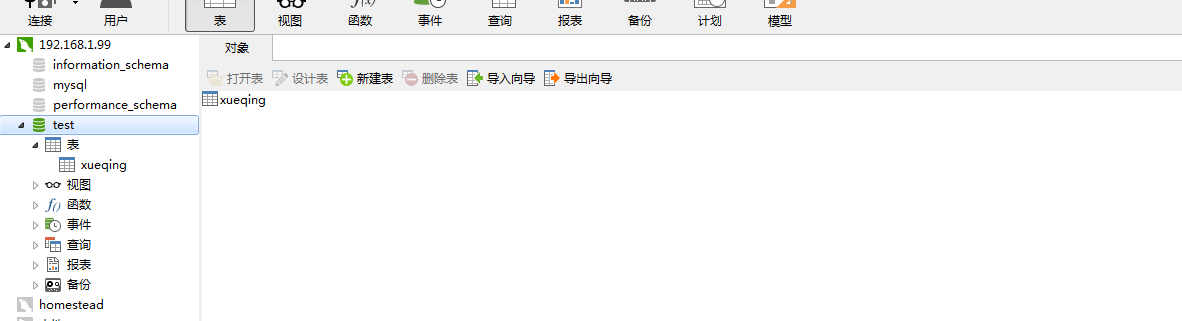
10,用mysql图像管理器登陆