创建helloworld项目
准备工作
我们将学习如何快速的创建一个Spring Boot应用,并且实现一个简单的Http请求处理。通过这个例子对Spring Boot有一个初步的了解,并体验其结构简单、开发快速的特性。
我的环境准备:
-
java version "1.8.0_181"
-
Maven-3.6.1
-
SpringBoot 2.x 最新版
开发工具:
-
IDEA
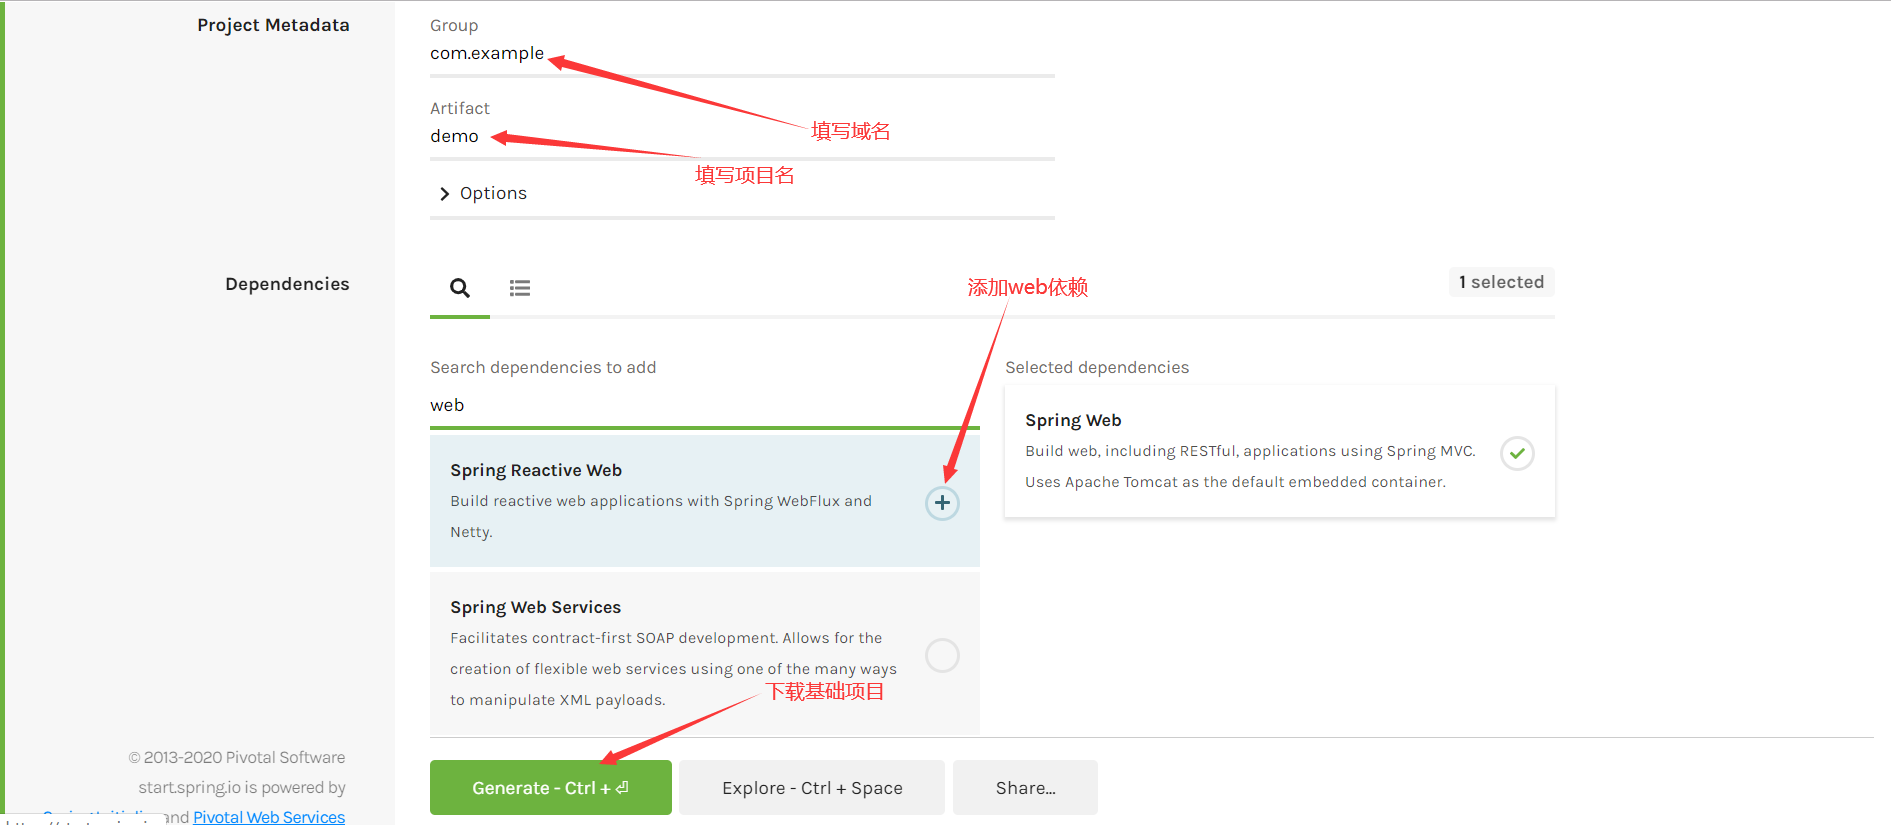
使用Spring Initializr页面创建项目
创建基础项目
Spring官方提供了非常方便的工具
Spring Initializr:https://start.spring.io/ 来帮助我们创建Spring Boot应用。
【目标一:使用Spring Initializr页面创建项目】
步骤:
-
填写项目信息
-
-
解压项目包,并用编译器以Maven项目导入,以IntelliJ IDEA为例:
-
导入这个Maven项目,一路下一步即可,直到项目导入完毕。如果是第一次使用,可能速度
会比较慢,需要耐心等待一切就绪
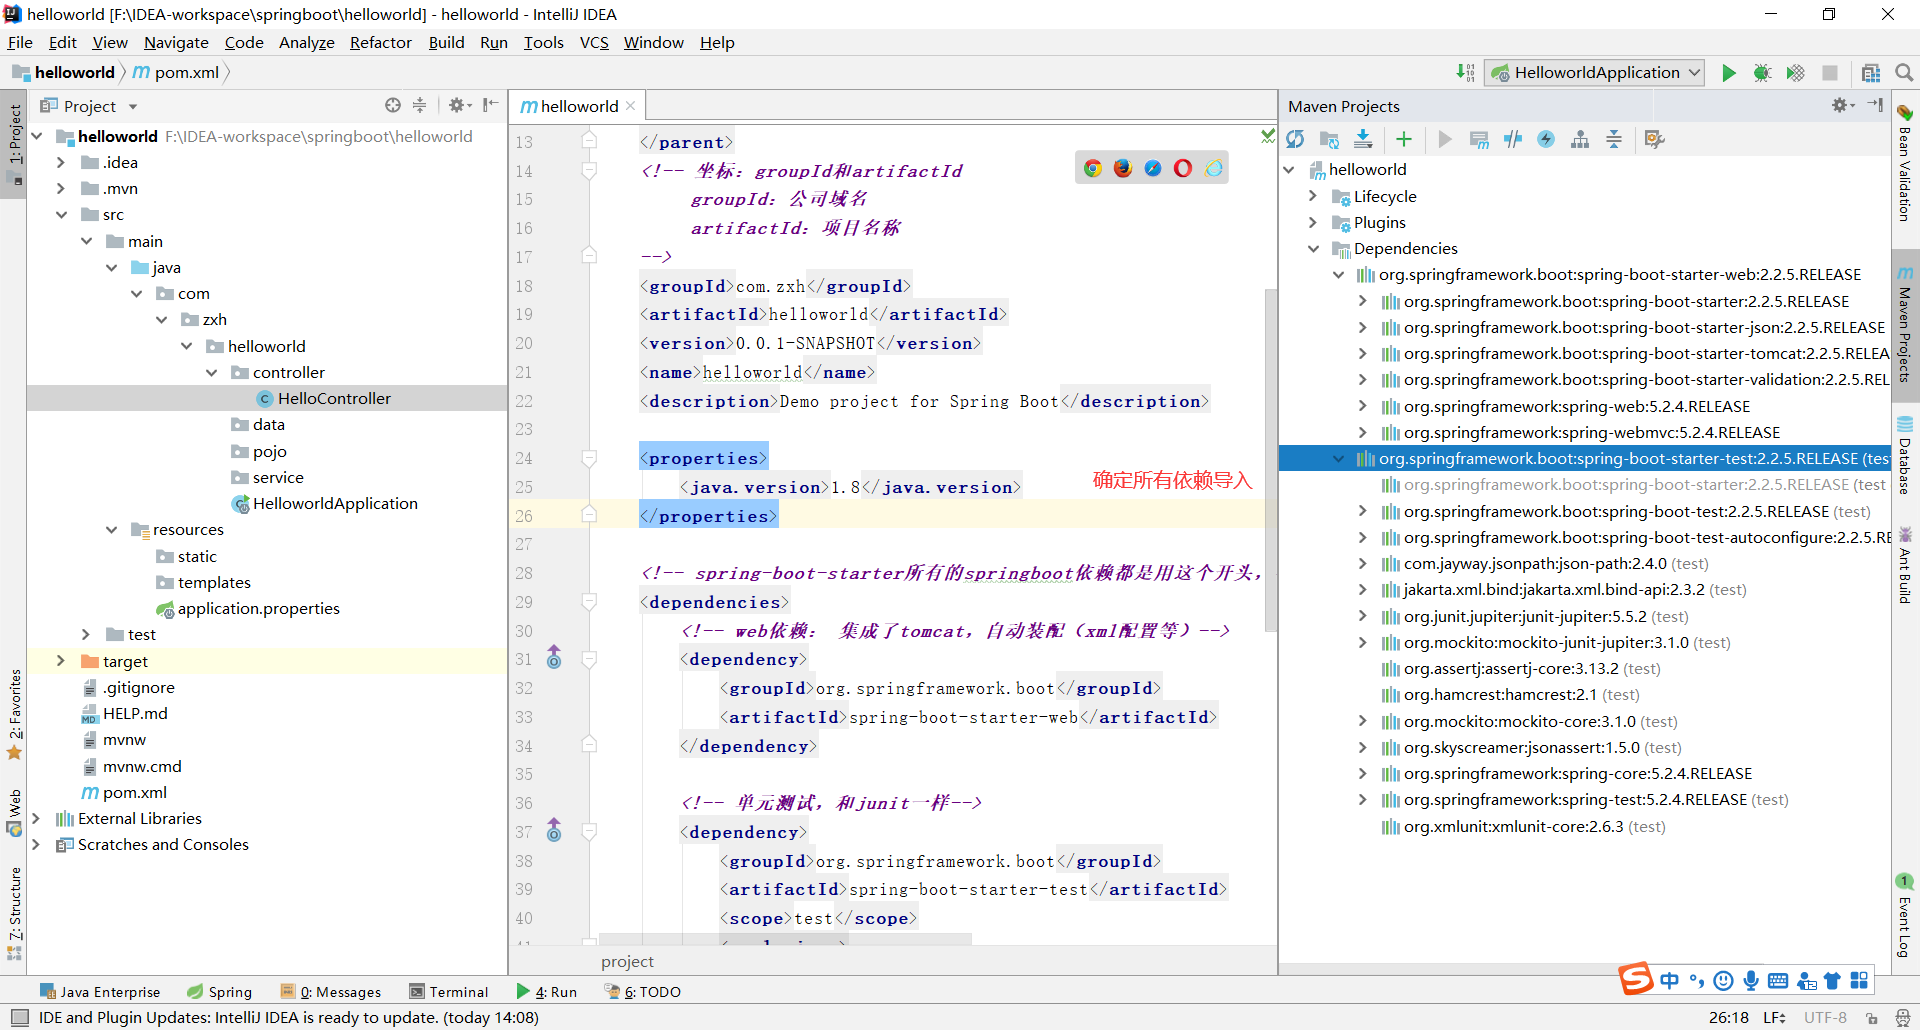
项目结构分析
通过上面步骤完成了基础项目的创建。就会自动生成以下文件。
-
程序的主程序类 DemoApplication
-
package com.zxh.helloworld;

import org.springframework.boot.SpringApplication;
import org.springframework.boot.autoconfigure.SpringBootApplication;

// @SpringBootApplication本身就是一个spring的一个组件

// 程序的主入口
@SpringBootApplication
public class HelloworldApplication {

    //SpringApplication应用的
    public static void main(String[] args) {
        SpringApplication.run(HelloworldApplication.class, args);
    }

}
-
一个 application.properties 配置文件
# SpringBoot 核心配置文件 -
一个测试类
-
package com.zxh.helloworld; import org.junit.jupiter.api.Test; import org.springframework.boot.test.context.SpringBootTest; @SpringBootTest class HelloworldApplicationTests { @Test void contextLoads() { } }
生成的DemoApplication和测试包下的DemoApplicationTests

pom.xml 分析
打开pom.xml,看看Spring Boot项目的依赖:
<?xml version="1.0" encoding="UTF-8"?> <project xmlns="http://maven.apache.org/POM/4.0.0" xmlns:xsi="http://www.w3.org/2001/XMLSchema-instance" xsi:schemaLocation="http://maven.apache.org/POM/4.0.0 https://maven.apache.org/xsd/maven-4.0.0.xsd"> <modelVersion>4.0.0</modelVersion> <!-- 有一个父项目,所以集成了父项目的所有依赖 <relativePath/>标签表示这是一个远程,在线的 --> <parent> <groupId>org.springframework.boot</groupId> <artifactId>spring-boot-starter-parent</artifactId> <version>2.2.5.RELEASE</version> <relativePath/> <!-- lookup parent from repository --> </parent> <!-- 坐标:groupId和artifactId groupId:公司域名 artifactId:项目名称 --> <groupId>com.zxh</groupId> <artifactId>helloworld</artifactId> <version>0.0.1-SNAPSHOT</version> <name>helloworld</name> <description>Demo project for Spring Boot</description> <properties> <java.version>1.8</java.version> </properties> <!-- spring-boot-starter所有的springboot依赖都是用这个开头,导入时直接在后面加--> <dependencies> <!-- web依赖: 集成了tomcat,自动装配(xml配置等)--> <dependency> <groupId>org.springframework.boot</groupId> <artifactId>spring-boot-starter-web</artifactId> </dependency> <!-- 单元测试,和junit一样--> <dependency> <groupId>org.springframework.boot</groupId> <artifactId>spring-boot-starter-test</artifactId> <scope>test</scope> <exclusions> <exclusion> <groupId>org.junit.vintage</groupId> <artifactId>junit-vintage-engine</artifactId> </exclusion> </exclusions> </dependency> </dependencies> <build> <!-- 打jar包的插件--> <plugins> <plugin> <groupId>org.springframework.boot</groupId> <artifactId>spring-boot-maven-plugin</artifactId> </plugin> </plugins> </build> </project>