nginx负载均衡配置,windows版本和linux版本的nginx除了启动方式其他基本无差异。
1.Niginx安装
参考:https://www.cnblogs.com/zwcry/p/9454647.html
2.nginx.conf配置
简单配置,满足测试与学习,其他属性详解可以问度娘。
配置了两个上游服务和两个监听服务
访问 www.dingjie.com 会分发到上游服务 app1_server
访问 www.dingjie.com 会分发到上游服务 app2_server
#nginx进程,一般设置为和cpu线程数一样
worker_processes  1;

events {
    #单个负载应用(tomcat)进程的最大并发链接数
    worker_connections  1024;
}


http {

    #连接超时时间,单位是秒
    keepalive_timeout  65;


    #防止DDOS攻击,每秒限制1个连接访问
    #limit_req_zone $binary_remote_addr zone=one:10m rate=1r/s;
    #limit_conn_zone $binary_remote_addr zone=addr:10m;

    #weight 权重    max_fails 失败次数    fail_timeout 失败超时
    #30秒内连接失败两次将认为该服务不可用

    #配置上游服务器1(就是负载均衡需要分发的服务器)
    upstream app1_server {
        #tomcat1
        server   192.168.159.129:8081 weight=1 max_fails=2 fail_timeout=30s;
        #tomcat2
        server   192.168.159.129:8082 weight=1 max_fails=2 fail_timeout=30s;
    }

    #配置上游服务器2(就是负载均衡需要分发的服务器)
    upstream app2_server {
        #tomcat1
        server   192.168.159.130:8081 weight=1 max_fails=2 fail_timeout=30s;
        #tomcat2
        server   192.168.159.130:8082 weight=1 max_fails=2 fail_timeout=30s;
    }

    #配置负载均衡服务器
    server {
        #监听端口
        listen       80;

        #监听地址(ip/域名)
        server_name  www.dingjie.com;

        #/拦截所有
        location / {
            proxy_pass   http://app1_server;
            proxy_connect_timeout 1;#连接应用(tomcat)超时
            proxy_read_timeout 180;
            proxy_send_timeout 180;
            index  index.html index.htm;
        }
    }

    #配置负载均衡服务器
    server {
        #监听端口
        listen       80;

        #监听地址(ip/域名)
        server_name  www.dingjie2.com;

        #/拦截所有
        location / {
            proxy_pass   http://app2_server;
            proxy_connect_timeout 1;#连接应用(tomcat)超时
            proxy_read_timeout 180;
            proxy_send_timeout 180;
            index  index.html index.htm;
        }
    }

    # HTTPS server
    #
    #server {
    #    listen       443 ssl;
    #    server_name  localhost;

    #    ssl_certificate      cert.pem;
    #    ssl_certificate_key  cert.key;

    #    ssl_session_cache    shared:SSL:1m;
    #    ssl_session_timeout  5m;

    #    ssl_ciphers  HIGH:!aNULL:!MD5;
    #    ssl_prefer_server_ciphers  on;

    #    location / {
    #        root   html;
    #        index  index.html index.htm;
    #    }
    #}

}
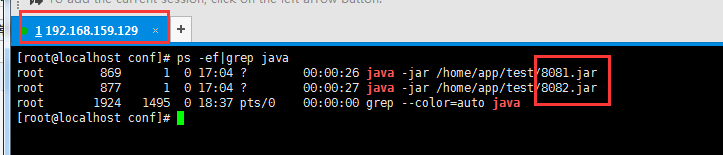
3.启动nigix.conf配置里的所有上游服务
如图,部署在tomcat上的java应用程序已经启动
注:每个java应用程序的访问地址对应niginx.conf里的upstream server的配置地址

4.修改本地hosts配置
windows系统下访问负载均衡地址:www.dingjie.com和www.dingjie2.com
www.dingjie.com和www.dingjie2.com 域名是假的,需要修改hosts(C:WindowsSystem32driversetchosts)文件。
在hosts最底部加入以下两行。
192.168.159.129 www.dingjie.com
192.168.159.129 www.dingjie2.com
注:(192.168.159.129是nginx所在服务器的ip地址);
5.访问测试
java应用服务已启动、nginx已启动、hosts文件已修改
打开浏览器访问www.dingjie.com和www.dingjie2.com