 点击我前往Github查看源代码 别忘记star
本项目github地址:https://github.com/wangqifan/ZhiHu
Redis安装
Redis官方并没有推出windows版本,人家觉得linux已经够了,开发windows版本影响开发进度,还好微软有一个团队维持着Redis的windows版本,网上有很多介绍Redis安装的博客,大多数是敲各种命令行。这里有Redis的msi版本,只需要像安装普通软件一样点击下一步,下一步即可地址:https://github.com/MSOpenTech/redis/releases/download/win-3.2.100/Redis-x64-3.2.100.msi
RRedis配置
Redis配置文件详解 http://www.cnblogs.com/kreo/p/4423362.html
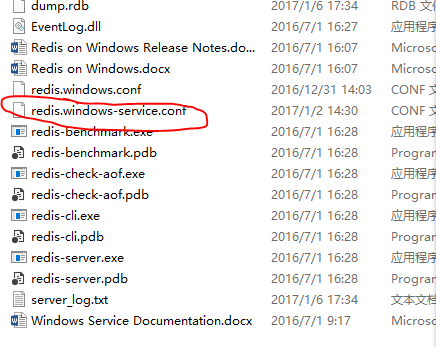
找到Redis.windowserver.conf
这里要注意的两点:1.远程连接
#
# ~~~ WARNING ~~~ If the computer running Redis is directly exposed to the
# internet, binding to all the interfaces is dangerous and will expose the
# instance to everybody on the internet. So by default we uncomment the
# following bind directive, that will force Redis to listen only into
# the IPv4 lookback interface address (this means Redis will be able to
# accept connections only from clients running into the same computer it
# is running).
#
# IF YOU ARE SURE YOU WANT YOUR INSTANCE TO LISTEN TO ALL THE INTERFACES
# JUST COMMENT THE FOLLOWING LINE.
# ~~~~~~~~~~~~~~~~~~~~~~~~~~~~~~~~~~~~~~~~~~~~~~~~~~~~~~~~~~~~~~~~~~~~~~~~
bind 0.0.0.0
将bind 127.0.0.1 修改成bind 0.0.0.0这样redis可以接受远程连接
内存限制
# NOTE: since Redis uses the system paging file to allocate the heap memory,
# the Working Set memory usage showed by the Windows Task Manager or by other
# tools such as ProcessExplorer will not always be accurate. For example, right
# after a background save of the RDB or the AOF files, the working set value
# may drop significantly. In order to check the correct amount of memory used
# by the redis-server to store the data, use the INFO client command. The INFO
# command shows only the memory used to store the redis data, not the extra
# memory used by the Windows process for its own requirements. Th3 extra amount
# of memory not reported by the INFO command can be calculated subtracting the
# Peak Working Set reported by the Windows Task Manager and the used_memory_peak
# reported by the INFO command.
#
maxmemory 2000mb
这里可以修改最大内存,建议放大点Redis比较还是吃内存的
连接Reids类的封装
Redis的C#驱动ServiceStack.Redis使用NuGet进行安装,由于这个类库已经商业化了,在4.0版本开始限制数量,每小时不得超过6000次,建议安装3.9版本
在这个爬虫系统中,开始时候我只使用一台电脑装Redis,后来发现这台电脑特别卡,后来换成三台电脑装Redis,一个负责hash表,一个负责UrlNext队列和Urltoken队列,一台负责User队列,由于实验室的电脑非常老旧,还是很卡。最后又加持2台电脑,实验室三台电脑负责hash表,我的电脑负责User队列,征用学妹电脑用作任务队列。
这个类命名为RedisCore
Ip地址列表
public static List<string> ips = new List<string>()

        {

            "59.74.169.54",

            "59.74.169.57",

            "59.74.169.52",

            "59.74.169.58",

            "59.74.169.39"

        };
对插入队列的封装。
Redis队列是有list这个数据结构实现的,从右边插入,左边弹出就可以实现队列
插入
public static bool PushIntoList(int type, string key, string value)

        {

            bool Result = false;

            using (RedisClient Redis = new RedisClient(ips[type - 1], 6379))

            {

                Redis.ConnectTimeout = 2000;

                Result = Redis.RPush(key, Encoding.UTF8.GetBytes(value)) > 0;

            }

            return Result;

        }
注意这个非托管资源要手动释放
弹出
public static string PopFromList(int type, string key)
        {
            string result = string.Empty;
            try
            {

                using (RedisClient Redis = new RedisClient(ips[type - 1], 6379))
                {
                    Redis.ConnectTimeout = 2000;
                    result = Encoding.UTF8.GetString(Redis.LPop(key));
                }

            }
            catch
            {

            }
            return result;
        }
Hash表有三个电脑,到底放到那一台,首先对key进行hash运算,取绝对值,对3取余,为0 就放到3号机器,为1放到4号机器,为2 放到5号机器
,如果hash表已经存在就会插入失败返回false,不存在插入成功返回true
 public static bool InsetIntoHash(int type, string hashid, string key, string value)
        {
            bool result = false;
            try
            {
                using (RedisClient Redis = new RedisClient(ips[type - 1], 6379))
                {
                    Redis.ConnectTimeout = 2000;
                    result = Redis.SetEntryInHashIfNotExists(hashid, key, value);
                }
            }
            catch { }

            return result;
        }