第一步创建一个react native 项目,在创建好的的项目App.js中引入 router-flux

App.js代码


import React, {Component} from 'react';
import {Platform, StyleSheet, Text, View,Image} from 'react-native';
import {Scene,Router,Tabs} from "react-native-router-flux";
import Information from "./app/first/Information";
import Me from "./app/fourth/Me";
import MailList from "./app/second/MailList";
import Find from "./app/third/Find";


type Props = {};
export default class App extends Component<Props> {
    InformationIcon=({focused})=>{
        if(focused){
            return(
                <Image style={{32,height:32}} source={require("./img/xinxi3.png")}/>
            )
        }else {
            return(
                <Image style={{32,height:32}} source={require("./img/xinxi1.png")}/>
            )
        }
    }
    MailListIcon=({focused})=> {
        if (focused){
            return(
                <Image style={{height: 30,  30}} source={require('./img/tongxunluZ.png')}/>
            )
        } else {
            return(
                <Image style={{30,height:30}} source={require("./img/tongxunlu.png")}/>
            )
        }
    }


    MeIcon=({focused})=> {
        if (focused){
            return(
                <Image style={{height: 30,  30}} source={require('./img/faxianZ.png')}/>
            )
        } else {
            return(
                <Image style={{30,height:30}} source={require("./img/faxian.png")}/>
            )
        }
    }
    FindIcon=({focused})=> {
        if (focused){
            return(
                <Image style={{height: 30,  30}} source={require('./img/woZ.png')}/>
            )
        } else {
            return(
                <Image style={{30,height:30}} source={require("./img/wo.png")}/>
            )
        }
    }
  render() {
    return (
        <Router>
            <Scene  key="root" initial={true} tabBarPosition={"bottom"} >
                <Tabs
                    key={"tabbar"}
                    swipeEnabled={true}
                    hideNavBar={true}
                    //隐藏标签栏
                    wrap={false}
                    showLable={false}
                    activeBackgroundColor={"white"}
                    inactiveBackgroundColor={"white"}
                    activeTintColor={"#46B11C"}
                    inactiveTintColor={"#9A9A9A"}
                    tabBarStyle={{height:65}}
                    labelStyle={{paddingBottom:0,fontSize:14}}
                >
                    <Scene key={"Information"} component={Information} title="微信" icon={this.InformationIcon}/>
                    <Scene key={"MailList"} component={MailList}  title="通讯录" icon={this.MailListIcon}/>
                    <Scene key={"Find"} component={Find} title="发现" icon={this.MeIcon}/>
                    <Scene key={"Me"} component={Me} title="我"icon={this.FindIcon}/>
                </Tabs>
            </Scene>
        </Router>

    );
  }
}

const styles = StyleSheet.create({
  container: {
    flex: 1,
    justifyContent: 'center',
    alignItems: 'center',
    backgroundColor: '#FFFFFF',
  },
  welcome: {
    fontSize: 20,
    textAlign: 'center',
    margin: 10,
  },
  instructions: {
    textAlign: 'center',
    color: '#333333',
    marginBottom: 5,
  },
});
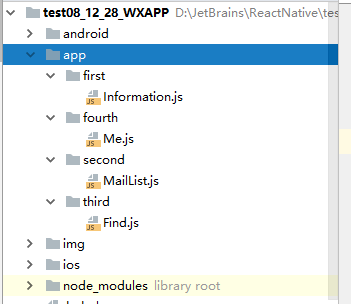
然后我是创建了一个app然后里面创建了四个文件夹,里面分别放了切换的四个页面
总结:
项目创建好有一个App.js ——》
一个自己创建的app文件夹——》
一个自己创建的img文件夹存放图片 ——》
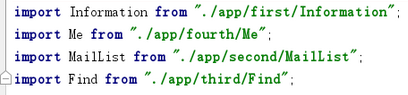
最后通过App.js引入进app文件中的代码
模块很少,代码很少。
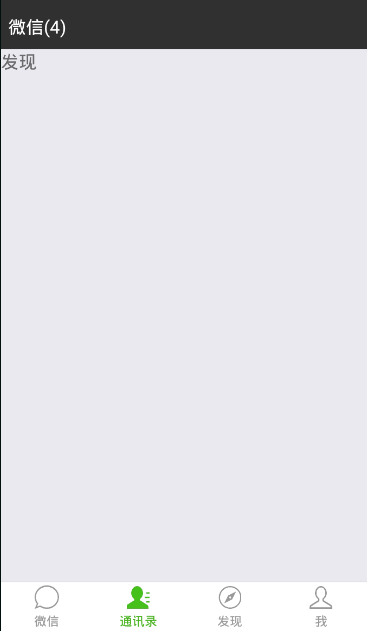
效果图:

源码:
链接: https://pan.baidu.com/s/1jUdAZBOh2mkQO8TQxBGZ1Q
提取码: vvtc