1.搭建环境(依赖jar包)
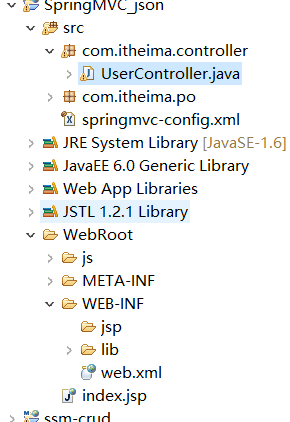

2.web.xml和前面配置一样
3.springmvc-config.xml


       <!-- 指定需要扫描的包 -->
        <context:component-scan base-package="com.itheima.controller"/>
        <!-- 配置注解驱动 -->
        <mvc:annotation-driven />
        <!-- 配置静态资源的访问映射,此配置中的文件,将不被前端控制器拦截 -->
        <mvc:resources location="/js/" mapping="/js/**" />
4.创建User用户和前面一样
5.index.jsp
<script type="text/javascript" src="${pageContext.request.contextPath }/js/jquery-1.8.3.min.js">
</script>
<script type="text/javascript">
function testJson(){
var username=$("#username").val();
var password=$("#password").val();
$.ajax({
url:"${pageContext.request.contextPath }/testJson",
type:"post",
//data表示发送的数据
data:JSON.stringify({username:username,password:password}),
//定义发送请求的数据格式为JSON字符串
contentType:"application/json;charset=UTF-8",
//定义回调响应的数据格式为JSON字符串,该属性可以省略
dataType:"json",
//成功响应
success:function(data){
if(data!=null){
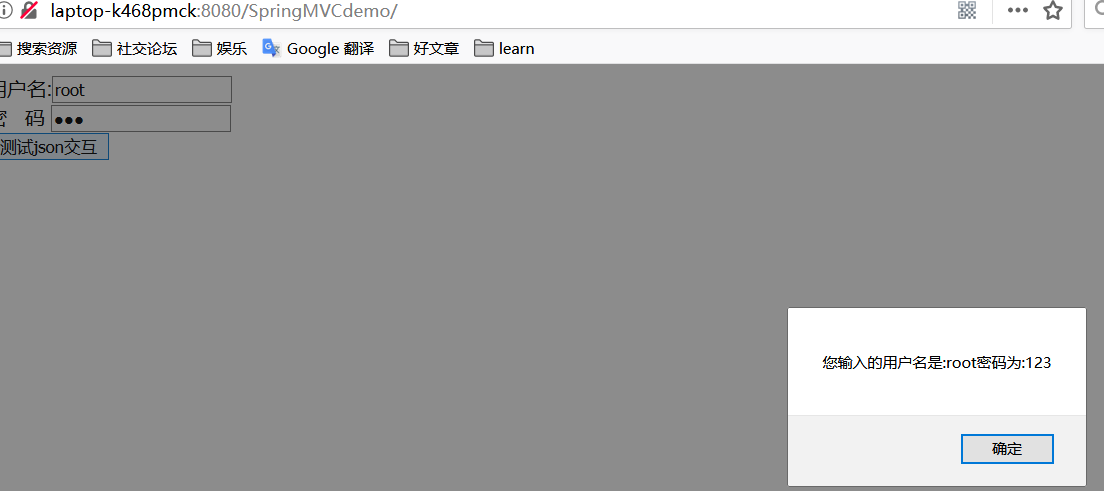
alert("您输入的用户名是:"+data.username+
"密码为:"+data.password);
}
}
});
}
</script>
<body> <form> 用户名:<input type="text" name="username" id="username"><br /> 密 码 <input type="password" name="password" id="password"><br /> <input type="button" value="测试json交互" onclick="testJson()"/> </form> </body>
6.控制类
@ResponseBody注释作用:将数据绑定到形参user上,此注解用于直接返回User对象,当反回POJO对象时,会默认转换为JSON格式数据进行响应
@Controller
public class UserController {
    @RequestMapping("/testJson")
    @ResponseBody
    public User testJson(@RequestBody User user){
        System.out.println(user);
        return user;
    }

}
7.结果演示