Android开发 ---如何操作资源目录中的资源文件2
一、颜色资源管理
效果图:
描述:
1、改变字体的背景颜色
2、改变字体颜色
3、改变按钮颜色
4、图像颜色切换
操作描述:
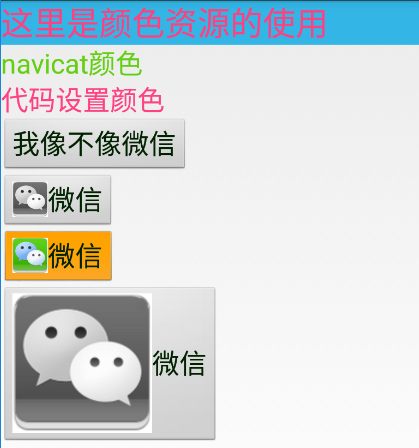
点击(1)中的颜色资源管理,进入(2),点击(2)中的微信字样,会出现(3)的效果
点击(1)中的颜色资源管理2,进入(4),点击(4)中的菜单按钮,菜单按钮的图片和字体的颜色会随之改变
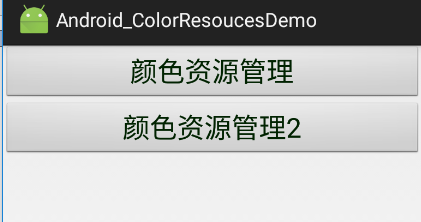
(1)
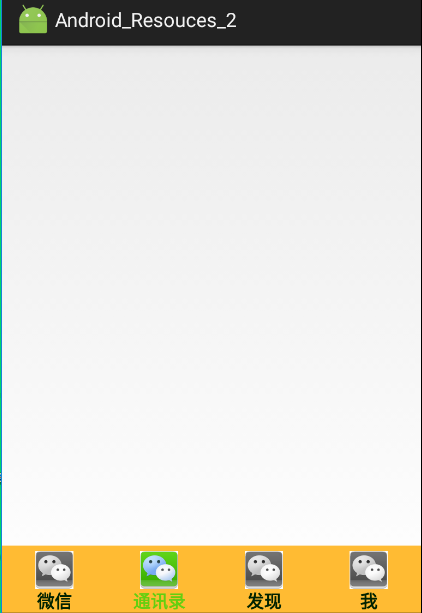
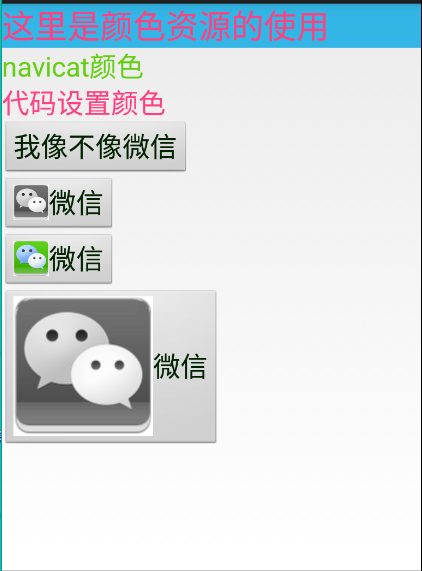
(4) (2) (3)
1、activity_main.xml
描述:
在MainActivity中画出两个按钮“颜色资源管理”和“颜色资源管理2”
<?xml version="1.0" encoding="utf-8"?>
<LinearLayout xmlns:android="http://schemas.android.com/apk/res/android"
    android:id="@+id/activity_main"
    android:layout_width="match_parent"
    android:layout_height="match_parent"
    android:orientation="vertical">
    <Button
        android:layout_width="match_parent"
        android:layout_height="wrap_content"
        android:id="@+id/btn1"
        android:text="颜色资源管理"
        android:onClick="test_1"
        />
    <Button
        android:layout_width="match_parent"
        android:layout_height="wrap_content"
        android:text="颜色资源管理2"
        android:onClick="test_2"
        />
</LinearLayout>
2、MainActivity.java
描述:
在MainActivity中点击两个按钮可分别进行页面跳转
package com.example.android_colorresoucesdemo;
import android.app.Activity;
import android.content.Intent;
import android.graphics.Typeface;
import android.os.Bundle;
import android.view.View;
import android.widget.Button;

public class MainActivity extends Activity {
    @Override
    protected void onCreate(Bundle savedInstanceState) {
        super.onCreate(savedInstanceState);
        setContentView(R.layout.activity_main);
    }
    public void test_1(View view){
        Intent intent = new Intent(this,ColorActivity.class);
        startActivity(intent);
    }
    public void test_2(View view){
        Intent intent = new Intent(this,WeixinMenuActivity.class);
        startActivity(intent);
    }
}
3、activity_color.xml
描述:
第一个TextView中:
背景引用的是系统颜色
字体颜色引用的是res目录下values包中color.xml文件中定义的颜色
第二个TextView中:
文本颜色引用的是res目录下values包中color.xml文件中定义的颜色
第三个TextView中:
并不是通过xml文件来设置字体颜色的而是通过在Activity中使用代码的方式设置文本颜色
<?xml version="1.0" encoding="utf-8"?>
<LinearLayout xmlns:android="http://schemas.android.com/apk/res/android"
    android:id="@+id/activity_color"
    android:layout_width="match_parent"
    android:layout_height="match_parent"
    android:orientation="vertical"
    >
    <TextView
        android:layout_width="match_parent"
        android:layout_height="wrap_content"
        android:id="@+id/showText"
        android:text="这里是颜色资源的使用"
        android:textSize="30sp"
        android:background="@android:color/holo_blue_light"
        android:textColor="@color/colorAccent"
        />
    <TextView
        android:layout_width="match_parent"
        android:layout_height="wrap_content"
        android:text="navicat颜色"
        android:textSize="25sp"
        android:textColor="@color/navicat_color"
        />
    <TextView
        android:layout_width="match_parent"
        android:layout_height="wrap_content"
        android:id="@+id/changeColor"
        android:text="代码设置颜色"
        android:textSize="25sp"
        />
    <Button
        android:layout_width="wrap_content"
        android:layout_height="wrap_content"
        android:text="我像不像微信"
        android:textColor="@color/btn_text_color"
        android:textSize="25sp"
        />
    <Button
        android:layout_width="wrap_content"
        android:layout_height="wrap_content"
        android:id="@+id/btn1"
        android:text="微信"
        android:textColor="@color/btn_text_color"
        />
    <Button
        android:layout_width="wrap_content"
        android:layout_height="wrap_content"
        android:id="@+id/btn2"
        android:text="微信"
        android:textColor="@color/btn_text_color"
        />
    <Button
        android:layout_width="wrap_content"
        android:layout_height="wrap_content"
        android:id="@+id/btn3"
        android:text="微信"
        android:textColor="@color/btn_text_color"
        android:drawableLeft="@drawable/btn_image_menu"
        />
</LinearLayout>
4、ColorActivity.java
描述:
通过代码的方式设置文本颜色有两种方式:
1、通过ARGB的方式设置文本颜色
2、通过引入资源文件中的资源的方式设置文本颜色
给按钮设置图标,即如何将图像设置在按钮上。
package com.example.android_colorresoucesdemo;

import android.app.Activity;
import android.graphics.Color;
import android.graphics.drawable.Drawable;
import android.os.Bundle;
import android.widget.Button;
import android.widget.TextView;

public class ColorActivity extends Activity {
  //通过代码设置文本颜色
    private TextView changeColor;
    private Button btn1,btn2;
    @Override
    protected void onCreate(Bundle savedInstanceState) {
        super.onCreate(savedInstanceState);
        setContentView(R.layout.activity_color);

        changeColor = (TextView)findViewById(R.id.changeColor);
     //通过ARGB模式设置文本颜色,参数分别代表,红色值、黄色值、蓝色值、透明度
        //changeColor.setTextColor(Color.argb(225,225,0,0));
     //通过资源引入的方式设置文本颜色
     //将id为changeColor的TextView的文本颜色设置为资源文件中定义的颜色
        changeColor.setTextColor(getResources().getColor(R.color.colorAccent));

     //获取两个按钮
        btn1 = (Button)findViewById(R.id.btn1);
        btn2 = (Button)findViewById(R.id.btn2);

     //读取资源文件中的图片文件w4.jpg
        Drawable image = getResources().getDrawable(R.drawable.w4);
     //四个参数的含义:x、y、width、height
        image.setBounds(0,0,65,65);
     //可以给按钮在上下左右设置图标,如果不想在某个地方显示,则设置为null.但是Drawable必须已经setBounds(Rect),意思是你要添加的资源必须已经设置过初始位置、宽和高等信息。
        btn1.setCompoundDrawables(image,null,null,null);

        Drawable image2 = getResources().getDrawable(R.drawable.w5);
        image2.setBounds(0,0,65,65);
        btn2.setCompoundDrawables(image2,null,null,null);

    }
}
5、activity_weixin_menu.xml
描述:
1、用了相对布局
2、相对布局中用了线性水平布局
3、RadioGroup原本是用来设置单选按钮的,这里则将单选按钮设置成图像按钮,实现了按钮的切换操作
拓展:
-
android:layout_above="@id/xxx" --将控件置于给定ID控件之上
-
android:layout_below="@id/xxx" --将控件置于给定ID控件之下
-
android:layout_toLeftOf="@id/xxx" --将控件的右边缘和给定ID控件的左边缘对齐
-
android:layout_toRightOf="@id/xxx" --将控件的左边缘和给定ID控件的右边缘对齐
-
android:layout_alignLeft="@id/xxx" --将控件的左边缘和给定ID控件的左边缘对齐
-
android:layout_alignTop="@id/xxx" --将控件的上边缘和给定ID控件的上边缘对齐
-
android:layout_alignRight="@id/xxx" --将控件的右边缘和给定ID控件的右边缘对齐
-
android:layout_alignBottom="@id/xxx" --将控件的底边缘和给定ID控件的底边缘对齐
-
android:layout_alignParentLeft="true" --将控件的左边缘和父控件的左边缘对齐
-
android:layout_alignParentTop="true" --将控件的上边缘和父控件的上边缘对齐
-
android:layout_alignParentRight="true" --将控件的右边缘和父控件的右边缘对齐
-
android:layout_alignParentBottom="true" --将控件的底边缘和父控件的底边缘对齐
-
android:layout_centerInParent="true" --将控件置于父控件的中心位置
-
android:layout_centerHorizontal="true" --将控件置于水平方向的中心位置
-
android:layout_centerVertical="true" --将控件置于垂直方向的中心位置
-
<?xml version="1.0" encoding="utf-8"?>
<RelativeLayout xmlns:android="http://schemas.android.com/apk/res/android"
    android:id="@+id/activity_weixin_menu"
    android:layout_width="match_parent"
    android:layout_height="match_parent"
    >
    <LinearLayout
        android:layout_width="match_parent"
        android:layout_height="wrap_content"
        android:id="@+id/WeixinMenu"
        android:orientation="horizontal" <!--线性水平布局-->
        android:background="@android:color/holo_orange_light"
        android:layout_alignParentBottom="true" <!--避免弹出输入法扰乱布局-->
        >
        <RadioGroup
            android:layout_width="match_parent"
            android:layout_height="wrap_content"
            android:checkedButton="1"
            android:layout_marginTop="5dp"
            android:orientation="horizontal"
            android:id="@+id/radioGroup"
            >
            <RadioButton
                android:layout_width="match_parent"
                android:layout_height="wrap_content"
                android:id="@+id/rad_1"
                android:text="微信"
                android:layout_weight="1"
                android:button="@null"
                android:clickable="true"
                android:gravity="center"
                android:textStyle="bold"
                android:textColor="@color/btn_text_color"
                android:drawableTop="@drawable/btn_image_menu"
                />
            <RadioButton
                android:layout_width="match_parent"
                android:layout_height="wrap_content"
                android:id="@+id/rad_2"
                android:text="通讯录"
                android:layout_weight="1"
                android:button="@null"
                android:clickable="true"
                android:gravity="center"
                android:textStyle="bold"
                android:textColor="@color/btn_text_color"
                android:drawableTop="@drawable/btn_image_menu"
                />
            <RadioButton
                android:layout_width="match_parent"
                android:layout_height="wrap_content"
                android:id="@+id/rad_3"
                android:text="发现"
                android:layout_weight="1"
                android:button="@null"
                android:gravity="center"
                android:textStyle="bold"
                android:clickable="true"
                android:textColor="@color/btn_text_color"
                android:drawableTop="@drawable/btn_image_menu"
                />
            <RadioButton
                android:layout_width="match_parent"
                android:layout_height="wrap_content"
                android:id="@+id/rad_4"
                android:text="我"
                android:layout_weight="1"
                android:button="@null"
                android:clickable="true"
                android:gravity="center"
                android:textStyle="bold"
                android:textColor="@color/btn_text_color"
                android:drawableTop="@drawable/btn_image_menu"
                />
        </RadioGroup>
    </LinearLayout>
</RelativeLayout>
6、WeixinMenuActivity.java
描述:
1、先获取到按钮
2、将每个按钮分别传入到setDrawableTop()方法中,
3、通过getCompoundDrawables()[1] 获取RedioButton上方向的图片
数组0,1,2,3,对应着左,上,右,下
4、设置图像的宽和高为70
package com.example.android_colorresoucesdemo;

import android.app.Activity;
import android.graphics.drawable.Drawable;
import android.os.Bundle;
import android.widget.RadioButton;

public class WeixinMenuActivity extends Activity {
    RadioButton rb1,rb2,rb3,rb4;
    @Override
    protected void onCreate(Bundle savedInstanceState) {
        super.onCreate(savedInstanceState);
        setContentView(R.layout.activity_weixin_menu);

        rb1 = (RadioButton)findViewById(R.id.rad_1);
        rb2 = (RadioButton)findViewById(R.id.rad_2);
        rb3 = (RadioButton)findViewById(R.id.rad_3);
        rb4 = (RadioButton)findViewById(R.id.rad_4);
     //调用下面定义的setDrawableTop()方法
        setDrawableTop(rb1);
        setDrawableTop(rb2);
        setDrawableTop(rb3);
        setDrawableTop(rb4);
    }

    public  void setDrawableTop(RadioButton tv){
     //数组0,1,2,3,对应着左,上,右,下
        Drawable drawable = tv.getCompoundDrawables()[1];
        drawable.setBounds(0,0,70,70);
     //动态的画左上右下四个方向,上面代码drawable.setBounds()初始化了图像的位置,现在将drawable放在第二个参数上,代表放在View的上面的位置上
        tv.setCompoundDrawables(null,drawable,null,null);
    }
}
7、在res目录下创建一个color包,color包中创建一个btn_text_color.xml文件

btn_text_color.xml
描述:
android:state_checked="false" 表示按钮没有被点击时显示的颜色
android:state_checked="true" 表示按钮被点击时按钮显示的颜色
如何引用这个资源呢?
只需在xml文件对应的按钮中使用 android:textColor="@color/btn_text_color"
<?xml version="1.0" encoding="utf-8"?>
<selector xmlns:android="http://schemas.android.com/apk/res/android">
    <item android:color="#002200" android:state_checked="false"/>
    <item android:state_checked="true" android:color="@color/navicat_color"/>
</selector>
8、在res目录下的drawable包中创建一个btn_image_menu.xml文件,且在包内放置两张图片
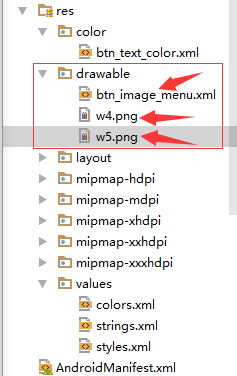


w4.jpg w5.jpg
btn_image_menu.xml
描述:
android:state_checked="false" 表示没有点击这个图像时默认显示的图片就是它
android:state_checked="true" 表示当点击了这个图像时图像显示的样子
<?xml version="1.0" encoding="utf-8"?>
<selector xmlns:android="http://schemas.android.com/apk/res/android">
    <item android:state_checked="false"
        android:drawable="@drawable/w4"
        />
    <item android:state_checked="true" android:drawable="@drawable/w5"/>
</selector>
9、在res目录下的values包中修改color.xml文件和styles.xml文件
color.xml
<?xml version="1.0" encoding="utf-8"?>
<resources>
    <color name="colorPrimary">#3F51B5</color>
    <color name="colorPrimaryDark">#303F9F</color>
    <color name="colorAccent">#FF4081</color>
    <color name="navicat_color">#63CF10</color>
</resources>
styles.xml
<resources>

    <!-- Base application theme. -->
    <style name="AppTheme" parent="android:Theme.Holo.Light.DarkActionBar">
        <!-- Customize your theme here. -->
    </style>
    <style name="MyTheme" parent="android:Theme.Holo.Light.DarkActionBar">
        <item name="android:buttonStyle">@style/MyButtonStyle</item>
        <item name="android:textViewStyle">@style/MyTextViewStyle</item>
    </style>
    <style name="MyButtonStyle" parent="android:Widget.Button">
        <item name="android:textSize">25dp</item>
        <item name="android:textColor">@color/btn_text_color</item>
        <item name="android:clickable">true</item>
    </style>
    <style name="MyTextViewStyle" parent="android:Widget.TextView">
        <item name="android:textSize">20dp</item>
        <item name="android:textColor">@color/colorAccent</item>
    </style>
</resources>
//四个参数含义:x、y、width、height