此教程适用于初学LNMP的菜鸟...
运行环境
- VmWare16虚拟机
- centos7 最小安装版本
- 具体环境安装包,见百度云盘 链接:https://pan.baidu.com/s/1y0ueGT6Fh_1gSmsSbKAgfg
- 提取码:iabw
Linux虚拟机配置*注意事项
1.安装centos镜像时虚拟机网络配置为桥接
2.安装完成后 配置网络 (ifcfg-ens33 可能为其他名字 不一定为ens33)
vi /etc/sysconfig/network-scripts/ifcfg-ens33
3.修改 ONBOOT=yes 表示启用该配置
ONBOOT=yes
4.启动网络
service network start
5.使用ip addr 查看当前ip地址

安装NGINX
1.安装EPEL和lsof插件
yum -y install epel-release lsof
2.安装Nginx
yum -y install nginx
3.启动nginx
service nginx start
4.关闭防火墙
systemctl stop firewalld
5.开机关闭防火墙,开机自启动nginx
systemctl enable nginx
systemctl disable firewalld
现在使用ip addr 查看自己的ip地址
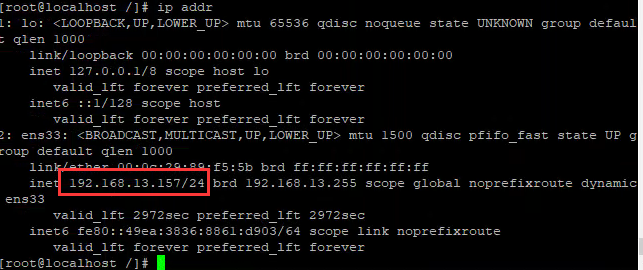
可以看到内网的ip地址是:192.168.13.157
浏览器中打开 http://192.168.13.157 可以发现Nginx的欢迎页面,说明nginx服务器已经部署成功了!
安装php7.4
1.升级yum rpm 包
yum install http://rpms.remirepo.net/enterprise/remi-release-7.rpm
2.查看 yum源中的php相关包(依赖组件---非必要)
yum search php74
3.安装 php7.4 及一些必要依赖
yum -y install php74-php-gd php74-php-pdo php74-php-mbstring php74-php-cli php74-php-fpm php74-php-mysqlnd
4.启动 php-fpm 服务 (用于开启fastapi接口服务)
service php74-php-fpm start
5.设置开机启动 php-fpm 服务
systemctl enable php74-php-fpm
整合Nginx 和 PHP 使nginx可以解析php文件
1.修改nginx 配置文件:
vi /etc/nginx/nginx.conf
将其中的 server 修改为以下信息
server {
    listen       80 default_server;
    listen       [::]:80 default_server;
    server_name  _;
    root         /usr/share/nginx/html;
    index index.php index.html index.htm;

    # Load configuration files for the default server block.
    include /etc/nginx/default.d/*.conf;

    location / {
    }

    error_page 404 /404.html;
    	location = /40x.html {
    }

    error_page 500 502 503 504 /50x.html;
    	location = /50x.html {
    }

    location ~ .php$ {
        try_files $uri =404;
        root /usr/share/nginx/html;
        fastcgi_pass 127.0.0.1:9000;
        fastcgi_index index.php;
        fastcgi_param SCRIPT_FILENAME $document_root$fastcgi_script_name;
        include fastcgi.conf;
    }
}
2.在网站目录下创建info.php
vi /usr/share/nginx/html/info.php
在info.php中添加内容
<?php phpinfo(); ?>
3.重启Nginx服务器 使配置生效
service nginx restart
4.访问 http://192.168.13.157/info.php 你会发现nginx可以解析php文件了!
mysql5.6 安装
1.更新 yum 源
yum install http://dev.mysql.com/get/mysql-community-release-el7-5.noarch.rpm
2.安装mysql
yum -y install mysql-community-server
3.启动mysql 设置开机启动
systemctl start mysqld
systemctl enable mysqld
4.进入mysql 设置密码(刚安装的mysql 是没有密码的)
# mysql -uroot
# set password for 'root'@'localhost' = password('root');
# exit;
测试php-MySQL 连通性
1.在网站目录下创建 mysql.php
vi /usr/share/nginx/html/mysql.php
2.在文件中输入测试语句
<?php
  $link = mysqli_connect('localhost', 'root', 'root');
  if (!$link) {
    die('Could not connect: ' . mysqli_error());
  }
  echo 'Connected successfully';
  mysqli_close($link);
?>
3.访问 http://192.168.13.157/mysql.php
-
如果看到 Connected successfully 说明mysql已经链接成功!
-
如果看到 Could not connect: xxxx 说明mysql 出现错误需要继续调试