在平时的Javaweb项目开发中为了便于后期的维护,我们一般会进行分层开发,最常见的就是分为domain(域模型层)、dao(数据库访问层)、service(业务逻辑层)、web(表现层),这样分层之后,各个层之间的职责会比较明确,后期维护起来也相对比较容易,今天我们就是使用Maven来构建以上的各个层。
项目结构如下:
system-parent
|----pom.xml
|----system-domain
|----pom.xml
|----system-dao
|----pom.xml
|----system-service
|----pom.xml
|----system-web
|----pom.xml
一、创建system-parent项目
创建system-parent,用来给各个子模块继承。
进入命令行,输入以下命令:
mvn archetype:generate -DgroupId=com.zang.maven -DartifactId=system-parent -DarchetypeArtifactId=maven-archetype-quickstart -DinteractiveMode=false

命令执行完成之后可以看到在当前目录(C:Documents and SettingsAdministrator)生成了system-parent目录,里面有一个src目录和一个pom.xml文件,如下图所示:
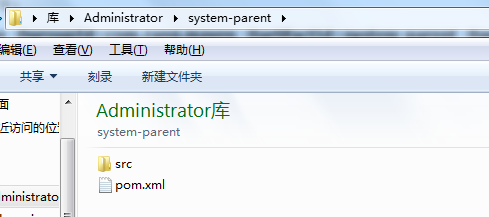
将src文件夹删除,然后修改pom.xml文件,将<packaging>jar</packaging>修改为<packaging>pom</packaging>,pom表示它是一个被继承的模块,修改后的内容如下:
<project xmlns="http://maven.apache.org/POM/4.0.0"
      xmlns:xsi="http://www.w3.org/2001/XMLSchema-instance"
      xsi:schemaLocation="http://maven.apache.org/POM/4.0.0 http://maven.apache.org/maven-v4_0_0.xsd">
  <modelVersion>4.0.0</modelVersion>

  <groupId>com.zang.maven</groupId>
  <artifactId>system-parent</artifactId>
  <packaging>pom</packaging>
  <version>1.0-SNAPSHOT</version>
  <name>system-parent</name>
  <url>http://maven.apache.org</url>

  <dependencies>
    <dependency>
      <groupId>junit</groupId>
      <artifactId>junit</artifactId>
      <version>3.8.1</version>
      <scope>test</scope>
    </dependency>
  </dependencies>
</project>
二、创建sytem-domain模块
在命令行进入创建好的system-parent目录,然后执行下列命令:
mvn archetype:generate -DgroupId=com.zang.maven -DartifactId=system-domain -DarchetypeArtifactId=maven-archetype-quickstart -DinteractiveMode=false

命令执行完成之后可以看到在system-parent目录中生成了system-domain,里面包含src目录和pom.xml文件。
同时,可以看到在system-parent目录中的pom.xml文件自动添加了如下内容:
 <modules>
    <module>system-domain</module>
  </modules>
修改system-domain目录中的pom.xml文件,把<groupId>com.zang.maven</groupId>和<version>1.0-SNAPSHOT</version>去掉,加上<packaging>jar</packaging>,因为groupId和version会继承system-parent中的groupId和version,packaging设置打包方式为jar
修改过后的pom.xml文件如下:
<?xml version="1.0"?>
<project xsi:schemaLocation="http://maven.apache.org/POM/4.0.0 http://maven.apache.org/xsd/maven-4.0.0.xsd"
     xmlns="http://maven.apache.org/POM/4.0.0"
       xmlns:xsi="http://www.w3.org/2001/XMLSchema-instance">
  <modelVersion>4.0.0</modelVersion>
  <parent>
    <groupId>com.zang.maven</groupId>
    <artifactId>system-parent</artifactId>
    <version>1.0-SNAPSHOT</version>
  </parent>

  <artifactId>system-domain</artifactId>
  <packaging>jar</packaging>

  <name>system-domain</name>
  <url>http://maven.apache.org</url>

</project>
三、创建sytem-dao模块
在命令行进入创建好的system-parent目录,然后执行下列命令:
mvn archetype:generate -DgroupId=com.zang.maven -DartifactId=system-dao -DarchetypeArtifactId=maven-archetype-quickstart -DinteractiveMode=false

命令执行完成之后可以看到在system-parent目录中生成了system-dao,里面包含src目录和pom.xml文件。
同时,在system-parent目录中的pom.xml文件<modules>标签中自动变成如下内容:
 <modules>
    <module>system-domain</module>
    <module>system-dao</module>
  </modules>
修改system-dao目录中的pom.xml文件,,把<groupId>com.zang.maven</groupId>和<version>1.0-SNAPSHOT</version>去掉,加上<packaging>jar</packaging>,因为groupId和version会继承system-parent中的groupId和version,packaging设置打包方式为jar,同时添加对system-domain模块的依赖,修改后的内容如下:
<?xml version="1.0"?>
<project xsi:schemaLocation="http://maven.apache.org/POM/4.0.0 http://maven.apache.org/xsd/maven-4.0.0.xsd"
      xmlns="http://maven.apache.org/POM/4.0.0"
       xmlns:xsi="http://www.w3.org/2001/XMLSchema-instance">
  <modelVersion>4.0.0</modelVersion>
  <parent>
    <groupId>com.zang.maven</groupId>
    <artifactId>system-parent</artifactId>
    <version>1.0-SNAPSHOT</version>
  </parent>

  <artifactId>system-dao</artifactId>
   <packaging>jar</packaging>

  <name>system-dao</name>
  <url>http://maven.apache.org</url>
  <dependencies>
  <!--system-dao需要使用到system-domain中的类,所以需要添加对system-domain模块的依赖-->
    <dependency>
       <groupId>com.zang.maven</groupId>
      <artifactId>system-domain</artifactId>
      <version>${project.version}</version>
    </dependency>

  </dependencies>
</project>
四、创建system-service模块
在命令行进入创建好的system-parent目录,然后执行下列命令:
mvn archetype:generate -DgroupId=com.zang.maven -DartifactId=system-service -DarchetypeArtifactId=maven-archetype-quickstart -DinteractiveMode=false
命令执行完成之后可以看到在system-parent目录中生成了system-service,里面包含src目录和pom.xml文件。
同时,在system-parent目录中的pom.xml文件<modules>标签中自动变成如下内容:
  <modules>
    <module>system-domain</module>
    <module>system-dao</module>
    <module>system-service</module>
  </modules>
修改system-service目录中的pom.xml文件,,把<groupId>com.zang.maven</groupId>和<version>1.0-SNAPSHOT</version>去掉,加上<packaging>jar</packaging>,因为groupId和version会继承system-parent中的groupId和version,packaging设置打包方式为jar,同时添加对system-dao模块的依赖,system-service依赖system-dao和system-domain,但是我们只需添加system-dao的依赖即可,因为system-dao已经依赖了system-domain。修改后的内容如下:
<?xml version="1.0"?>
<project xsi:schemaLocation="http://maven.apache.org/POM/4.0.0 http://maven.apache.org/xsd/maven-4.0.0.xsd"
      xmlns="http://maven.apache.org/POM/4.0.0"
        xmlns:xsi="http://www.w3.org/2001/XMLSchema-instance">
  <modelVersion>4.0.0</modelVersion>
  <parent>
    <groupId>com.zang.maven</groupId>
    <artifactId>system-parent</artifactId>
    <version>1.0-SNAPSHOT</version>
  </parent>

  <artifactId>system-service</artifactId>
  <packaging>jar</packaging>

  <name>system-service</name>
  <url>http://maven.apache.org</url>
  <dependencies>
   <!--
    system-service依赖system-dao和system-domain,
    但是我们只需添加system-dao的依赖即可,因为system-dao已经依赖了system-domain
    -->
    <dependency>
      <groupId>com.zang.maven</groupId>
        <artifactId>system-dao</artifactId>
      <version>${project.version}</version>
    </dependency>

  </dependencies>
</project>
五、创建system-web模块
在命令行进入创建好的system-parent目录,然后执行下列命令:
mvn archetype:generate -DgroupId=com.zang.maven -DartifactId=system-web -DarchetypeArtifactId=maven-archetype-webapp
-DinteractiveMode=false
命令执行完成之后可以看到在system-parent目录中生成了system-web,里面包含src目录和pom.xml文件。
在system-websrcmainwebapp目录中还生成了一个简单的index.jsp, 在system-websrcmainwebappWEB-INF目录中生成了web.xml。
同时,在system-parent目录中的pom.xml文件<modules>标签中自动变成如下内容:
<modules>
    <module>system-domain</module>
    <module>system-dao</module>
    <module>system-service</module>
    <module>system-web</module>
  </modules>
修改system-web目录中的pom.xml文件,,把<groupId>me.gacl</groupId>和<version>1.0-SNAPSHOT</version>去掉,因为groupId和version会继承system-parent中的groupId和version,同时添加对system-service模块的依赖,修改后的内容如下:
<?xml version="1.0"?>
<project xsi:schemaLocation="http://maven.apache.org/POM/4.0.0 http://maven.apache.org/xsd/maven-4.0.0.xsd"
      xmlns="http://maven.apache.org/POM/4.0.0"
       xmlns:xsi="http://www.w3.org/2001/XMLSchema-instance">
  <modelVersion>4.0.0</modelVersion>
  <parent>
    <groupId>com.zang.maven</groupId>
    <artifactId>system-parent</artifactId>
    <version>1.0-SNAPSHOT</version>
  </parent>

  <artifactId>system-web</artifactId>
  <packaging>war</packaging>

  <name>system-web Maven Webapp</name>
  <url>http://maven.apache.org</url>
  <dependencies>
   <!--
    system-web依赖system-service
    -->
    <dependency>
     <groupId>com.zang.maven</groupId>
       <artifactId>system-service</artifactId>
      <version>${project.version}</version>
    </dependency>

  </dependencies>
  <build>
    <finalName>system-web</finalName>
  </build>
</project>
注意,web项目的打包方式是war。
六、编译运行项目
经过上面的五个步骤,相关的模块全部创建完成,怎么运行起来呢。由于最终运行的是system-web模块,所以我们对该模块添加jetty支持,方便测试运行。修改system-web项目的pom.xml如下:
<?xml version="1.0"?>
<project xsi:schemaLocation="http://maven.apache.org/POM/4.0.0 http://maven.apache.org/xsd/maven-4.0.0.xsd" xmlns="http://maven.apache.org/POM/4.0.0"
    xmlns:xsi="http://www.w3.org/2001/XMLSchema-instance">
  <modelVersion>4.0.0</modelVersion>
  <parent>
    <groupId>com.zang.maven</groupId>
    <artifactId>system-parent</artifactId>
    <version>1.0-SNAPSHOT</version>
  </parent>

  <artifactId>system-web</artifactId>
  <packaging>war</packaging>

  <name>system-web Maven Webapp</name>
  <url>http://maven.apache.org</url>
  <dependencies>
   <!--
    system-web依赖system-service
    -->
    <dependency>
     <groupId>com.zang.maven</groupId>
       <artifactId>system-service</artifactId>
      <version>${project.version}</version>
    </dependency>

  </dependencies>
  <build>
    <finalName>system-web</finalName>

    <plugins>
        <!--配置Jetty插件-->
        <plugin>
            <groupId>org.mortbay.jetty</groupId>
            <artifactId>maven-jetty-plugin</artifactId>
        </plugin>
    </plugins>

  </build>
</project>
在命令行进入system-parent目录,然后执行下列命令:
mvn clean install
模块构建成功:
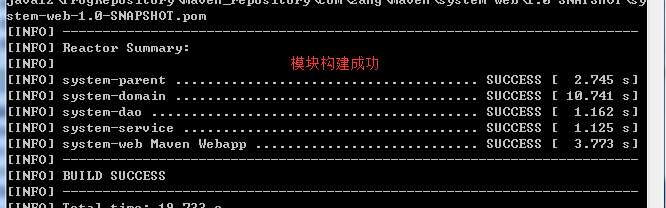
命令执行完后,在system-web目录下多出了target目录,里面有了system-web.war,如下图所示:

命令行进入system-web目录,执行如下命令,启动jetty
mvn jetty:run


启动jetty服务器后,访问http://localhost:8080/system-web/ 运行结果如下图所示:

七、导入Eclipse中进行开发
Import——>Existing Maven Projects——>选中导入即可。。。。