一、json 和 pickle模块
用于序列化的两个模块
- json,用于字符串 和 python数据类型间进行转换
- pickle,用于python特有的类型 和 python的数据类型间进行转换
Json模块提供了四个功能:dumps、dump、loads、load
pickle模块提供了四个功能:dumps、dump、loads、load
例子:
json序列化:
import json
info = {
    'name':'lxj',
    'age':27
}

with open('text.json','w') as f:
    f.write(json.dumps(info))   #这句话等同于json.dump(info,f)
把内容写到文件中,字符串存储的形式为"",''是错误的,这里需要注意

json反序列化:
import json

with open("text.json",'r') as f:
    data = json.loads(f.read())  #这句话等同于data = json.load(f)
    print(data.get('age'))       #不用做任何转换就可以读取字典,读取字典age内容 27

注意:这里如果用json.loads(s),这里只能传入字符串。上面的例子,虽然data读出来是字典,但是f.read()是字符串
import json
fp = open('test.json','w',encoding='utf-8')
json.dump(["alex", 123, 'eric'],fp)
fp.close()
fp = open('test.json','r',encoding='utf-8')
s = fp.read()
print(s,type(s))
s = json.loads(s)
print(s,type(s))
json总结:json在所有语言都通用,只能保存简单数据类型,如字典、列表、字符串。像函数、类则不能存储。这里注意只dump一次(虽然可以dump多次,但别这么用),只load一次(在3.x模式下)

pickle序列化
pickle:只能在python中用,用法与上面一致,可以序列化函数、类
如:
pickle序列化:
import pickle

def sayhi(name):
    print("name is %s"%name)

info = {
    'name':'lxj',
    'age':28,
    "func":sayhi          #序列化sayhi函数对象
}

with open('text.text','wb') as f:   #这里注意要用二进制模式写。
    pickle.dump(info,f)
pickle反序列化:
import pickle

def sayhi(name):               #在pickle序列化时,是序列化整个对象。伴随程序运行完结束,sayhi指向的内存地址就释放了。我们这里再调用就会出错,所以一定要定义sayhi函数,我们调用func()才有用。没什么用。
    print("name is %s"%name)  #函数体可以变成其他内容

with open("text.text",'rb') as f: #这里注意要用二进制模式读。,
    data = pickle.load(f)
    print(data.get('func')('lxj')) #运行函数

二、shelve模块
shelve模块是一个简单的k,v将内存数据通过文件持久化的模块,可以持久化任何pickle可支持的python数据格式


shelve模块写:
import shelve
f = shelve.open('shelve_text') #这里注意文件名不能加后缀(如.text,.json都是不行的)
names = ["lxj","sx"]
infos = {
'name':'lxj',
'age':27
}
f['name'] = names
f['info'] = infos
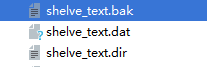
执行完成后会生成三个文件,
shelve模块读:
import shelve

f = shelve.open('shelve_text')

print(f['name'])
print(f['info'])

总结:相当于可以dump多次,load多次


三、XML模块
xml是实现不同语言或程序之间进行数据交换的协议,跟json差不多,但json使用起来更简单,不过,古时候,在json还没诞生的黑暗年代,大家只能选择用xml呀,至今很多传统公司如金融行业的很多系统的接口还主要是xml。
xml的格式如下,就是通过<>节点来区别数据结构的(类似于字典):
<?xml version="1.0"?>
<data> <country name="Liechtenstein"> <rank updated="yes">2</rank> <year>2008</year> <gdppc>141100</gdppc> <neighbor name="Austria" direction="E"/> <neighbor name="Switzerland" direction="W"/> </country> <country name="Singapore"> <rank updated="yes">5</rank> <year>2011</year> <gdppc>59900</gdppc> <neighbor name="Malaysia" direction="N"/> </country> <country name="Panama"> <rank updated="yes">69</rank> <year>2011</year> <gdppc>13600</gdppc> <neighbor name="Costa Rica" direction="W"/> <neighbor name="Colombia" direction="E"/> </country></data>增删改查操作
import xml.etree.ElementTree as ET

tree = ET.parse("text_xml.xml")   #打开文件
root = tree.getroot()      #获取根节点
print(root.tag)      #获取根节点标签 ,结果data

#遍历XML文档

# for child in root:               #遍历子节点
#     print(child.tag,child.attrib)  #打印子节点的标签,属性
#     for i in child:              #遍历子节点下的数据
#         print("	",i.tag,i.attrib,i.text)  #打印子节点下的标签,属性,及文本

#过滤neighbor数据
# for node in root.iter('neighbor'):   #遍历子节点下所有neighbor的数据
#     print(node.tag,node.attrib,node.text)

# #过滤子节点下的neighbor数据
# for child in root:
#     print(child.tag)
#     for i in child.iter('neighbor'):
#         print("	",i.tag,i.attrib,i.text)

#修改数据
# for child in root:                                   #遍历子节点
#     if child.attrib['name'] == 'Liechtenstein':   #过滤出子节点属性name为Liechtenstein的节点
#         for i in child.iter('year'):               #在该子节点下过滤出year的数据
#             i.text = '2018'                        #修改文本
#             i.set("abc","123")                    #修改属性
#
# tree.write('text1.xml')                           #写入文件

#删除node
# for country in root.findall('country'):    ##遍历所有country子节点
#     rank = int(country.find('rank').text)   #找到counrry下的rank的文本
#     if rank >50:
#         root.remove(country)                #移除country节点
# tree.write('text1.xml')                    #写入文件

#创建xml文件
namelist = ET.Element("NameList")          #创建一个根节点
name = ET.SubElement(namelist,"name",attrib={"whatever":'yes',"name":"lxj"}) #创建一个子节点并添加属性
age = ET.SubElement(name,'age')    #添加节点至name子节点下
age.text = '26'                    #为该节点添加文件信息
role = ET.SubElement(name,'role')
role.text = 'teacher'

et = ET.ElementTree(namelist)    #生成文档对象
et.write("text3.xml",encoding="utf-8",xml_declaration=True) #写入文件