1.springcloud配置:
1.1 服务注册中心
pom.xml
主类中:加注解
application中
1.2创建“服务提供方”
pom
主类
application
测试类:
1.3 高可用注册中心
创建配置文件application-peer1.properties
创建配置文件application-peer2.properties
启动:
访问:
加入服务提供方
修改application
若想使用IP地址为路径名
1.4 服务消费者
pom
修改主类
application
创建对应的接口控制器(使用服务)
1.5 客户端负载均衡Ribbon
pom
主类
测试类:
直接使用Ribbon的API
测试类
方法2
主类、
测试类
具体笔记:
1.springcloud配置:
1.1 服务注册中心
pom.xml
1.dependencies中:
<dependency>
    <groupId>org.springframework.cloud</groupId>
    <artifactId>spring-cloud-starter-eureka-server</artifactId>
</dependency>
2.project中:
     <dependencyManagement>
        <dependencies>
            <dependency>
                <groupId>org.springframework.cloud</groupId>
                <artifactId>spring-cloud-dependencies</artifactId>
                <version>Dalston.SR1</version>
                <type>pom</type>
                <scope>import</scope>
            </dependency>
        </dependencies>
    </dependencyManagement>
主类中:加注解
@EnableEurekaServer
@SpringBootApplication
application中
#端口号
server.port=1111
#配置
eureka.client.register-with-eureka=false
#不注册自己
eureka.client.fetch-registry=false
#不检索服务
eureka.client.serviceUrl.defaultZone=http://localhost:${server.port}/eureka/访问路径:http://localhost:1111/
页面:
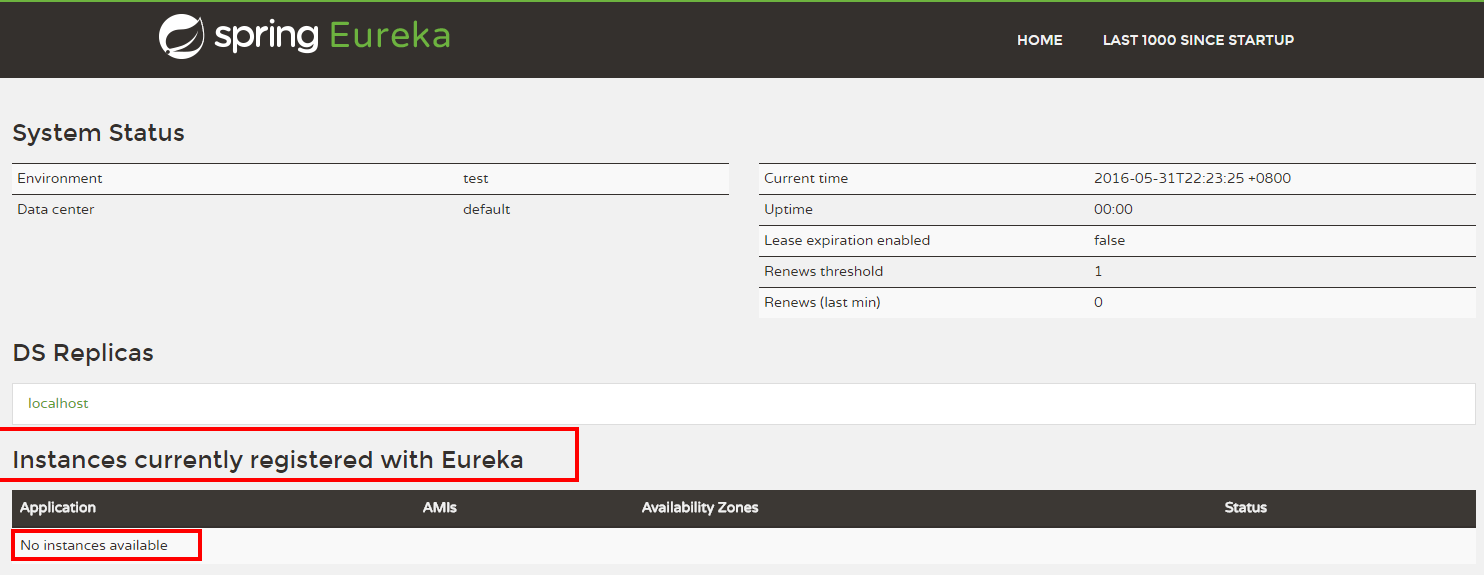
该工程可参见:Chapter9-1-1/eureka-server
1.2创建“服务提供方”
pom
1.dependencies中
    <dependency>
        <groupId>org.springframework.cloud</groupId>
    <artifactId>spring-cloud-starter-eureka</artifactId>
    </dependency>
2.project中:
<dependencyManagement>
        <dependencies>
            <dependency>
                <groupId>org.springframework.cloud</groupId>
                <artifactId>spring-cloud-dependencies</artifactId>
                <version>Dalston.SR1</version>
                <type>pom</type>
                <scope>import</scope>
            </dependency>
        </dependencies>
    </dependencyManagement>
主类
注解:
@EnableDiscoveryClient
@SpringBootApplication
application
spring.application.name=compute-service
server.port=2222
eureka.client.serviceUrl.defaultZone=http://localhost:1111/eureka/
通过
spring.application.name属性,我们可以指定微服务的名称后续在调用的时候只需要使用该名称就可以进行服务的访问。
eureka.client.serviceUrl.defaultZone属性对应服务注册中心的配置内容,指定服务注册中心的位置。
为了在本机上测试区分服务提供方和服务注册中心,使用server.port属性设置不同的端口。
测试类:
实现/add请求处理接口,通过DiscoveryClient对象,在日志中打印出服务实例的相关内容
方法内容为a+b加法测试
@RestController
public class ComputeController {
    private final Logger logger = Logger.getLogger(getClass());
    @Autowired
    private DiscoveryClient client;
    @RequestMapping(value = "/add" ,method = RequestMethod.GET)
    public Integer add(@RequestParam Integer a, @RequestParam Integer b) {
        ServiceInstance instance = client.getLocalServiceInstance();
        Integer r = a + b;
        logger.info("/add, host:" + instance.getHost() + ", service_id:" + instance.getServiceId() + ", result:" + r);
        return r;
    }
}
//------------------
会输出:
/add,host:PC-1111(计算机名) service_id:add-service,result:结果
1.3 高可用注册中心
eureka server 的高可用实际上就是将自己作为服务向其他服务注册中心注册自己,这样就可以形成一组互相注册的服务注册中心,以实现服务清单的互相同步,达到高可用的效果
是在注册中心上进行修改的
创建配置文件application-peer1.properties
spring.application.name=eureka-server
server.port=1111
eureka.instance.hostname=peer1
eureka.client.register-with-eureka=true
eureka.client.fetch-registry=true
eureka.client.serviceUrl.defaultZone=http://peer2:1112/eureka/
创建配置文件application-peer2.properties
spring.application.name=eureka-server
server.port=1112
#本来的是location
eureka.instance.hostname=peer2
eureka.client.register-with-eureka=true
eureka.client.fetch-registry=true
eureka.client.serviceUrl.defaultZone=http://peer1:1111/eureka/
启动:
1.在系统中配置:C:WindowsSystem32driversetc的hosts中加上:
127.0.0.1  peer1
127.0.0.1  peer2

2.将注册中心打包(jar包):
    右键--maven--build--package

2.打开cmd,进入jar包路径:G:workspace_2eureka-server	arget
java -jar eureka-server-0.0.1-SNAPSHOT.jar --spring.profiles.active=peer1
java -jar eureka-server-0.0.1-SNAPSHOT.jar --spring.profiles.active=peer2
访问:
用peer1的http://localhost:1111/ 可以看到peer2
用peer12的http://localhost:1112/ 可以看到peer1
加入服务提供方
修改application
eureka.client.serviceUrl.defaultZone=http://peer1:1111/eureka/,http://peer2:1112/eureka/若想使用IP地址为路径名
eureka.instance.prefer-ip-address=true1.4 服务消费者
服务发现是由eureka的客户端完成,服务消费是由Ribbon完成。
pom
        <dependency>
            <groupId>org.springframework.cloud</groupId>
            <artifactId>spring-cloud-starter-eureka</artifactId>
        </dependency>

        <dependency>
            <groupId>org.springframework.cloud</groupId>
            <artifactId>spring-cloud-starter-ribbon</artifactId>
        </dependency>
<dependencyManagement>
<dependencies>
<dependency>
<groupId>org.springframework.cloud</groupId>
<artifactId>spring-cloud-dependencies</artifactId>
<version>Dalston.SR1</version>
<type>pom</type>
<scope>import</scope>
</dependency>
</dependencies>
</dependencyManagement>修改主类
@SpringBootApplication
@EnableDiscoveryClient   //新加
public class RibbonApplication {
    @Bean
    @LoadBalanced
    RestTemplate restTemplate() {
        return new RestTemplate();
    }

    public static void main(String[] args) {
        SpringApplication.run(RibbonApplication.class, args);
    }
}
application
spring.application.name=ribbon-consumer
server.port=3333
eureka.client.serviceUrl.defaultZone=http://localhost:1111/eureka/
创建对应的接口控制器(使用服务)
调用服务注册中心的服务,调用a+b的方法
@RestController
public class ConsumerController {
    @Autowired
    RestTemplate restTemplate;
    @RequestMapping(value = "/add", method = RequestMethod.GET)
    public String add() {
        return restTemplate.getForEntity("http://COMPUTE-SERVICE/add?a=10&b=20", String.class).getBody();
    }
}
1.5 客户端负载均衡Ribbon
https://github.com/netflix/ribbon

pom
<dependency>
    <groupId>org.springframework.cloud</groupId>
    <artifactId>spring-cloud-starter-ribbon</artifactId>
</dependency>
主类
- @EnableDiscoveryClient注解,说明这是一个Eureka客户端,同时也可以获取到Eureka服务器中所注册的服务列表;
- 在RestTemplate中我们增加了一个@LoadBalanced注解,该注解就是能够让RestTemplate启用客户端负载均衡
@SpringBootApplication
@EnableDiscoveryClient
public class RibbonApplication {

    @Bean
    @LoadBalanced
    RestTemplate restTemplate() {
        return new RestTemplate();
    }

    public static void main(String[] args) {
        SpringApplication.run(RibbonApplication.class, args);
    }

}
测试类:
  @GetMapping("/movie/{id}")
  public User findById(@PathVariable Long id) {
    // http://localhost:7900/simple/
    // VIP virtual IP
    // HAProxy Heartbeat
    return this.restTemplate.getForObject("http://microservice-provider-user/simple/" + id, User.class);//端口/IP
  }
启动多个服务提供方(add方法),消费者调用多次(调用add方法),可以看到调用的是多个服务提供方的随机一个(调用的是不同接口的add方法(多次刷新消费者的页面,就可以调用多次了))

直接使用Ribbon的API
另外,除了使用@LoadBalanced注解外,我们还可以直接使用Ribbon所提供的
LoadBalancerClient来实现负载均衡:
测试类
@RestController
public class HelloController {
    protected Logger logger = LoggerFactory.getLogger(HelloController.class);
    @Autowired
    private RestTemplate restTemplate;

    @Autowired
    private LoadBalancerClient loadBalancerClient;

    @RequestMapping(value = "/hello", method = RequestMethod.GET)
    public String hello() {
        return restTemplate.getForEntity("http://SERVICE-HELLO/hello", String.class).getBody();
    }

    @RequestMapping(value = "/helloEx", method = RequestMethod.GET)
    public String helloEx() {
        ServiceInstance instance = this.loadBalancerClient.choose("SERVICE-HELLO");
        URI helloUri = URI.create(String.format("http://%s:%s/hello", instance.getHost(), instance.getPort()));
        logger.info("Target service uri = {}. ", helloUri.toString());
        return new RestTemplate().getForEntity(helloUri, String.class).getBody();
    }
}同样多次访问http://localhost:8080/helloEx 后,在控制台中将会输出以下日志:
2017-06-26 21:31:30 891 [http-nio-8080-exec-3] INFO  i.t.c.c.h.controller.HelloController - Target service uri = http://cd826dembp.lan:2100/hello.
2017-06-26 21:31:33 008 [http-nio-8080-exec-4] INFO  i.t.c.c.h.controller.HelloController - Target service uri = http://cd826dembp.lan:2200/hello.
2017-06-26 21:31:34 447 [http-nio-8080-exec-6] INFO  i.t.c.c.h.controller.HelloController - Target service uri = http://cd826dembp.lan:2100/hello.
2017-06-26 21:31:35 395 [http-nio-8080-exec-7] INFO  i.t.c.c.h.controller.HelloController - Target service uri = http://cd826dembp.lan:2200/hello.
2017-06-26 21:31:36 220 [http-nio-8080-exec-8] INFO  i.t.c.c.h.controller.HelloController - Target service uri = http://cd826dembp.lan:2100/hello.
注意:在helloEx方法中不能够使用之前自动织入的restTemplate,否则会报以下错误:
java.lang.IllegalStateException: No instances available for cd826dembp.lan
这个是因为自动织入的restTemplate会把服务器的逻辑名称当作服务名称来使用,造成找不到相应的服务实例,从而报错。
方法2
主类、
@Primary
@Bean(name="lbcRestTemplate")
RestTemplate lbcRestTemplate() {
    return new RestTemplate();
}
测试类
@RestController
public class HelloController {
    protected Logger logger = LoggerFactory.getLogger(HelloController.class);

    @Autowired
    @Qualifier(value = "restTemplate")
    private RestTemplate restTemplate;

    @Autowired
    @Qualifier(value = "lbcRestTemplate")
    private RestTemplate lbcRestTemplate;

    @Autowired
    private LoadBalancerClient loadBalancerClient;

    @RequestMapping(value = "/hello", method = RequestMethod.GET)
    public String hello() {
        return restTemplate.getForEntity("http://SERVICE-HELLO/hello", String.class).getBody();
    }

    @RequestMapping(value = "/helloEx", method = RequestMethod.GET)
    public String helloEx() {
        ServiceInstance instance = this.loadBalancerClient.choose("SERVICE-HELLO");
        URI helloUri = URI.create(String.format("http://%s:%s/hello", instance.getHost(), instance.getPort()));
        logger.info("Target service uri = {}. ", helloUri.toString());
        return this.lbcRestTemplate.getForEntity(helloUri, String.class).getBody();
    }
}