在本博文,我们要学习一个挖掘气象数据的程序。气象数据是通过分布在美国全国各地区的很多气象传感器每隔一小时进行收集,这些数据是半结构化数据且是按照记录方式存储的,因此非常适合使用 MapReduce 程序来统计分析。
我们使用的数据来自美国国家气候数据中心、美国国家海洋和大气管理局(简称 NCDCNOAA),这些数据按行并以 ASCII 格式存储,其中每一行是一条记录。 下面我们展示一行采样数据,其中重要的字段被突出显示。该行数据被分割成很多行以突出每个字段,但在实际文件中,这些字段被整合成一行且没有任何分隔符。
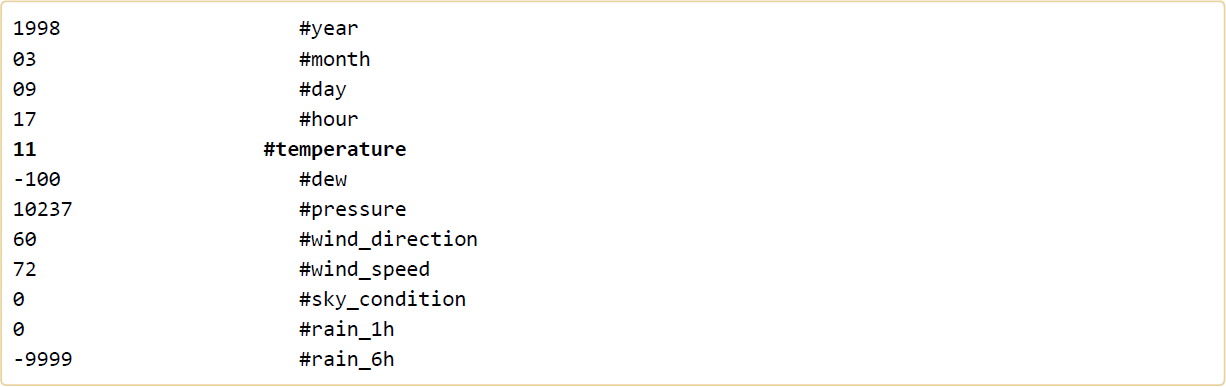

MapReduce 任务过程分为两个处理阶段:map 阶段和reduce阶段 。每个阶段都以键值对作为输入和输出,其类型由程序员自己来选择。程序员还需要写两个函数:map 函数和reduce 函数。在这里, map 阶段的输入是 NCDC NOAA 原始数据。我们选择文本格式作为输入格式,将数据集的每一行作为文本输入。键是某一行起始位置相对于文件起始位置的偏移量,不过我们不需要这个信息,所以将其忽略。我们的 map 函数很简单。由于我们只对气象站和气温感兴趣,所以只需要取出这两个字段数据。在本博文中,map 函数只是一个数据准备阶段, 通过这种方式来准备数据,使reducer 函数能够继续对它进行处理:即统计出每个气象站 30 年来的平均气温。map 函数还是一个比较合适去除已损记录的地方,在 map 函数里面,我们可以筛掉缺失的或者错误的气温数据。
我们明白 MapReduce 程序的工作原理之后,下一步就是写代码实现它。我们需要编写三块代码内容:一个 map 函数、一个 reduce 函数和一些用来运行作业的代码。map 函数由 Mapper 类实现来表示,Mapper 声明一个 map() 虚方法,其内容由我们自己来实现。
下面我们来编写 Mapper 类,实现 map() 方法,提取气象站和气温数据。
package com.hadoop.test;

import java.io.IOException;
import org.apache.hadoop.fs.FileSystem;
import org.apache.hadoop.fs.Path;
import org.apache.hadoop.util.Tool;
import org.apache.hadoop.util.ToolRunner;
import org.apache.hadoop.conf.Configured;
import org.apache.hadoop.conf.Configuration;
import org.apache.hadoop.io.IntWritable;
import org.apache.hadoop.io.LongWritable;
import org.apache.hadoop.io.Text;
import org.apache.hadoop.mapreduce.lib.input.FileInputFormat;
import org.apache.hadoop.mapreduce.lib.input.FileSplit;
import org.apache.hadoop.mapreduce.lib.output.FileOutputFormat;
import org.apache.hadoop.mapreduce.Job;
import org.apache.hadoop.mapreduce.Mapper;
import org.apache.hadoop.mapreduce.Reducer;

/**
 *
 * 统计美国每个气象站30年来的平均气温
 * 1.编写map()函数
 * 2.编写reduce()函数
 * 3.编写run()执行方法,负责运行MapReduce作业
 * 4.在main()方法中运行程序
 *
 */
public class Temperature extends Configured implements Tool{

    //定义TemperatureMapper继承自Mapper类,并在其中实现map()函数;
    //Mapper<>接口的数据类型为:Mapper<输入可有值相当于Java的int类型,输入value值相当于Java的String类型,输出key值,输出value值>
    public static class TemperatureMapper extends Mapper<LongWritable, Text, Text, IntWritable>{
        public void map(LongWritable key, Text value, Context context) throws IOException, InterruptedException{//Context实例用于键值对的输出
            //第一步:将每行气象站数据转换为String类型
            String line = value.toString();

            //第二步:提取气温值
            int temperature = Integer.parseInt(line.substring(14, 19).trim());

            if (temperature != -9999) {
                //第三步:获取气象站编号
                //通过context实例获取数据分片
                FileSplit fileSplit = (FileSplit) context.getInputSplit();
                //然后获取气象站编号
                String weatherStationId = fileSplit.getPath().getName().substring(5, 10);

                //第四步:输出数据
                context.write(new Text(weatherStationId), new IntWritable(temperature));
            }

        }
    }

    public static class TemperatureReducer extends Reducer<Text, IntWritable, Text, IntWritable> {
        private IntWritable result = new IntWritable();
        public void reduce(Text key, Iterable<IntWritable> values, Context context) throws IOException, InterruptedException{

            //统计气象站的所有气温值
            int sum = 0;
            int count = 0;
            for(IntWritable val:values) {
                //对所有气温值累加
                sum += val.get();
                //统计集合大小
                count++;
            }

            //第二步:求同一个气象站的平均气温
            result.set(sum/count);

            //第三步:输出数据
            context.write(key, result);
        }
    }

    public static void main(String[] args) throws Exception {
        // TODO Auto-generated method stub
        //输入输出路径
        String[] args0 = {args[0], args[1]};//该写法用于在Hadoop集群上进行测试,如果在Eclipse上进行测试请采用下一行的写法
                //{"hdfs://Centpy:9000/weather/", "hdfs://Centpy:9000/weather/output"};
        //执行
        int ec = ToolRunner.run(new Configuration(), new Temperature(), args0);
        System.exit(ec);
    }

    @Override
    public int run(String[] arg0) throws Exception{
        // TODO Auto-generated method stub
        //第一步:读取配置文件
        Configuration conf = new Configuration();

        //第二步:如果输出路径已经存在,则删除
        Path mypath =new Path(arg0[1]);
        FileSystem hdfs = mypath.getFileSystem(conf);
        if (hdfs.isDirectory(mypath)) {
            hdfs.delete(mypath, true);
        }

        //第三步:构建Job对象
        Job job = new Job(conf, "temperature");
        job.setJarByClass(Temperature.class);

        //第四步:指定数据的输入输出路径
        FileInputFormat.addInputPath(job, new Path(arg0[0]));
        FileOutputFormat.setOutputPath(job, new Path(arg0[1]));

        //第五步:指定Mapper和Reducer
        job.setMapperClass(TemperatureMapper.class);
        job.setReducerClass(TemperatureReducer.class);

        //第六步:设置map()函数和reducer()函数输出类型
        job.setOutputKeyClass(Text.class);
        job.setOutputValueClass(IntWritable.class);

        //第七步:提交作业
        job.waitForCompletion(true);
        return 0;
    }

}
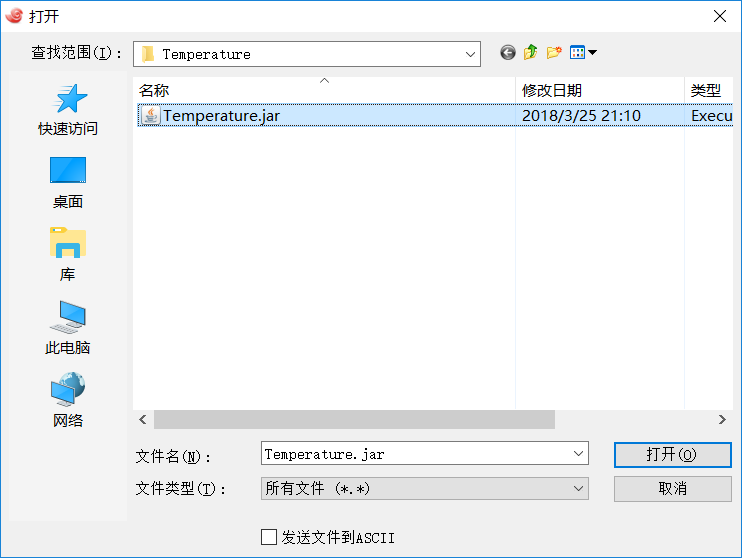
写完之后我们需要将其导出为JAR包。

然后上传到Hadoop集群上Hadoop的安装路径下(可用cd $HADOOP_HOME命令快速进入目录),然后使用rz命令上传,如果没装rz命令请先运行命令:
yum -y install lrzsz
然后找到刚才导出的JAR包确认上传。
最后,执行运行命令:
hadoop jar Temperature.jar com.hadoop.test.Temperature /weather /weatherOutput // 第一个jar表示运行的对象是jar文件
// .jar文件为我们要运行的jar文件
// com.hadoop.test.Temperature为类的路径,注意请写全
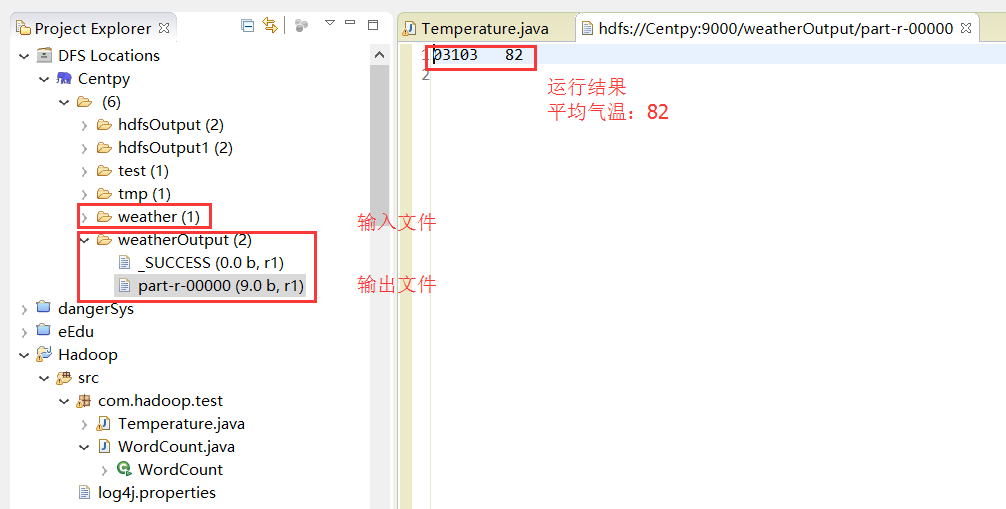
// /weather表示我们的输入文件,对应代码中的args[0]
// /weatherOutput表示我的输出文件,对应代码中的args[1],注意必须是不存在的路径
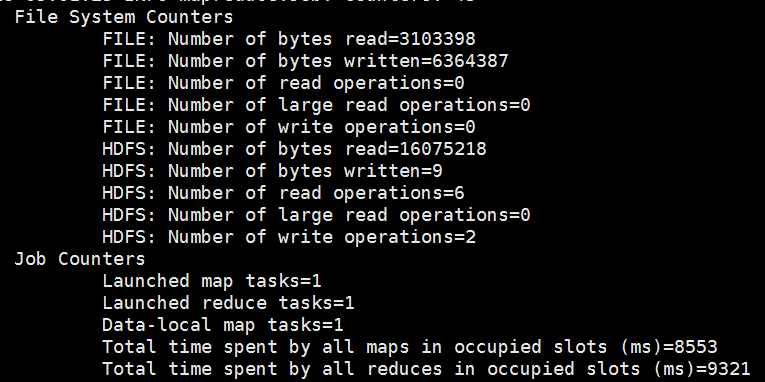
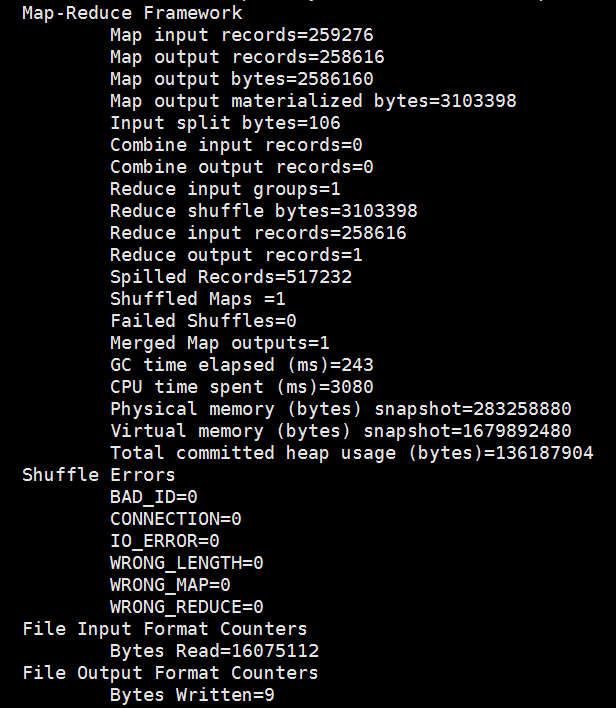
运行结果如下:
以上就是博主为大家介绍的这一板块的主要内容,这都是博主自己的学习过程,希望能给大家带来一定的指导作用,有用的还望大家点个支持,如果对你没用也望包涵,有错误烦请指出。如有期待可关注博主以第一时间获取更新哦,谢谢!
版权声明:本文为博主原创文章,未经博主允许不得转载。