实现功能
现实需求中,有一些类似无法加入扫描组件注解的。如jdk里面的类。
那么框架必须要支持将没有组件注解标识的类也可以有一个方式注入到容器里面。
那么,我们通过类似Spring的@Bean的方案,来实现这个需求。
通过在配置类的方法的上面,使用@Bean注解,将返回的对象加到容器中。
实现思路
获得有@Configuration注解标识的类。检索它的方法,如果有@Bean,执行这个方法并将返回的对象放在容器中。
实现步骤
1.定义一个Bean注解
 1 package ioc.core.annotation;
 2
 3 import java.lang.annotation.Documented;
 4 import java.lang.annotation.ElementType;
 5 import java.lang.annotation.Retention;
 6 import java.lang.annotation.RetentionPolicy;
 7 import java.lang.annotation.Target;
 8
 9 //表示用于运行时的注解
10 @Retention(RetentionPolicy.RUNTIME)
11 //表示只能在类或者接口的上面使用
12 @Target(value=ElementType.METHOD)
13 @Documented
14 public @interface Bean {
15
16     /**
17      * 用于设置对象名
18      * @return
19      */
20     String name() default "";
21
22 }
2.修改AbstractApplicationContext代码
(1)创建一个bean的方法处理从bean注解的方法中获得对象
(2)将从组件注解的类扫描的方式创建对象放在scan方法内
根据这个修改方法,首先将AbstractApplicationContext类构造方法原来使用@ComponentScan创建对象的代码移到scan()方法中,然后创建一个bean()方法编写通过@Bean获得对象
 1 private void bean(Class<?> classType,Context context) throws InstantiationException, IllegalAccessException, IllegalArgumentException, InvocationTargetException{
 2         Map<String, Object> objects = context.getObjects();
 3         //1.获得配置类的对象
 4         Object configuration = classType.newInstance();
 5         //2.获得配置类的所有方法
 6         Method[] methods = classType.getMethods();
 7         for(Method method:methods){
 8             Bean bean = method.getDeclaredAnnotation(Bean.class);
 9             if(bean!=null){
10                 Object object = method.invoke(configuration);
11                 if(bean.name()!=null&&!"".equals(bean.name())){
12                     objects.put(bean.name(), object);
13                 }else{
14                     objects.put(NamingUtils.firstCharToLower(object.getClass().getSimpleName()), object);
15                 }
16             }
17         }
18
19     }
20
21     private void scan(Class<?> classType,Context context) throws ClassNotFoundException, InstantiationException, IllegalAccessException{
22
23             // 获得组件扫描注解
24             ComponentScan componentScan = classType.getDeclaredAnnotation(ComponentScan.class);
25             // 获得包名
26             this.basePackage = componentScan.basePackages();
27             // 根据包名获得类全限制名
28             // Set<String> classNames =
29             // PackageUtils.getClassName(this.basePackage[0], true);
30             // 将扫描一个包,修改为多个包
31             Set<String> classNames = PackageUtils.getClassNames(this.basePackage, true);
32             // 通过类名创建对象
33             Iterator<String> iteratorClassName = classNames.iterator();
34             while (iteratorClassName.hasNext()) {
35
36                 String className = iteratorClassName.next();
37                 // System.out.println(className);
38
39                 // 通过类全名创建对象
40                 Class<?> objectClassType = Class.forName(className);
41                 /*
42                  * 判断如果类权限名对应的不是接口,并且包含有@Component|@Controller|@Service|
43                  *
44                  * @Repository 才可以创建对象
45                  */
46                 if (this.isComponent(objectClassType)) {
47                     Object instance = objectClassType.newInstance();
48                     // 修改为,默认对象支持首字符小写
49                     String objectName = null;
50                     // 获得组件注解的name属性值
51                     String componentName = this.getComponentOfName(objectClassType);
52
53                     if (componentName == null) {
54                         // 如果组件注解的name属性没有值,使用默认命名对象
55                         objectName = NamingUtils.firstCharToLower(instance.getClass().getSimpleName());
56                     } else {
57                         // 如果组件注解的name属性有值,使用自定义命名对象
58                         objectName = componentName;
59                     }
60                     System.out.println("1."+instance);
61                     //将对象加入到容器
62                     context.addObject(objectName, instance);
63                 }
64
65             }
66         }
67
2.修改AbstractApplicationContext的构造方法的代码。如下:
 1     /**
 2      * 将容器操作加载创建对象的代码写抽象类里面,这样可以方便以后扩展多种实现。
 3      *
 4      * @param classType
 5      */
 6     public AbstractApplicationContext(Class<?> classType) {
 7         try {
 8             // 判断配置类是否有Configuration注解
 9             Configuration annotation = classType.getDeclaredAnnotation(Configuration.class);
10             if(annotation!=null){
11                 bean(classType, this.getContext());
12                 scan(classType, this.getContext());
13
14             // 注入对象到有@Autowired注解属性和方法中。
15             autowired();
16         } catch (InstantiationException e) {
17             e.printStackTrace();
18         } catch (IllegalAccessException e) {
19             e.printStackTrace();
20         } catch (ClassNotFoundException e) {
21             e.printStackTrace();
22         } catch (IllegalArgumentException e) {
23             // TODO Auto-generated catch block
24             e.printStackTrace();
25         } catch (InvocationTargetException e) {
26             // TODO Auto-generated catch block
27             e.printStackTrace();
28         } catch (SecurityException e) {
29             // TODO Auto-generated catch block
30             e.printStackTrace();
31         }
32
33     }
测试代码
1.创建一个没有注解的普通Java类
1 package ioc.core.test;
2
3 public class TestUtils {
4
5     public void test(){
6         System.out.println("--测试没有组件注解的类-");
7     }
8
9 }
2.在配置类使用@Bean注入这个类
 1 package ioc.core.test.config;
 2
 3 import ioc.core.annotation.Bean;
 4 import ioc.core.annotation.ComponentScan;
 5 import ioc.core.annotation.Configuration;
 6 import ioc.core.test.TestUtils;
 7
 8 //使用定义@Configuration定义该类是一个配置类
 9 @Configuration
10 //使用ComponentScan设置扫描包的路径
11 @ComponentScan(basePackages={"ioc.core"})
12 public class Config {
13
14     @Bean
15     public Object getTestUtils(){
16         TestUtils tu=new TestUtils();
17         return tu;
18     }
19
20 }
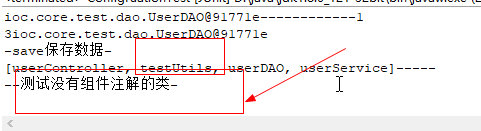
3.测试输出TestUtils的test() 方法
 1 package ioc.core.test;
 2
 3 import org.junit.Test;
 4
 5 import ioc.core.impl.AnntationApplicationContext;
 6 import ioc.core.test.config.Config;
 7
 8 public class ConfigruationTest {
 9
10     @Test
11     public void bean(){
12         try {
13             AnntationApplicationContext context=new AnntationApplicationContext(Config.class);
14              TestUtils testUtils = context.getBean("testUtils", TestUtils.class);
15              System.out.println(context.getContext().getObjects().keySet()+"-----");
16              testUtils.test();
17         } catch (Exception e) {
18             // TODO Auto-generated catch block
19             e.printStackTrace();
20         }
21     }
22
23 }
4.测试结果,输出了这个方法的内容,成功!
总结
至此,一个满足基本开发需要的Ioc的框架就写完了。后续会根据需求,再不断更新众多功能。