基于java配置SSM,eclipse
新建maven,web项目
....
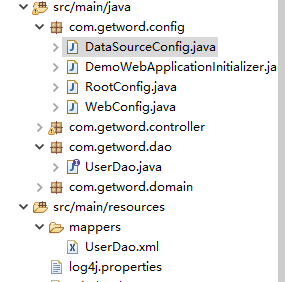
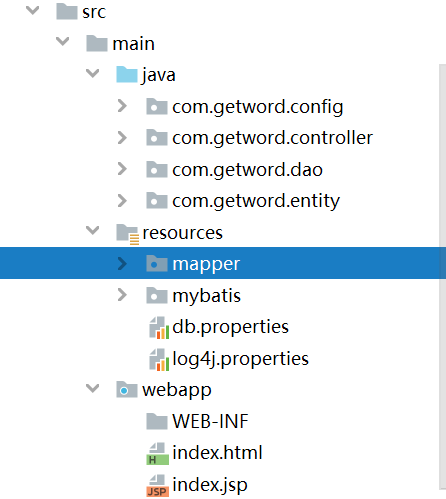
项目结构:
jar包
spring和DispatcherServlet上下文
  public class DemoWebApplicationInitializer
  	extends AbstractAnnotationConfigDispatcherServletInitializer  {
  	@Override
  	protected Class<?>[] getRootConfigClasses() {
  		// TODO Auto-generated method stub
  		return new Class<?>[] {RootConfig.class};
  	}
  	@Override
  	protected Class<?>[] getServletConfigClasses() {
  		// TODO Auto-generated method stub
  		return new Class<?>[] {WebConfig.class};
  	}
  	@Override
  	protected String[] getServletMappings() {
  		// TODO Auto-generated method stub
  		return new String[] {"/"};
  	}
  }
DispatcherServlet
  @Configuration
  @EnableWebMvc
  @ComponentScan(basePackages = {"com.getword.controller"})
  public class WebConfig extends WebMvcConfigurerAdapter {
  	@Bean
  	public ViewResolver viewResolver() {
  		InternalResourceViewResolver resolver = new InternalResourceViewResolver();
  		resolver.setPrefix("/WEB-INF/views/");
  		resolver.setSuffix(".jsp");
  		resolver.setExposeContextBeansAsAttributes(true);
  		return resolver;
  	}
  	/**
  	 * 静态资源
  	 */
  	@Override
  	public void configureDefaultServletHandling(DefaultServletHandlerConfigurer configurer) {
  		// TODO Auto-generated method stub
  		configurer.enable();
  	}
  }
spring 上下文
  @Configuration
  @ComponentScan(basePackages = {"com.getword"},
  		excludeFilters = {@Filter(type = FilterType.ANNOTATION, value = EnableWebMvc.class)})
  @Import(DataSourceConfig.class)
  public class RootConfig {
  	@Bean
  	public BeanNameAutoProxyCreator autoProxyCreator() {
  		BeanNameAutoProxyCreator autoProxyCreator = new BeanNameAutoProxyCreator();
  		autoProxyCreator.setProxyTargetClass(true);
  		// 设置要创建代理的那些Bean的名字
  		autoProxyCreator.setBeanNames("*Service");
  		autoProxyCreator.setInterceptorNames("transactionInterceptor");
  		return autoProxyCreator;
  	}
  }
DataSourceConfig
  @Configuration
  @MapperScan("com.getword.dao")
  public class DataSourceConfig {
  	private final static Logger LOG = Logger.getLogger(DataSourceConfig.class);
  	private String driver = "com.mysql.jdbc.Driver";;
  	private String url = "jdbc:mysql://localhost:3306/spring?characterEncoding=UTF-8&serverTimezone=UTC";
  	private String username = "root";
  	private String password = "123";
  	@Bean
  	public BasicDataSource dataSource() {
  		LOG.info("Initialize the BasicDataSource...");
  		BasicDataSource dataSource = new BasicDataSource();
  		dataSource.setDriverClassName(driver);
  		dataSource.setUrl(url);
  		dataSource.setUsername(username);
  		dataSource.setPassword(password);
  		return dataSource;
  	}
  	// mybatis的配置
  	@Bean
  	public SqlSessionFactoryBean sqlSessionFactoryBean() throws IOException {
  		ResourcePatternResolver resourcePatternResolver = new PathMatchingResourcePatternResolver();
  		SqlSessionFactoryBean sqlSessionFactoryBean = new SqlSessionFactoryBean();
  		sqlSessionFactoryBean.setDataSource(dataSource());
  		sqlSessionFactoryBean.setMapperLocations(resourcePatternResolver.getResources("classpath*:mappers/*.xml"));
  		sqlSessionFactoryBean.setTypeAliasesPackage("com.getword.domain");// 别名,让*Mpper.xml实体类映射可以不加上具体包名
  		return sqlSessionFactoryBean;
  	}

  	// 事务管理器 对mybatis操作数据库事务控制,spring使用jdbc的事务控制类
  	@Bean(name = "transactionManager")
  	public DataSourceTransactionManager dataSourceTransactionManager() {
  		DataSourceTransactionManager dataSourceTransactionManager = new DataSourceTransactionManager();
  		dataSourceTransactionManager.setDataSource(dataSource());
  		return dataSourceTransactionManager;
  	}

  	@Bean(name = "transactionInterceptor")
  	public TransactionInterceptor interceptor() {
  		TransactionInterceptor interceptor = new TransactionInterceptor();
  		interceptor.setTransactionManager(dataSourceTransactionManager());
  		Properties transactionAttributes = new Properties();
  		transactionAttributes.setProperty("save*", "PROPAGATION_REQUIRED");
  		transactionAttributes.setProperty("del*", "PROPAGATION_REQUIRED");
  		transactionAttributes.setProperty("update*", "PROPAGATION_REQUIRED");
  		transactionAttributes.setProperty("get*", "PROPAGATION_REQUIRED,readOnly");
  		transactionAttributes.setProperty("find*", "PROPAGATION_REQUIRED,readOnly");
  		transactionAttributes.setProperty("*", "PROPAGATION_REQUIRED");
  		interceptor.setTransactionAttributes(transactionAttributes);
  		return interceptor;
  	}
  }
注意:mapper的命名空间必须和对应的接口的全路径一致!!!
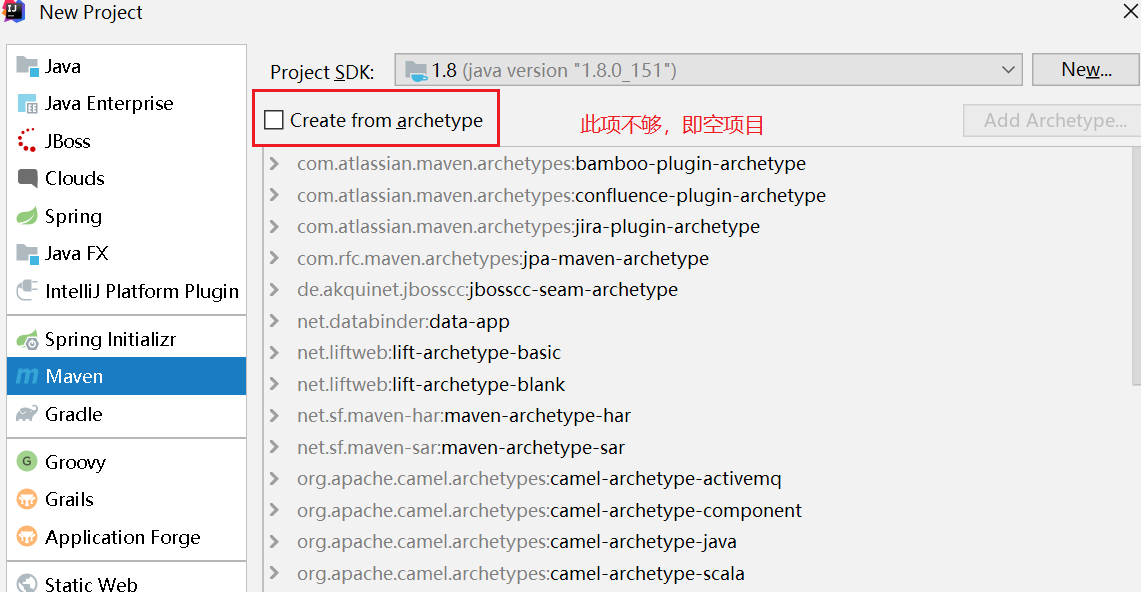
idea,从maven简单java项目转web项目
新建maven项目
- 新建maven项目
- 填写group id和artifictId,next

- 输入项目名称,finish
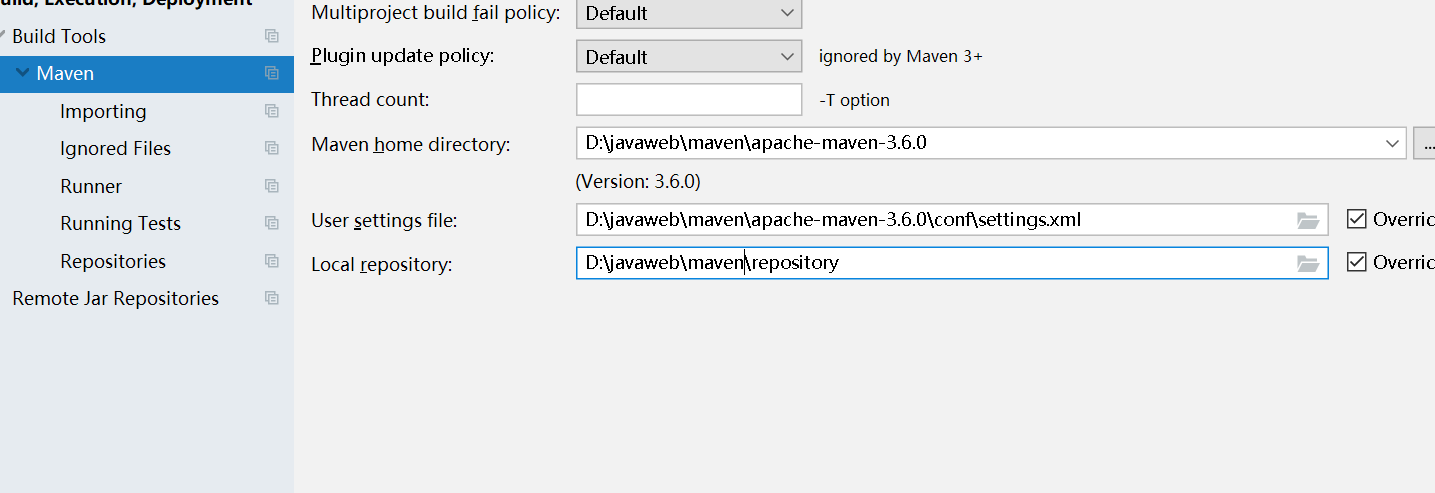
- 配置maven,次步骤最后在新建项目之前
项目结果如下:

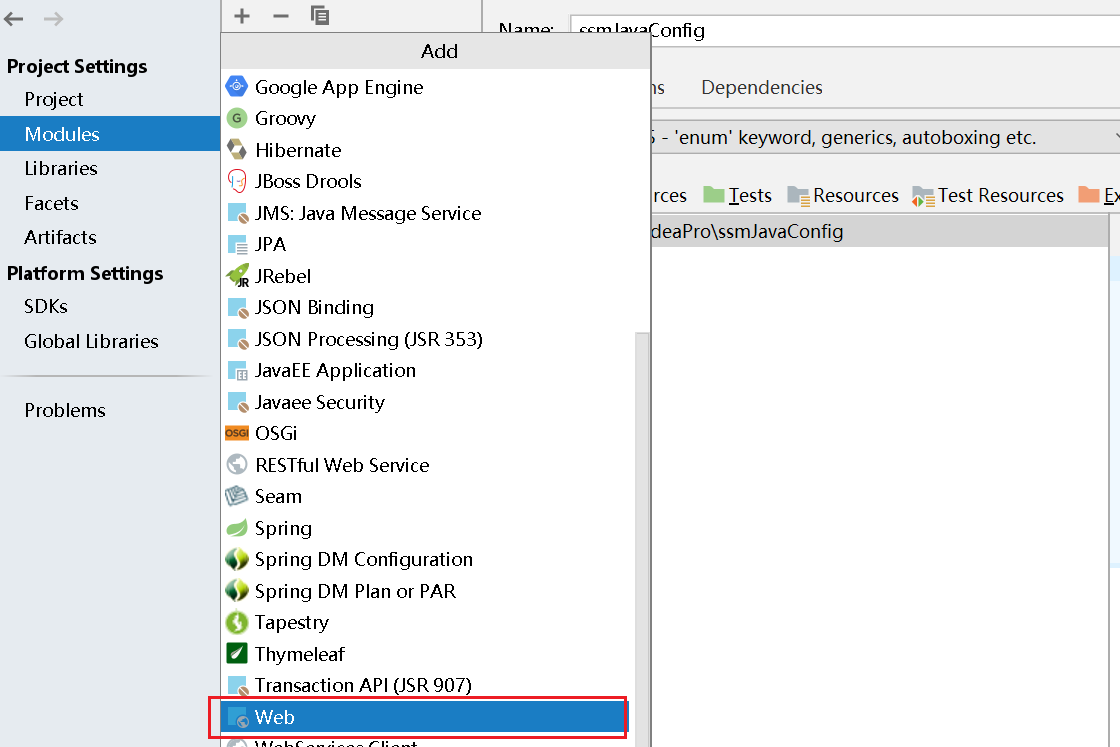
添加web模块
- 项目结构->Modules->add->web
- 删除web.xml

- 设置web项目根路径

- 添加artifact
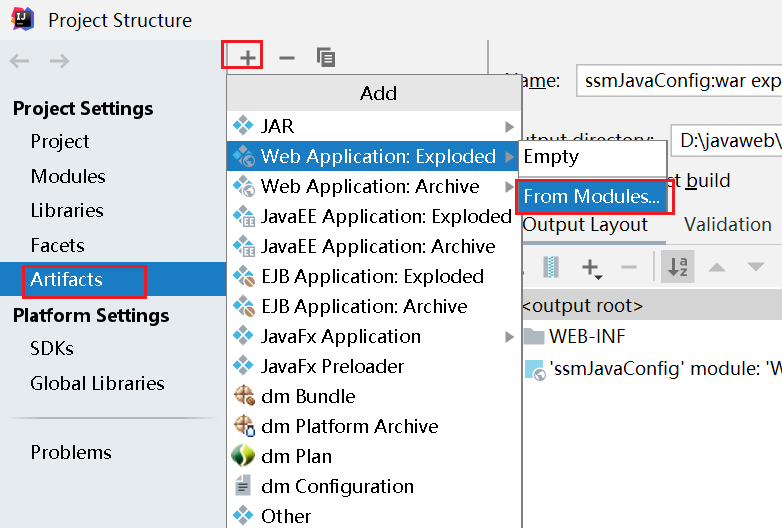
- 配置Tomcat
- 此时项目结构
此时可以访问webapp下的静态文件了
- jar包,pom.xml
注意:使用maven时也要添加servlet依赖,注意作用域。此时可以使用servlet了
spring配置
同eclipse。