首先先编写导航栏组件
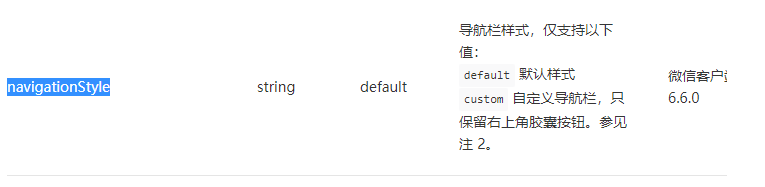
1你要自定义导航栏首先你要知道导航栏的高度,导航栏由状态栏和胶囊按钮构成
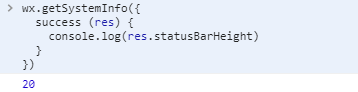
通过Object wx.getMenuButtonBoundingClientRect()可以拿到胶囊按钮的信息,通过wx.getSystemInfo可以拿导航栏信息
通过Object wx.getMenuButtonBoundingClientRect()可以拿到胶囊按钮的信息,通过wx.getSystemInfo可以拿导航栏信息

直接分成导航栏和nav栏两块
直接上代码,代码里面有注释
.wxml
 1 <view class="share-reward-header" style="height: {{navBarSpaceHeight}}px" style="background-color: {{backgroundColor}}">
 2   <view class="navbar" >
 3     <view style="height:{{statusBarHeight}}px" />
 4     <view style="height:{{navigateContentHeight}}px;}}" class="navbar-content">
 5         <view class="go-back" style="height:{{navigateContentHeight}}px;" wx:if="{{!hideBack}}">
 6           <navigator open-type="switchTab" class="go-back-navigate" hover-class="none" url="{{url}}">
 7             <image src="../../images/go-back.png"></image>
 8           </navigator>
 9         </view>
10         <text class="navbar-title" style="max-{{navigateTitleMaxWidth}}px;">{{title}}</text>
11     </view>
12   </view>
13 </view>
14 <view style="height: {{navBarSpaceHeight}}px;100%;"></view> //占位块
.wxss
 1 .share-reward-header{
 2    100%;
 3   position: fixed;
 4   z-index: 9999;
 5 }
 6 .share-reward-header .navbar {
 7   /* background-color: #FF650C; */
 8   position: relative;
 9 }
10 .share-reward-header .navbar-content {
11   display: flex;
12   align-items: center;
13   justify-content: center;
14   position: relative;
15 }
16 .share-reward-header .go-back{
17   position: absolute;
18   left:0;
19   top:0;
20   display: flex;
21   justify-content: center;
22   align-items: center;
23   box-sizing: border-box;
24   z-index:1000;
25 }
26 .share-reward-header .go-back .go-back-navigate{
27   display: flex;
28   justify-content: center;
29   align-items: center;
30   box-sizing: content-box;
31   20rpx;
32   height:100%;
33   padding:0 10rpx 0 26rpx;
34 }
35 .share-reward-header .go-back image{
36   display: block;
37   20rpx;
38   height:37rpx;
39 }
40 .share-reward-header .navbar-title {
41   text-align: center;
42   white-space: nowrap;
43   overflow: hidden;
44   text-overflow: ellipsis;
45   font-size: 30rpx;
46   font-weight: bold;
47   z-index:999;
48   color: #ffffff;
49   max- 350rpx;
50 }
.js
import { IApp } from '../../../app'
const app = getApp<IApp>();
Component({
properties:{
title:{
type:String,
value:''
}, //标题
url:{
type:String,
value:""
}, //返回键跳转地址
hideBack:{
type:Boolean,
value:false
}, //是否显示返回键
backgroundColor:{
type:String,
value:"#FF7700"
} //背景色
},
data:{
statusBarHeight:20,
navigateTitleMaxWidth:0,
fontSizeSetting:0,
navigateContentHeight:0,
navBarSpaceHeight:0
},
attached:function(){
const headerPosi = app.globalData.headerBtnPosi // 胶囊位置信息
let navigateTitleMaxWidth = 0
const statusBarHeight = app.globalData.systemInfo.statusBarHeight // 状态栏高度
navigateTitleMaxWidth = app.globalData.systemInfo.windowWidth - (app.globalData.systemInfo.windowWidth - headerPosi.left + 15) * 2
this.setData({
statusBarHeight: statusBarHeight,
navigateContentHeight: (headerPosi.top - statusBarHeight) * 2 + headerPosi.height,
navigateTitleMaxWidth:navigateTitleMaxWidth
},()=>{
this.setData({
navBarSpaceHeight:this.data.statusBarHeight+this.data.navigateContentHeight
})
})
},
methods:{
}
})
//你看到app.globalData.某某可能有点懵,这里我在app.js里面做了全局变量处理,一次定义全局使用
this.globalData.headerBtnPosi = wx.getMenuButtonBoundingClientRect()
wx.getSystemInfo({
success: function (res) {
this.globalData.systemInfo = res
}
})
{
    "component": true
}
.json 里面一定要加上面这个
由于全局只用直接在app.json里面配置的时候注册
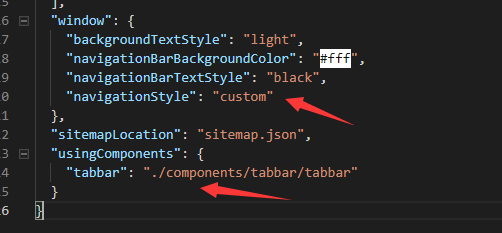
使用如下
<tabbar title="标题" url="跳转地址"></tabbar>
不需要返回键<tabbar title="标题" hideBack="true"></tabbar>
然后就结束了