如下图为Vue官网(https://cn.vuejs.org/v2/guide/instance.html#实例生命周期)给出的生命周期图示
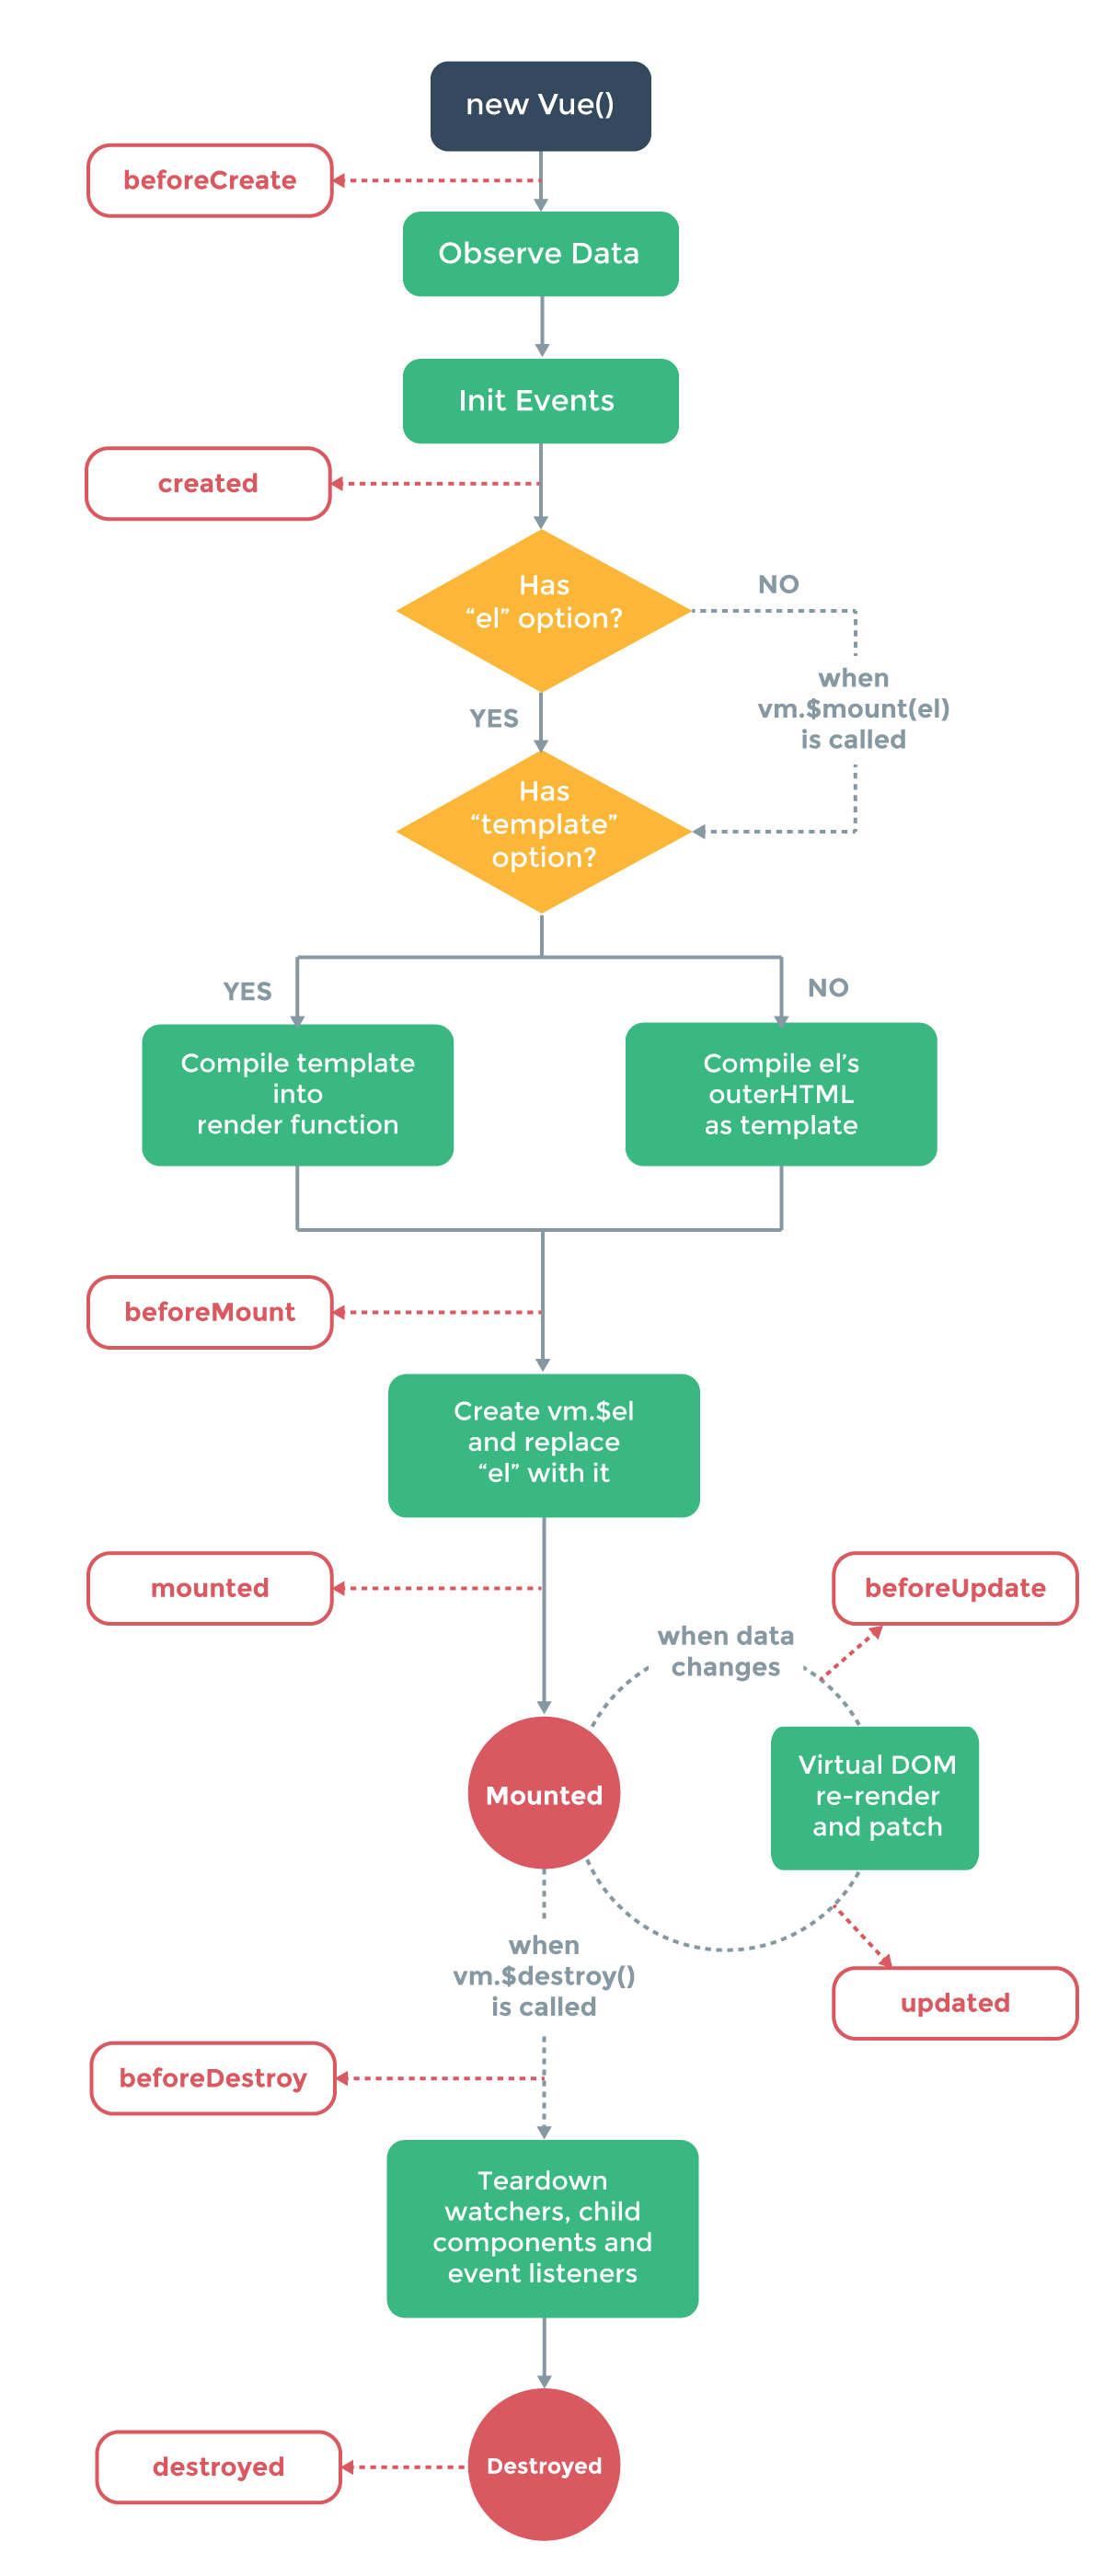
光看图或许不够直观,接下来就是一段代码来加强理解。
mounted方法及其之前
dom部分:
<div id="app">
    <p>{{message}}</p>
</div>
js部分:
<script>
        var app = new Vue({
            el: '#app',
            data: {
              message : "some data"
            },
            beforeCreate: function () {
                console.log('beforeCreate 创建前状态===============》');
                console.log("%c%s", "color:red" , "el     : " + this.$el);
                console.log("%c%s", "color:red","data   : " + this.$data);
                console.log("%c%s", "color:red","message: " + this.message)
            },
            created: function () {
                console.log('created 创建完毕状态===============》');
                console.log("%c%s", "color:red","el     : " + this.$el);
                console.log("%c%s", "color:red","data   : " + this.$data);
                console.log("%c%s", "color:red","message: " + this.message);
            },
            beforeMount: function () {
                console.log('beforeMount 挂载前状态===============》');
                console.log("%c%s", "color:red","el     : " + (this.$el));
                console.log(this.$el);
                console.log("%c%s", "color:red","data   : " + this.$data);
                console.log("%c%s", "color:red","message: " + this.message);
            },
            mounted: function () {
                console.log('mounted 挂载结束状态===============》');
                console.log("%c%s", "color:red","el     : " + this.$el);
                console.log(this.$el);
                console.log("%c%s", "color:red","data   : " + this.$data);
                console.log("%c%s", "color:red","message: " + this.message);
            },
            beforeUpdate: function () {
                console.log('beforeUpdate 更新前状态===============》');
                console.log("%c%s", "color:red","el     : " + this.$el);
                console.log(this.$el);
                console.log("%c%s", "color:red","data   : " + this.$data);
                console.log("%c%s", "color:red","message: " + this.message);
            },
            updated: function () {
                console.log('updated 更新完成状态===============》');
                console.log("%c%s", "color:red","el     : " + this.$el);
                console.log(this.$el);
                console.log("%c%s", "color:red","data   : " + this.$data);
                console.log("%c%s", "color:red","message: " + this.message);
            },
            beforeDestroy: function () {
                console.log('beforeDestroy 销毁前状态===============》');
                console.log("%c%s", "color:red","el     : " + this.$el);
                console.log(this.$el);
                console.log("%c%s", "color:red","data   : " + this.$data);
                console.log("%c%s", "color:red","message: " + this.message);
            },
            destroyed: function () {
                console.log('destroyed 销毁完成状态===============》');
                console.log("%c%s", "color:red","el     : " + this.$el);
                console.log(this.$el);
                console.log("%c%s", "color:red","data   : " + this.$data);
                console.log("%c%s", "color:red","message: " + this.message)
            }
        })
        </script>
以上代码的运行结果为:
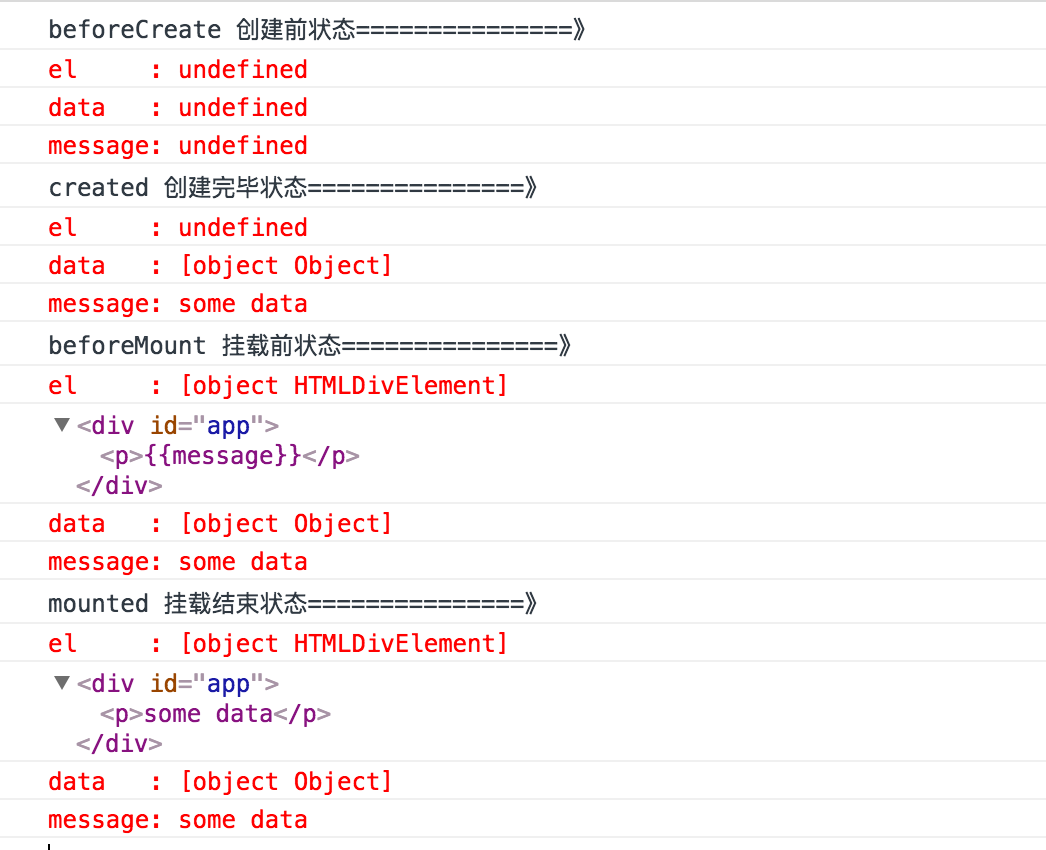
从运行结果可以看出来:
在beforeCreated阶段,vue实例的挂载元素$el和数据对象data都为undefined,还未初始化,
在created阶段,vue实例的数据对象data有了,$el还没有,
在beforeMount阶段,vue实例的$el和data都初始化了,但还是挂载之前为虚拟的dom节点,data.message还未替换
在mounted阶段,vue实例挂载完成,data.message成功渲染
update部分
在浏览器控制台中输入 app.message = "new data",会出现如下变化
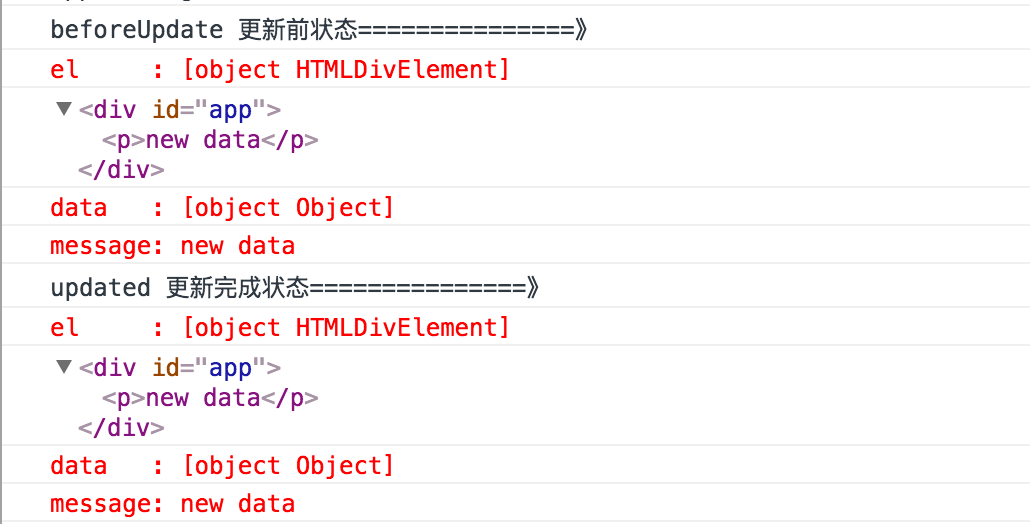
可以发现,当data变化时,会触发beforeUpdate和updated方法
destroy部分
在浏览器控制台中输入app.$destroy()
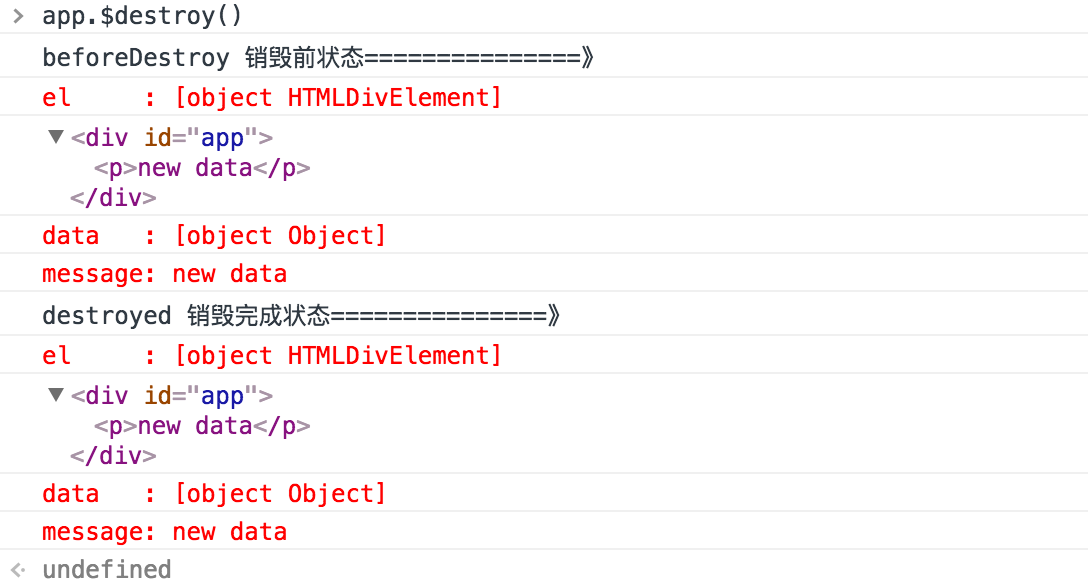
此时再继续修改message的值,在浏览器控制台输入app.message = "change after destory",你会发现:

因此,在执行destroy方法后,对data的改变不会再触发周期函数,说明此时vue实例已经解除了事件监听以及和dom的绑定,但是dom结构依然存在。