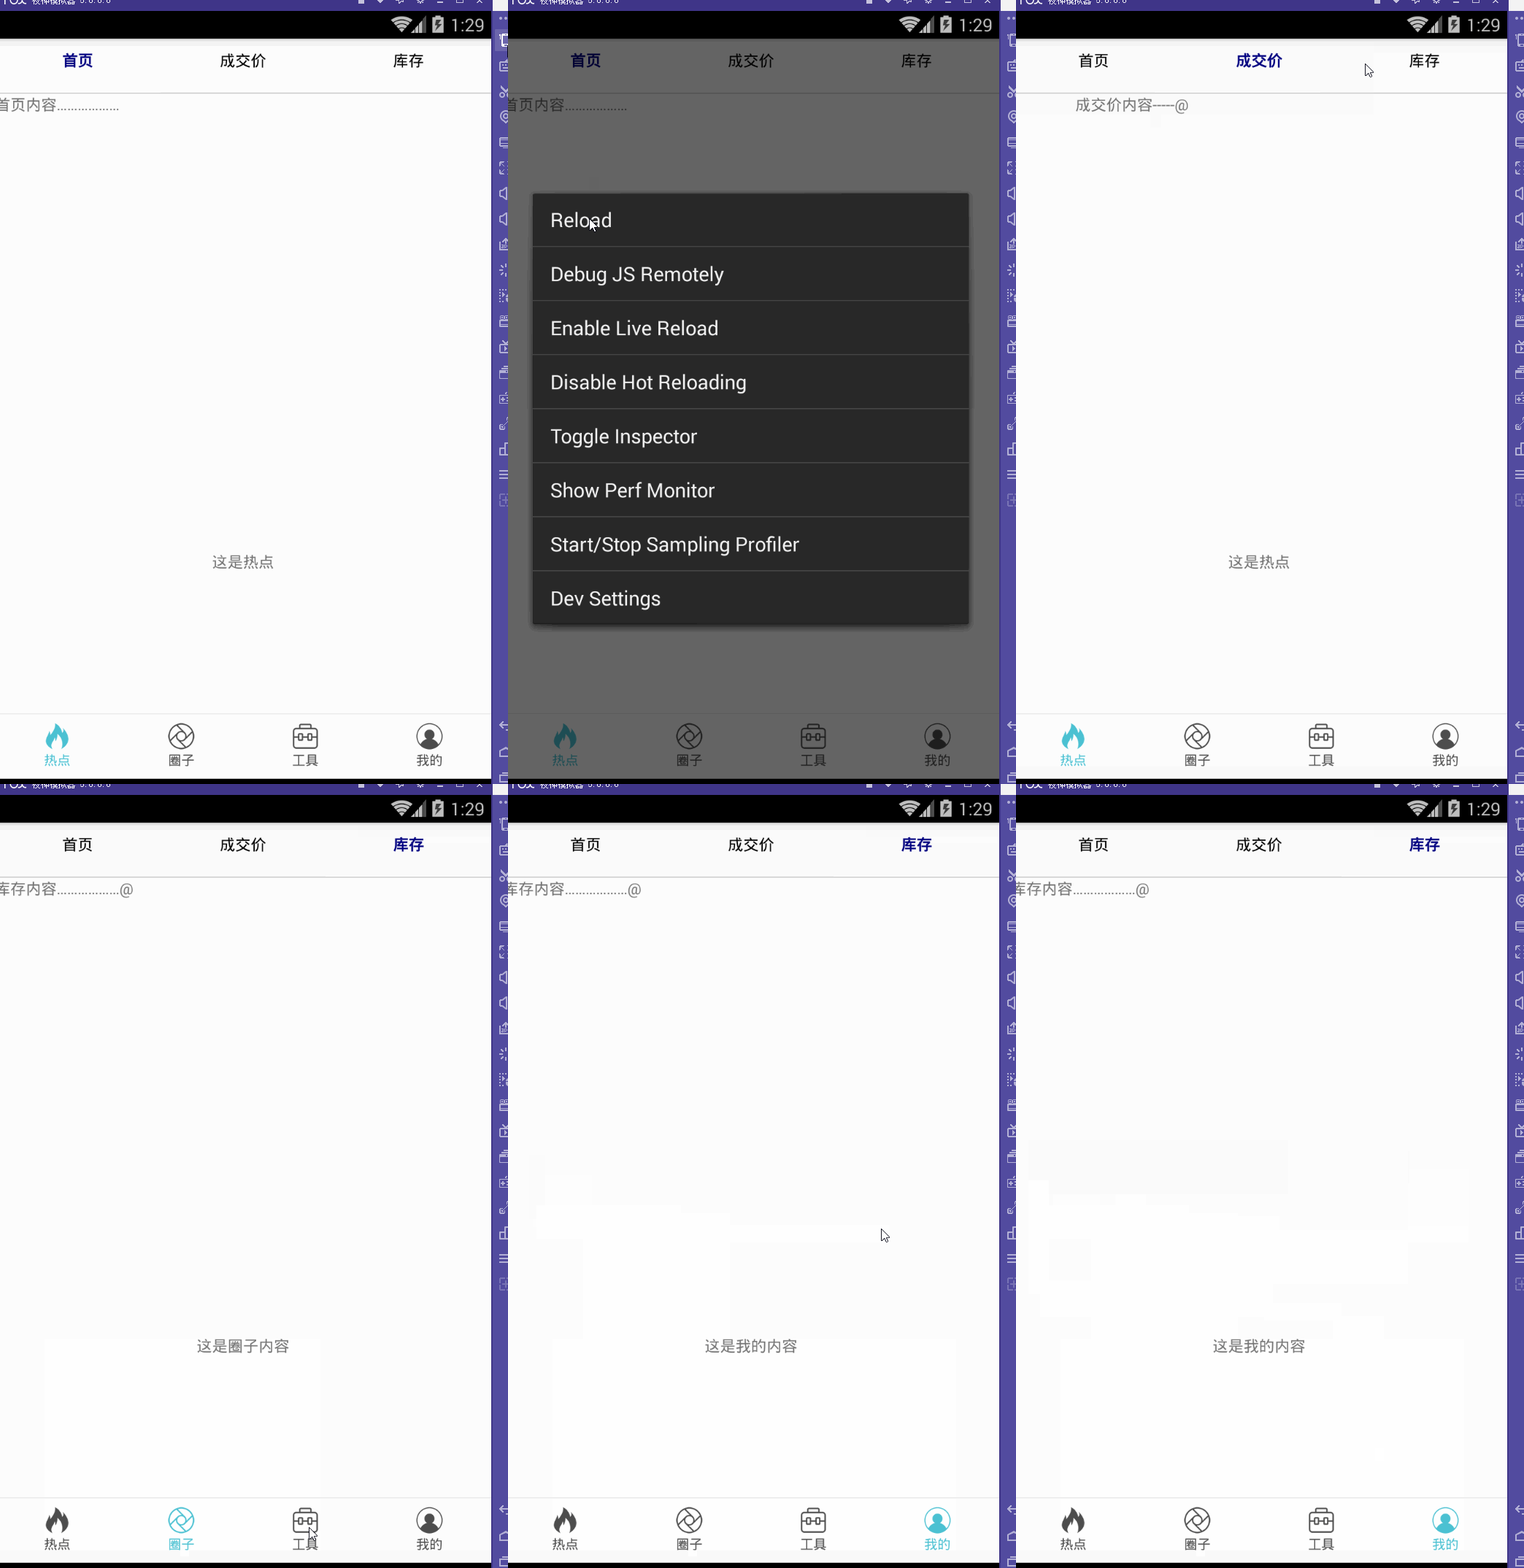
效果图:
一步一步慢慢来:
其实刚入手做app的时候,就应该做出简单的顶部以及底部导航栏。无奈又在忙其他事情,导致这些现在才整理出来。
1.顶部导航栏:react-native-scrollable-tab-view;文档地址:https://github.com/skv-headless/react-native-scrollable-tab-view
2.底部导航栏:react-navigation中的TabNavigator;文档地址:https://reactnavigation.org/docs/navigators/tab
3.一直想让index.android.js的代码简洁一些,苦思不得其解,直到现在才找到了一点“路径”,看这版的源代码:
index.android.js:
/**
 * Sample React Native App
 * https://github.com/facebook/react-native
 * @flow
 */

import React, { Component } from 'react';
import {
  AppRegistry,
  StyleSheet,
  Text,
  View,
  Image
} from 'react-native';

//顶部导航栏
import TopTabBar from './Views/TopTabBar';
//底部导航栏
import BottomTabBar from './Views/BottomTabBar';


export default class ywg extends Component {
  render() {
    return (
      <View style={{flex:1}}>
        <TopTabBar/>
        <BottomTabBar/>
      </View>
    );
  }
}

AppRegistry.registerComponent('ywg', () => ywg);
怎样?够简单吧……对了,这样的代码看起来才比较“优雅”(容忍zheng小叶正儿八经的胡说八道哦~)而主要的代码就在
//顶部导航栏
import TopTabBar from './Views/TopTabBar';
//底部导航栏
import BottomTabBar from './Views/BottomTabBar';
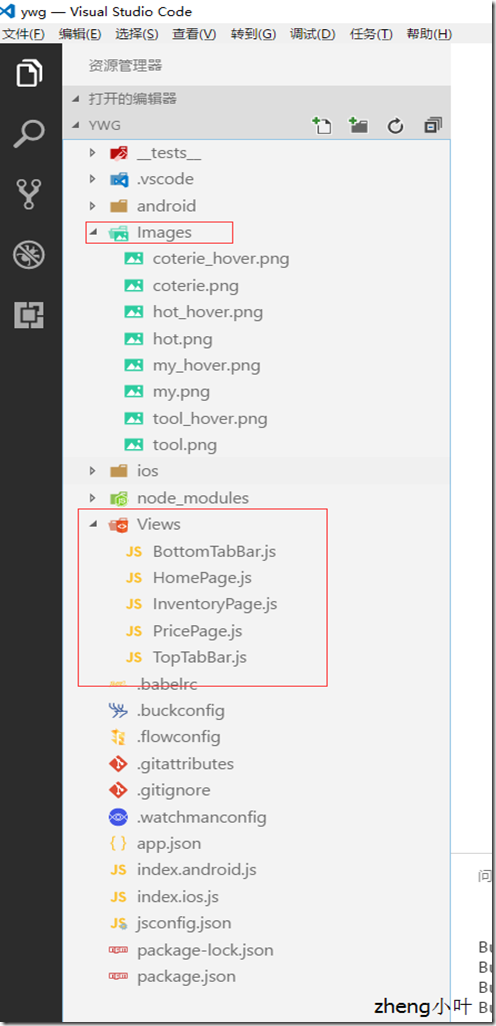
这两个红色的文件中。
【重点注意】将两个Component同时使用的时候,一定要在最外层的View上定义样式,否则任你怎样摆弄,它们总是不会展现“庐山真面目”,具体的文档在:http://reactnative.cn/docs/0.46/layout-props.html
这是项目文件路径。
BottomTabBar.js:
/**
 * Sample React Native App
 * https://github.com/facebook/react-native
 * @flow
 */

import React, { Component } from 'react';
import {
  AppRegistry,
  StyleSheet,
  Text,
  View,
  Image
} from 'react-native';

//底部导航栏
import { TabNavigator } from "react-navigation";

class Home extends React.Component {
  static navigationOptions = {
      tabBarLabel: '热点',
      tabBarIcon: ({ focused, tintColor }) => (
          <Image
              source={focused ? require('../Images/hot_hover.png') : require('../Images/hot.png')}
              style={{  26, height: 26, tintColor: tintColor }}
          />
      )
  };
  render() {
      return (
          <View style={styles.container}>
              <Text>这是热点</Text>
          </View>
      );
  }
}   class Circle extends React.Component {
  static navigationOptions = {
      tabBarLabel: '圈子',
      tabBarIcon: ({ focused, tintColor }) => (
          <Image
              source={focused ? require('../Images/coterie_hover.png') : require('../Images/coterie.png')}
              style={{  26, height: 26, tintColor: tintColor }}
          />
      )
  };
  render() {
      return (
          <View style={styles.container}>
              <Text>这是圈子内容</Text>
          </View>
      );
  }
}   class Tools extends React.Component {
  static navigationOptions = {
      tabBarLabel: '工具',
      tabBarIcon: ({ focused, tintColor }) => (
          <Image
              source={focused ? require('../Images/tool.png') : require('../Images/tool.png')}
              style={{  26, height: 26, tintColor: tintColor }}
          />
      )
  };
  render() {
      return (
          <View style={styles.container}>
              <Text>这是工具内容</Text>
          </View>
      );
  }
}
class Mypage extends React.Component {
    static navigationOptions = {
      tabBarLabel: '我的',
      tabBarIcon: ({ focused, tintColor }) => (
        <Image
          source={focused ? require('../Images/my_hover.png') : require('../Images/my.png')}
          style={{  26, height: 26, tintColor: tintColor }}
        />
      )
    };
    render() {
      return (
        <View style={styles.container}>
          <Text>这是我的内容</Text>
        </View>
      );
    }
}

const BottomTabBar = TabNavigator(
  {
    Home: {
      screen: Home,
    },
    Circle: {
      screen: Circle,
    },
    Tools: {
      screen: Tools,
    },
    Mypage: {
      screen: Mypage,
    },
  },
  {
    tabBarOptions: {
      activeTintColor: '#4BC1D2',
      inactiveTintColor: '#000',
      showIcon: true,
      showLabel: true,
      upperCaseLabel: false,
      pressColor: '#823453',
      pressOpacity: 0.8,
      style: {
        backgroundColor: '#fff',
        paddingBottom: 0,
        borderTopWidth: 0.5,
        borderTopColor: '#ccc',
      },
      labelStyle: {
        fontSize: 12,
        margin: 1
      },
      indicatorStyle: { height: 0 }, //android 中TabBar下面会显示一条线,高度设为 0 后就不显示线了
    },
    tabBarPosition: 'bottom',
    swipeEnabled: false,
    animationEnabled: false,
    lazy: true,
    backBehavior: 'none',
  });

const styles = StyleSheet.create({
  container: {
    flex: 1,
    justifyContent: 'center',
    alignItems: 'center',
    backgroundColor: '#fff',
  }
});

module.exports = BottomTabBar;
TopTabBar.js:
/**
 * Sample React Native App
 * https://github.com/facebook/react-native
 * @flow
 */

import React, { Component } from 'react';
import {
  AppRegistry,
  StyleSheet,
  Text,
  View,
  Image
} from 'react-native';
import HomePage from '../Views/HomePage';
import PricePage from '../Views/PricePage';
import InventoryPage from '../Views/InventoryPage';

//顶部导航
var ScrollableTabView = require('react-native-scrollable-tab-view');


export default class TopTabBar extends Component {
  render() {
    return (
      <ScrollableTabView
       tabBarUnderlineStyle={{backgroundColor:'#fff'}}
      >
        <HomePage tabLabel="首页" />
        <PricePage tabLabel="成交价" />
        <InventoryPage tabLabel="库存" />
      </ScrollableTabView>
    );
  }
}
module.exports = TopTabBar;
而关于这些的详细介绍可以参考这里(老大的小结):http://www.cnblogs.com/vipstone/p/7516115.html?utm_source=tuicool&utm_medium=referral;
美中不足:
怎样才能实现顶部栏、底部栏控制各自部分功能呢?留下来的~~~
PS:尴尬的事情猝不及防的发生了……
一直想不明白,顶部导航栏跟底部导航栏同时存在的情况下,怎样控制各自的功能呢?于是再请教完做手机开发的同事后才恍然大悟,原来自己想的顶部导航栏根本不是顶部导航栏,简言之就是自己把布局搞错了!明明只是有底部导航栏,而所谓的“顶部导航栏”也只是底部导航栏中的第一小部分里面嵌套着一个轮播组件,才会给人以错觉,啊啊啊……事实真相居然是这样的~


